When using the Outlook mail client, a pop-up message may appear asking for the user to select a profile. An Outlook profile consists of the accounts, data files, and settings that specify where your email messages are saved.
How to Remove Cached Credentials from Credentials Manager
The credentials manager stores login data such as usernames and passwords to make it easier when signing into various websites. If you are experiencing issues with signing in or accessing your Outlook or Connect account, it may be due to incorrect credentials saved under the Windows Credentials Manager.
To open Credential Manager, type credential manager in the search box on the taskbar and select Credential Manager Control panel.
Select Windows Credentials to access the credentials you want to manage.
Remove all Outlook or Connect entries.
How to Remove a Profile
A profile consists of accounts, data files, and settings that specify where your email messages are saved.
If you no longer need an Outlook profile, you can delete it and by doing so, this also deletes all email accounts stored in that profile.
Open the Outlook app
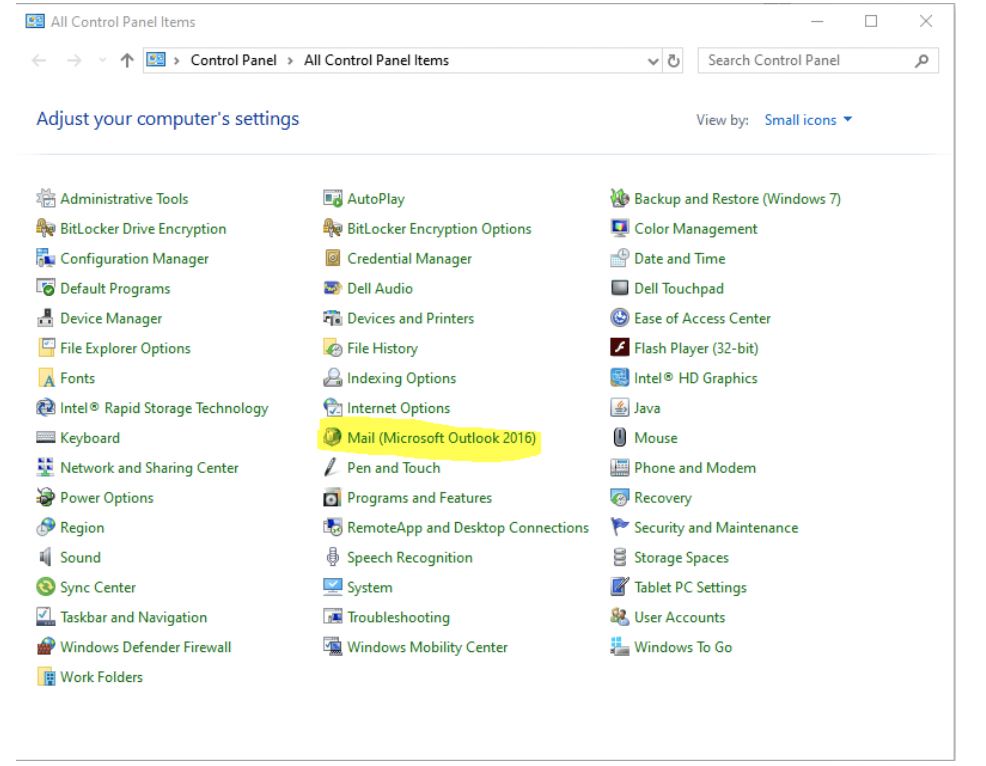
Go to Control Panel > User Accounts > Mail
Press Windows + R > type Control Panel > OK
In Control Panel > User Accounts > Mail (32bit).
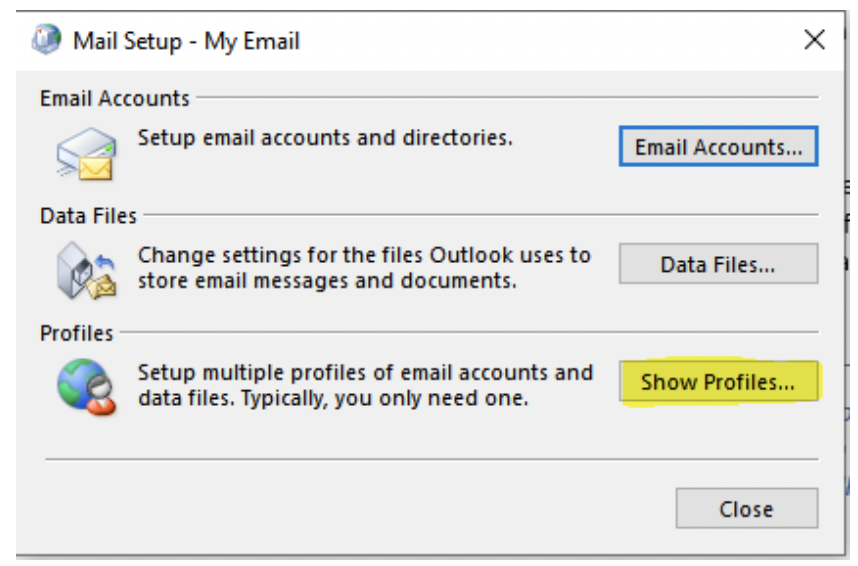
Click Show Profiles.
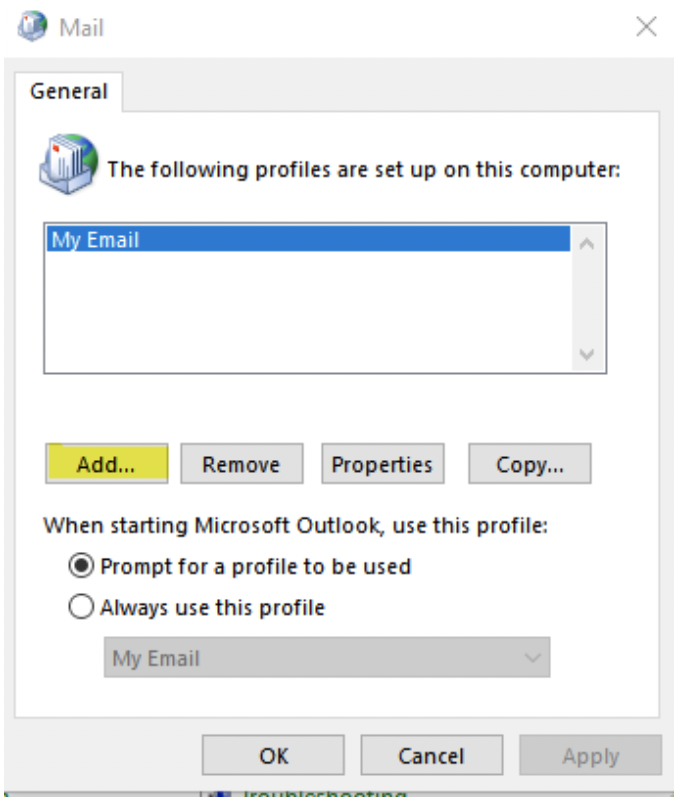
Select a profile (Outlook).
Click Remove.
How to create an new Outlook Profile
Quit Outlook.
Open the Control Panel and open the Mail settings.
Click the Show Profiles… button
Click the Add button
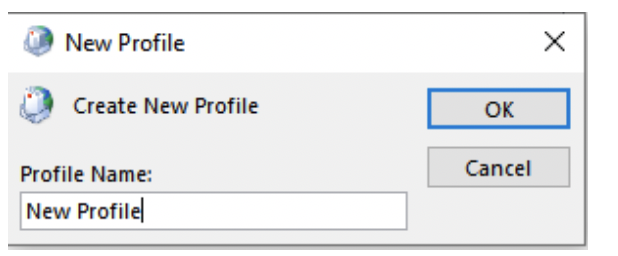
Type a profile name in the text box (it can be anything as long as it’s not the same as an existing profile name) and click OK
Type in your Email Account information and password and click Next (if the Email address field is already populated and the password field are missing, just click next)
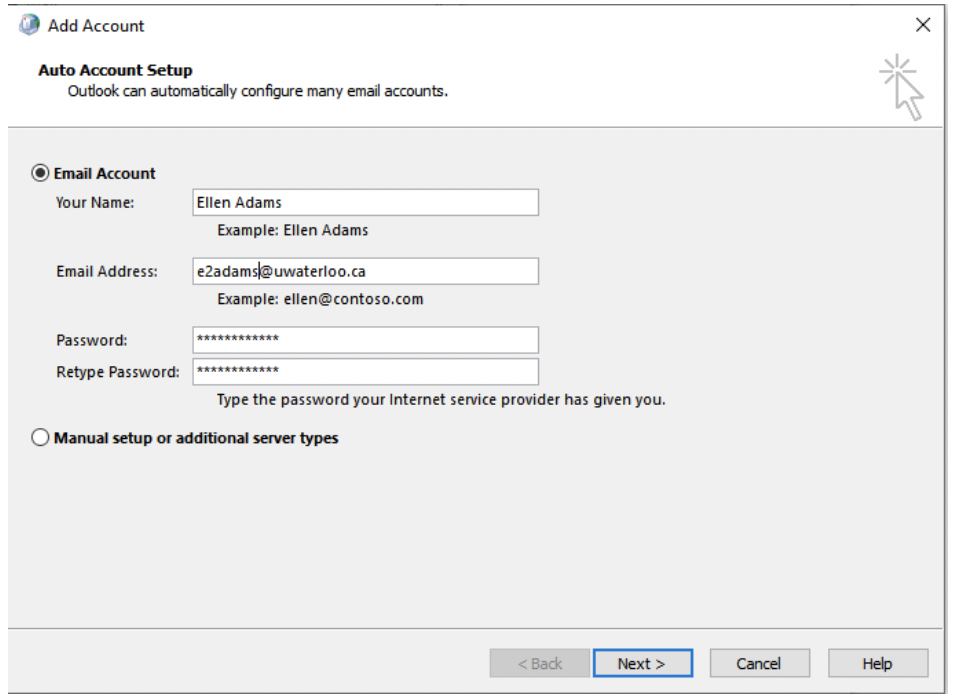
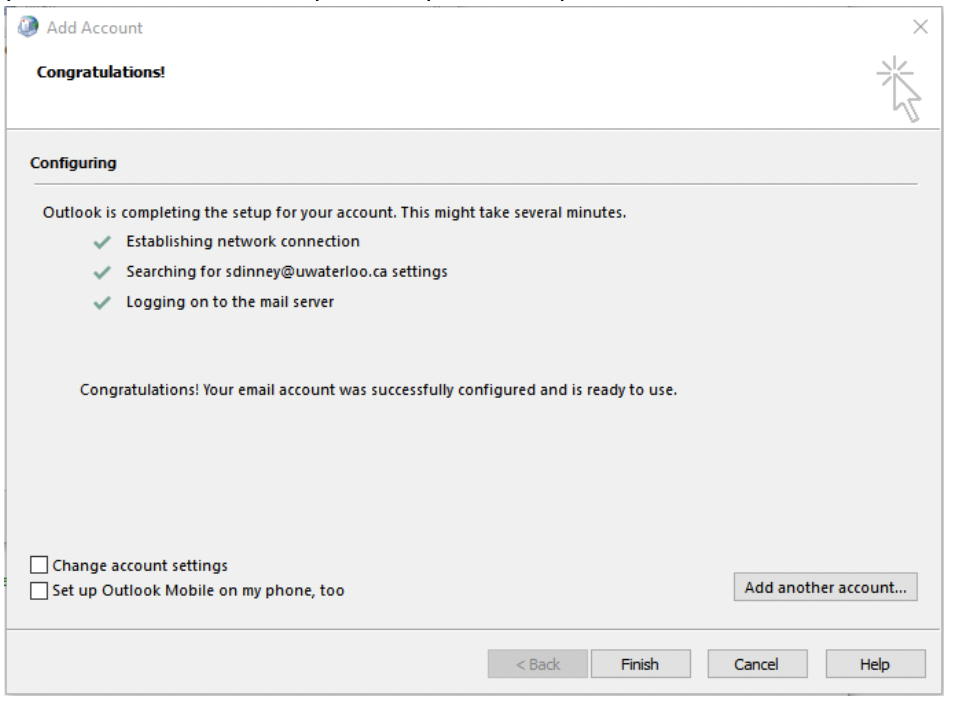
Outlook will find your information based on Auto Discover settings. If everything is checked off, you can click Finish to complete the profile setup
Back on Mail settings window, change the setting for “When starting Microsoft Outlook, use this profile:” to “Always use this profile”, select your new profile name and click OK
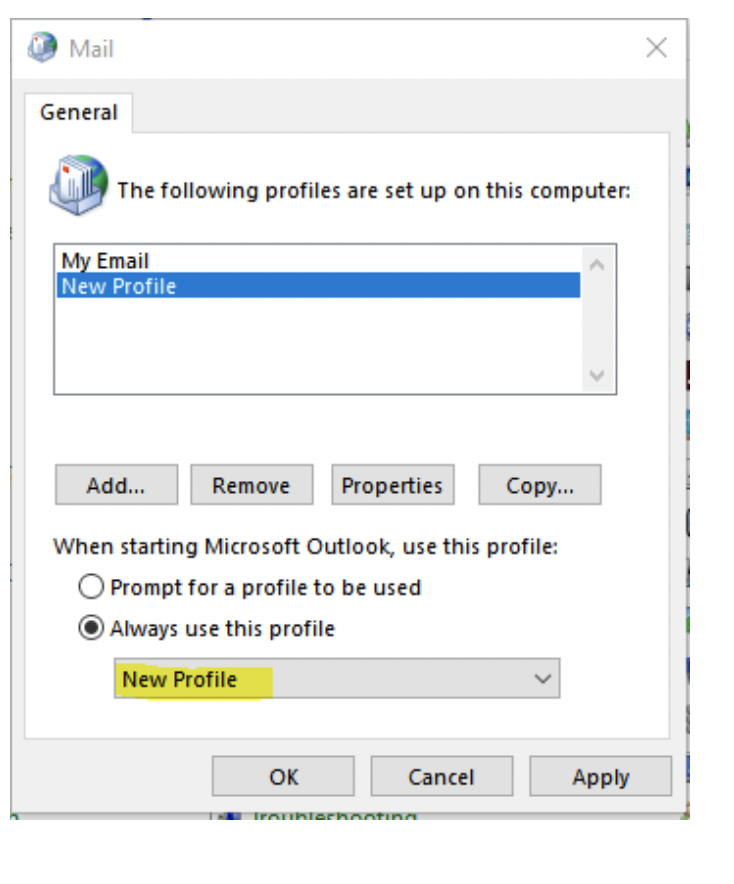
You should now be able to start Outlook using the new profile.
To ensure that you are now able to send and receive emails, please send a test email.
Related articles
Need help?
Contact the IST Service Desk online or 519-888-4567 ext. 44357.
Article feedback
If you’d like to share any feedback about this article, please let us know.