Students living and studying in China may experience slow connections, increased latency, and inconsistent access while using Waterloo learning technologies from China. Waterloo has engaged a cloud enterprise network service from Alibaba, a company operated within China, to improve network flows in and out of China. You should see improvements when using the solution for learning technologies (e.g. LEARN, Crowdmark, Bongo), though the degree of improvement can vary depending upon your home province and your residential internet speed.
About this service
- The University of Waterloo provides this service using the Alibaba Cloud Enterprise Network.
- Alibaba Cloud, also known as Aliyun, is a Chinese cloud computing company, and subject to laws in China or surveillance by authorities in China
- Alibaba Cloud's terms of service is available here
- Use of this service is optional. You are under no obligation to use this service.
- Alibaba Cloud doesn't hold, or have access to, any University of Waterloo records, including your university userid, student id, name, and email address
- The University of Waterloo cannot ensure or warrant the security of Alibaba Cloud's product and services
- The service is meant to be used only for learning technologies in your courses (such as LEARN, Crowdmark, PebblePad, Bongo), and only those applications are enabled through this solution. It does not lift restrictions on resources that are not generally available to you.
- You may find the troubleshooting steps of the common errors here Common errors for the Alibaba cloud enterprise network solution
- Here are a list of sites allowed through the VPN: https://istns.uwaterloo.ca/CN-Whitelist/
Note for incoming Fall 2020 students: Not all incoming students have access to the Alibaba cloud enterprise network solution yet. If you see "can't find a password" error on https://checkin.uwaterloo.ca/fetchmyvpnpassword/ it means that you do not have access to it yet. Information Systems & Technology will be adding all students who have selected their Fall 2020 courses soon.
On this page
- Accessing your login credentials
- How to connect on Windows 10
- How to connect on MacOS
- How to connect on Ubuntu
- How to connect on iOS
- How to connect on Android
Accessing your login credentials
Students registered for fall 2019, winter 2020, and spring 2020 terms may use the following 'fetch my VPN password' tool to receive their special login ID and password, https://checkin.uwaterloo.ca/fetchmyvpnpassword/.
How to connect on Windows 10
Installation
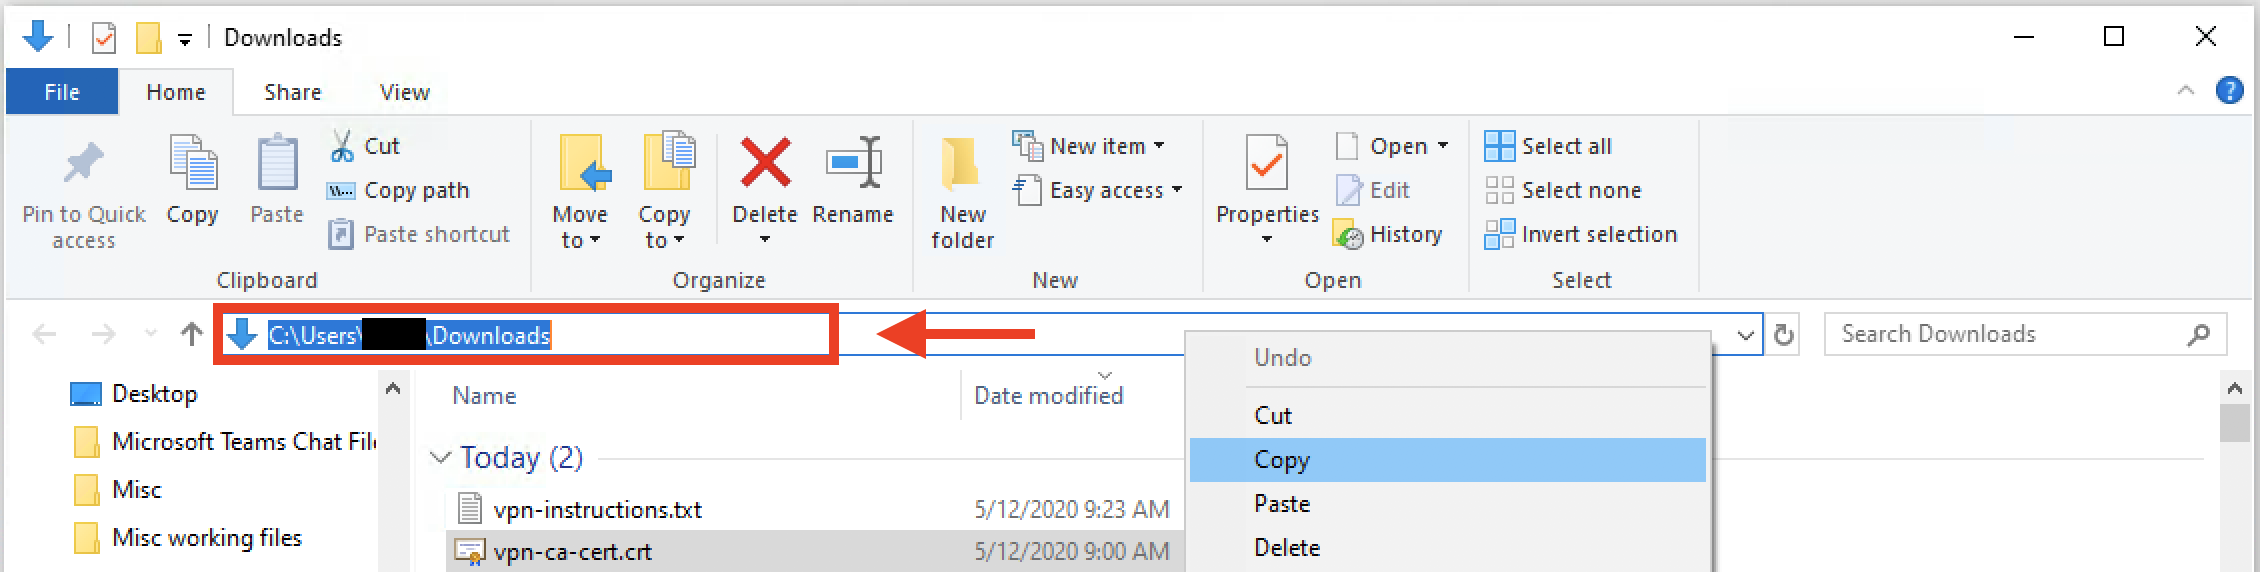
Download the 'vpn-ca-cert.crt' file and save to your Downloads folder.
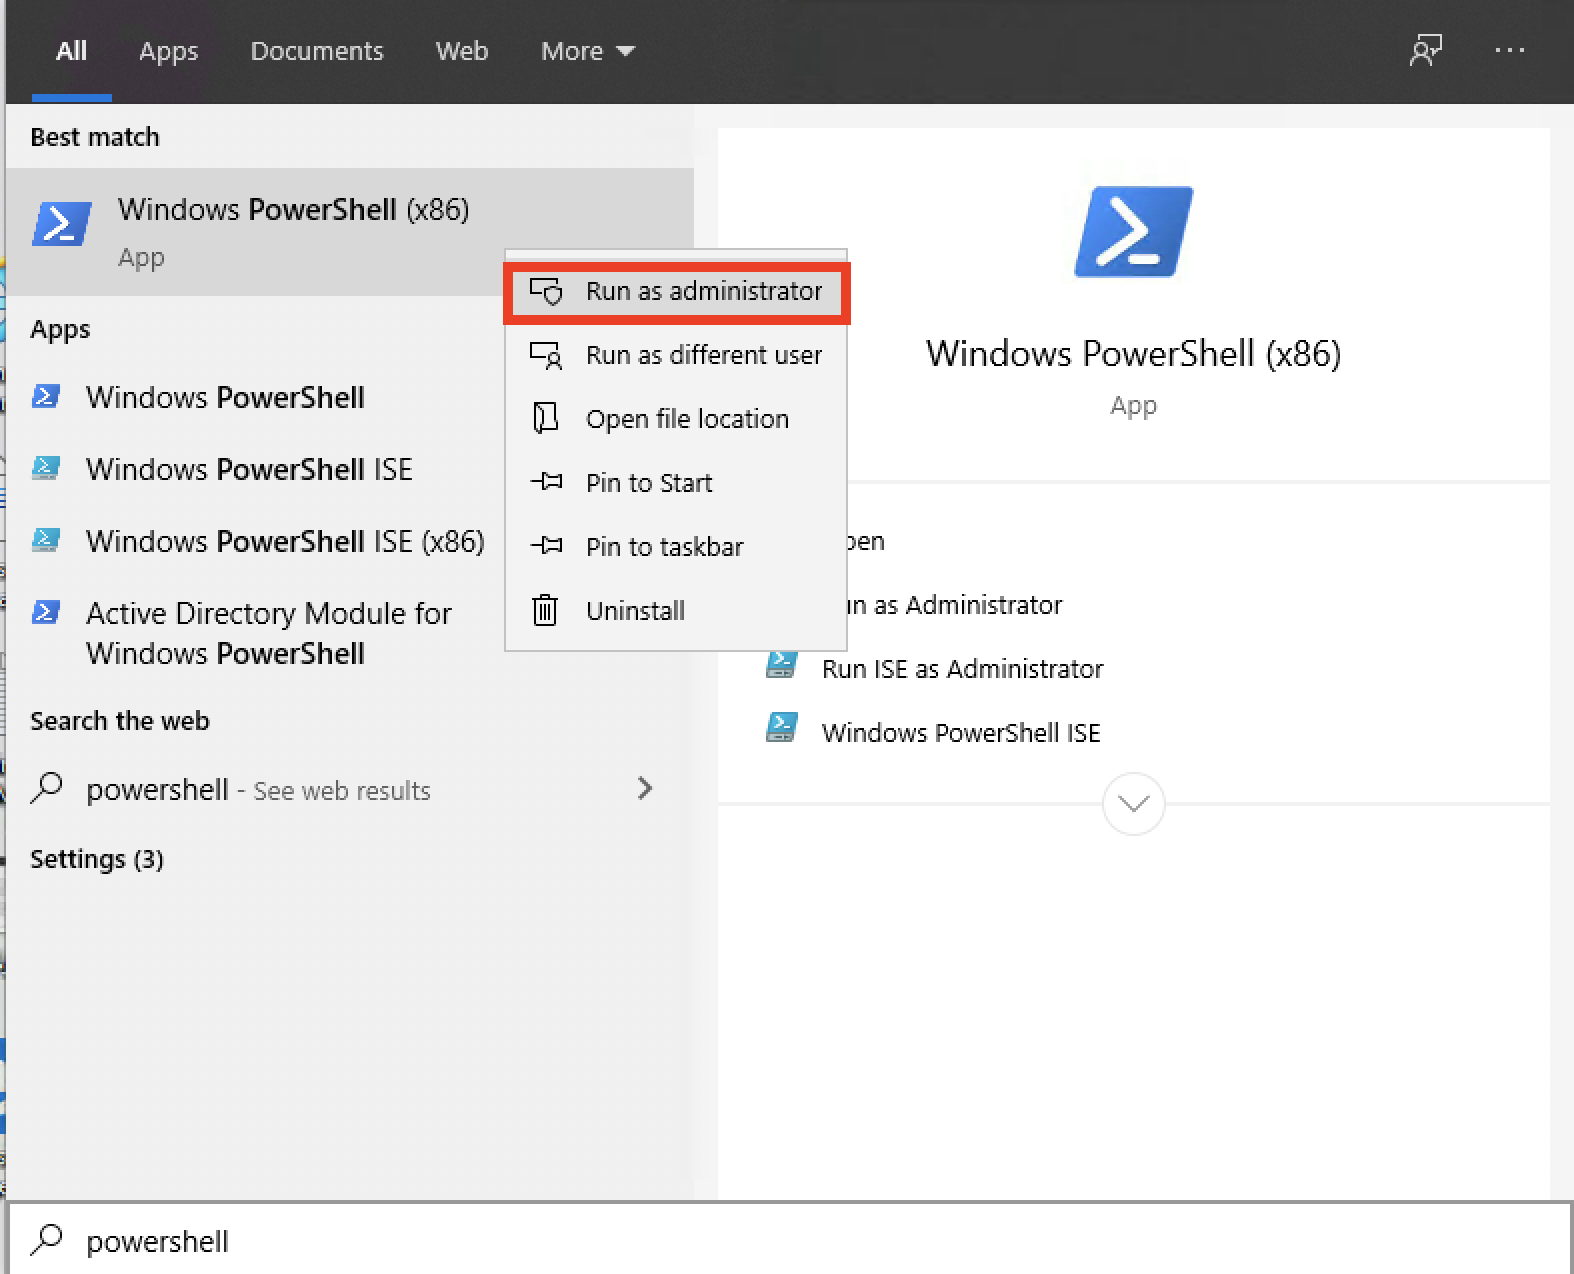
Go to Start menu > search for 'Windows PowerShell (x86)' and right-click and select Run as an Administrator. Enter your credentials when prompted.
Open your Downloads folder > right-click and Copy the file path of the 'vpn-ca-cert.crt' file and save for step 4.
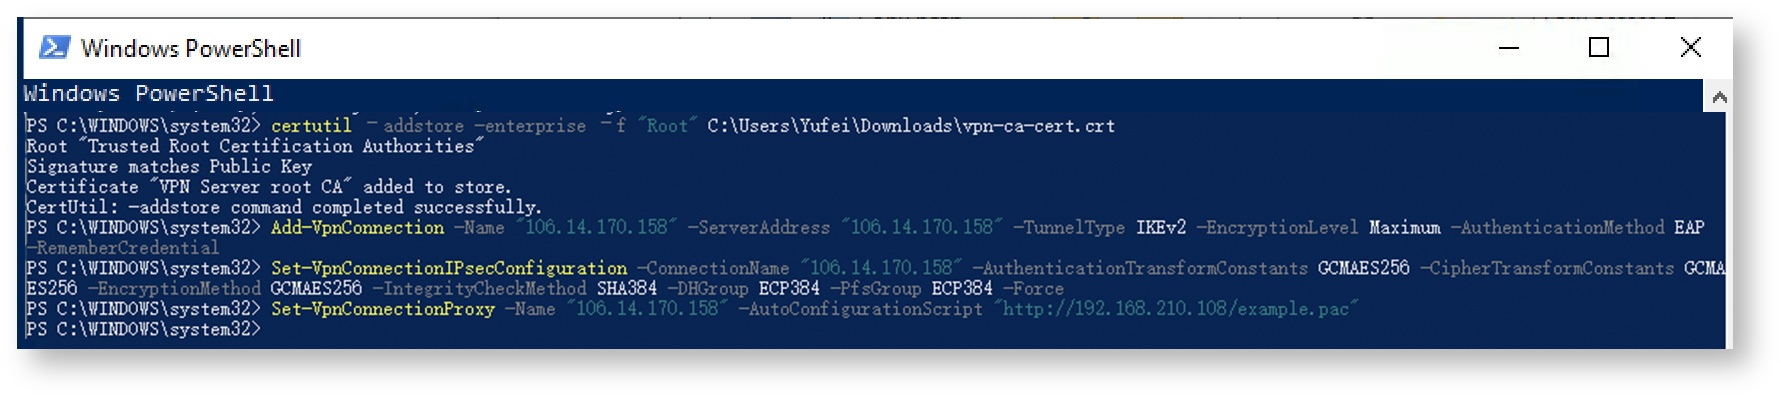
In PowerShell, copy the following four command lines and press Enter after each line .
In line 1 of the command below, replace the "~\Downloads\vpn-ca-cert.crt " with the file path copied from step 3 concatenated with "vpn-ca-cert.crt".
certutil –addstore -enterprise –f "Root" ~\Downloads\vpn-ca-cert.crt

Add-VpnConnection -Name "106.14.170.158" -ServerAddress "106.14.170.158" -TunnelType IKEv2 -EncryptionLevel Maximum -AuthenticationMethod EAP -RememberCredential

Set-VpnConnectionIPsecConfiguration -ConnectionName "106.14.170.158" -AuthenticationTransformConstants GCMAES256 -CipherTransformConstants GCMAES256 -EncryptionMethod GCMAES256 -IntegrityCheckMethod SHA384 -DHGroup ECP384 -PfsGroup ECP384 -Force

Set-VpnConnectionProxy -Name "106.14.170.158" -AutoConfigurationScript "http://192.168.210.108/example.pac"
Warning
If you received any error messages through the course of the installation process, you should always delete and clear the results of those commands. Please see Common errors for the Alibaba cloud enterprise network solution
- Make sure your PowerShell outputs are the following before proceeding to the next section:
How to connect
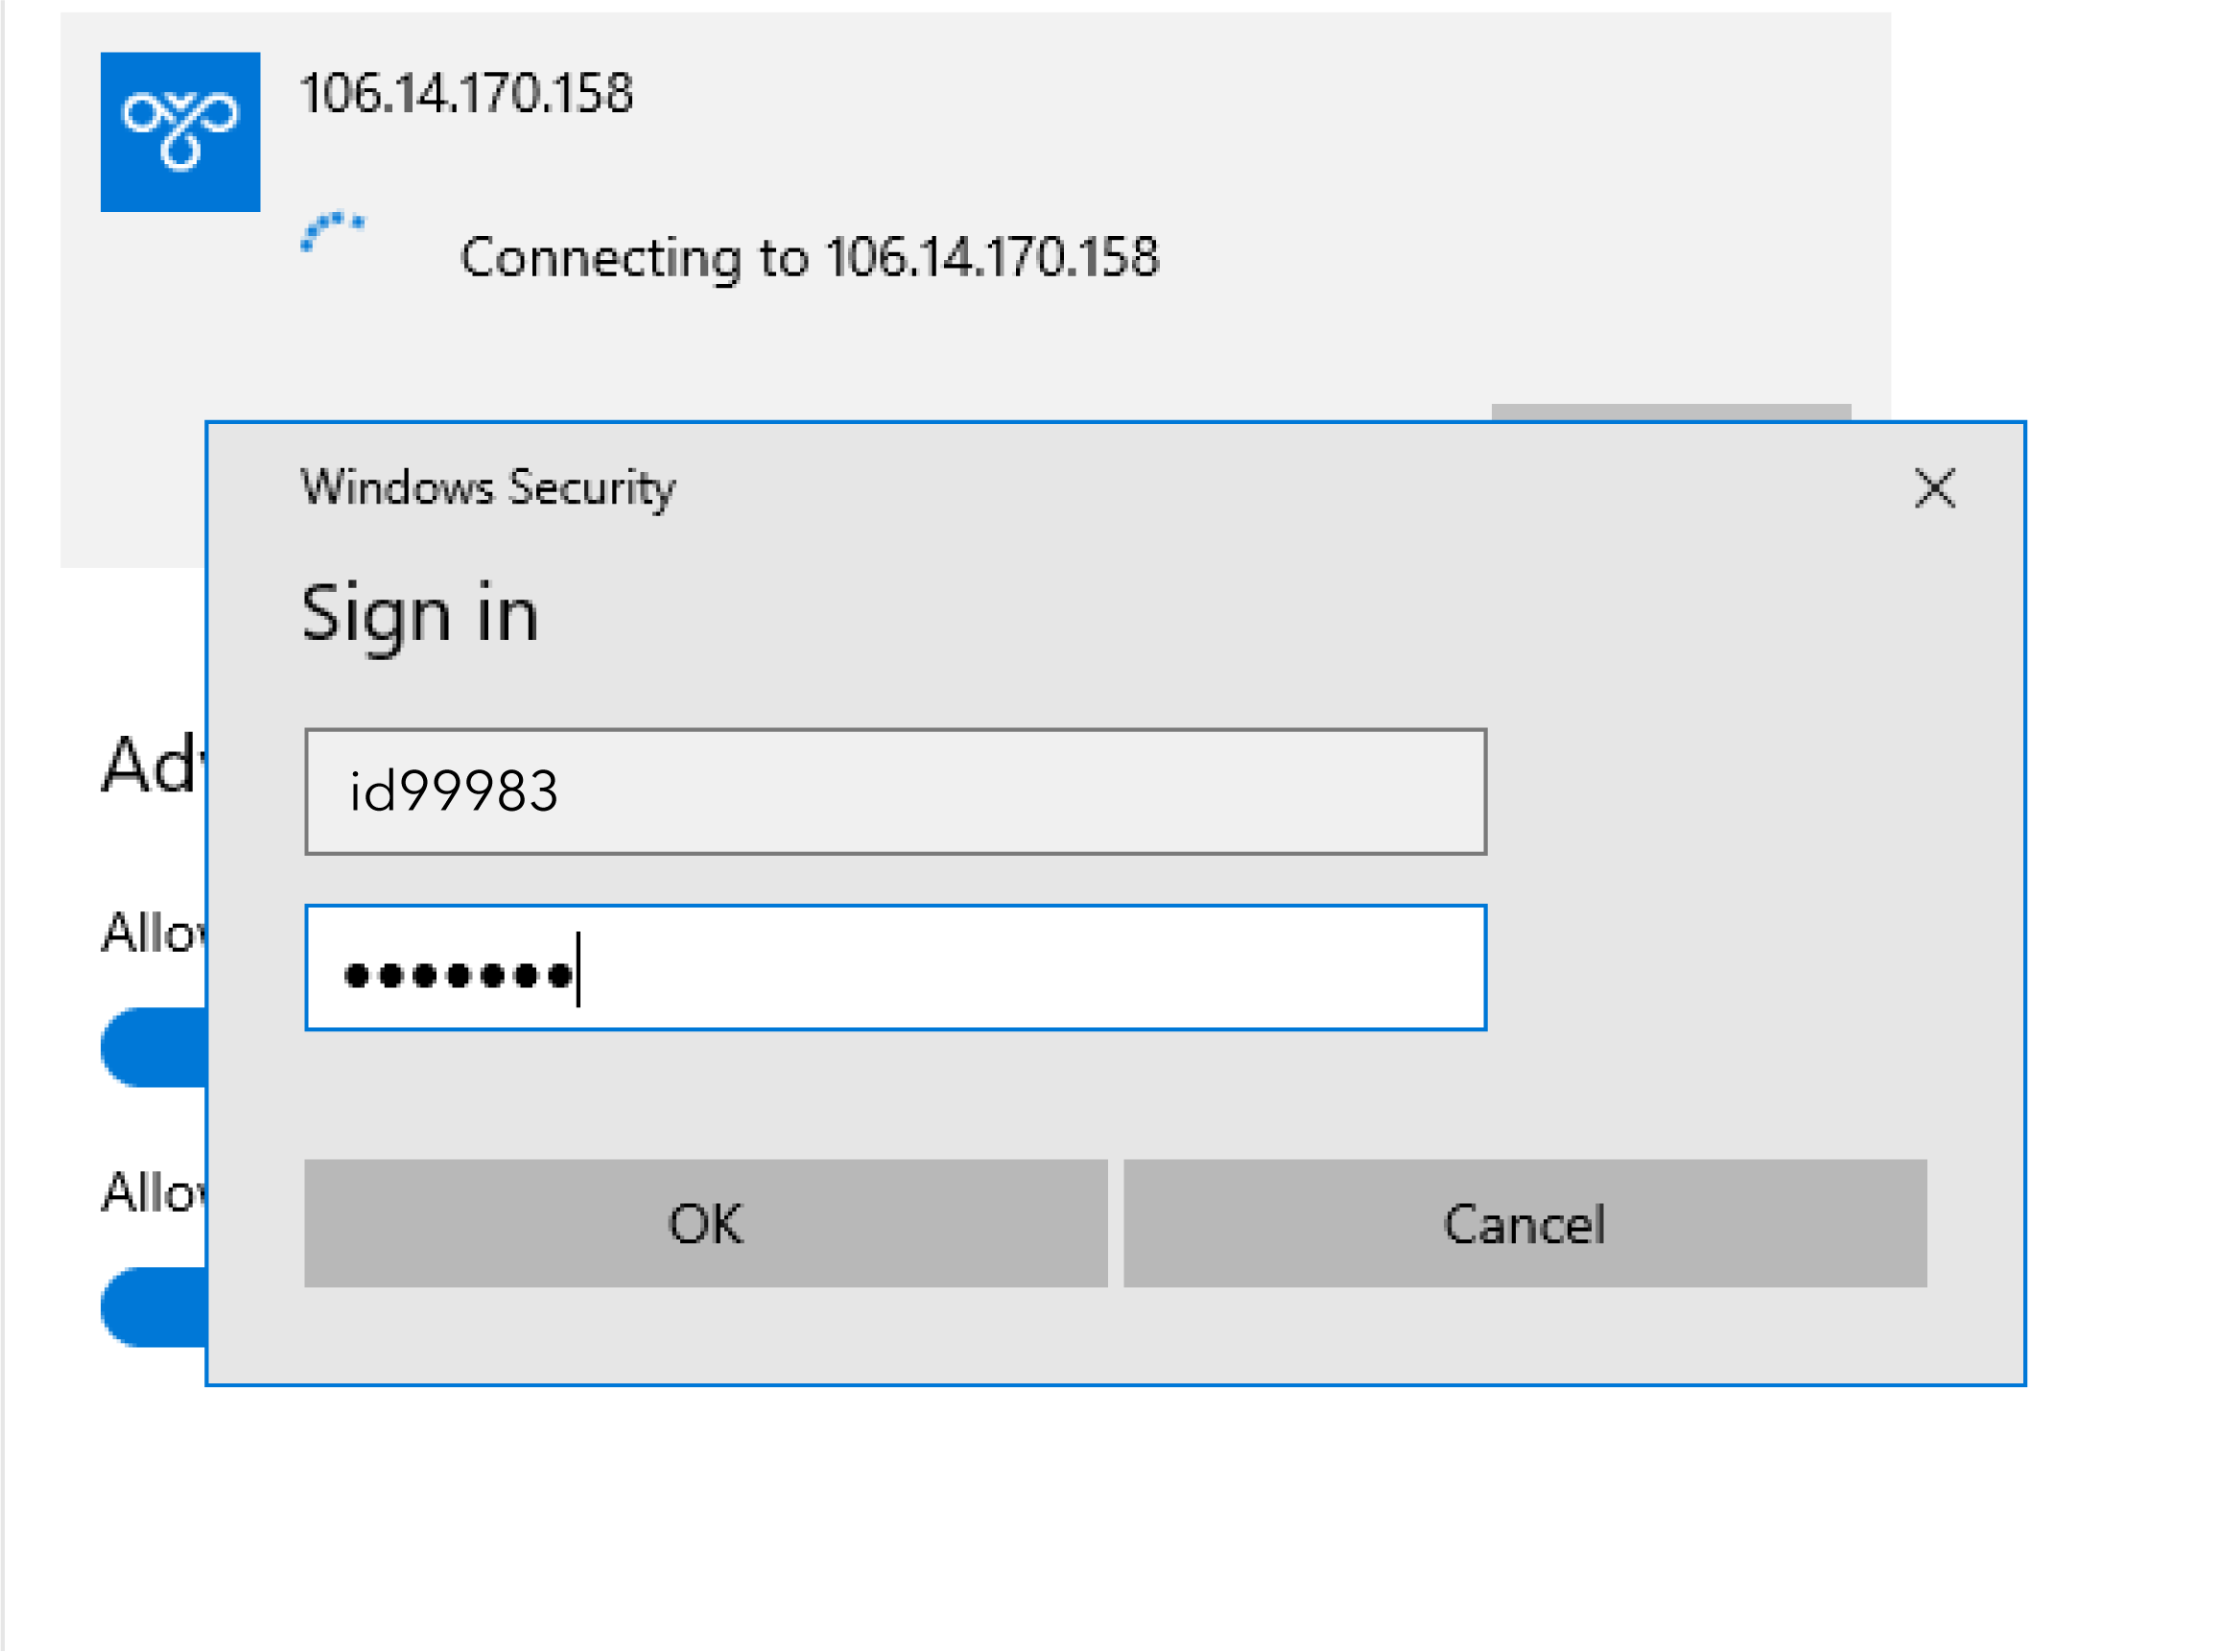
- Go to Start menu > search for 'VPN' and click on VPN settings.

- Select the 106.14.170.158 network and click Connect.
.png?version=2&modificationDate=1589293430627&cacheVersion=1&api=v2&width=497&height=151)
Enter the special VPN username and password provided. You will now be connected to the VPN. Do not enter your normal University of Waterloo username and password.
Warning
If you received an error message when connecting, please see Common errors for the Alibaba cloud enterprise network solution
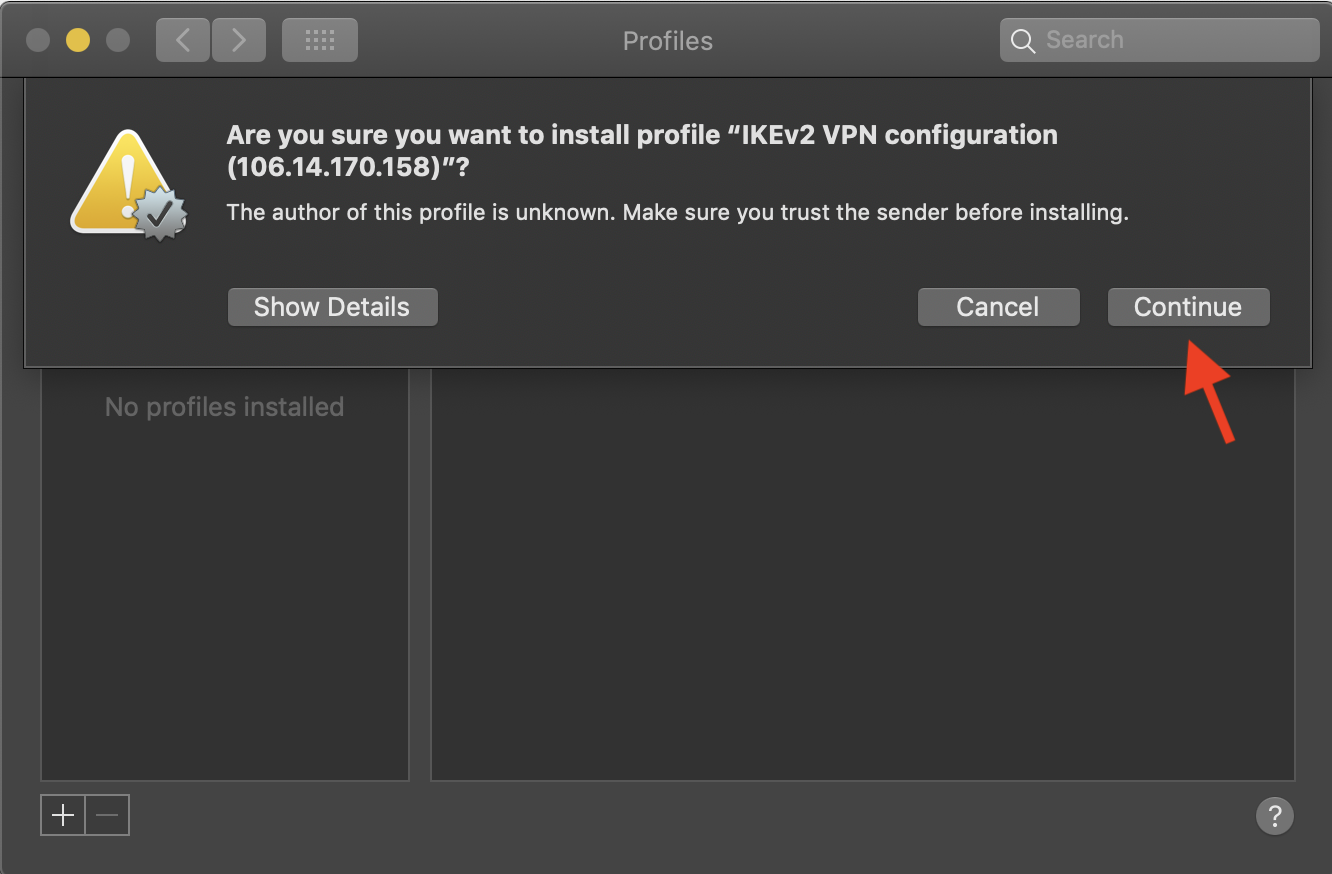
How to connect on MacOS
Installation
Download the 'vpn-ios-or-mac.mobileconfig' file onto your device. Click the file to open.
Please see Common errors for the Alibaba cloud enterprise network solution if you are having issues download the file
- Click Continue in the pop-up windows.
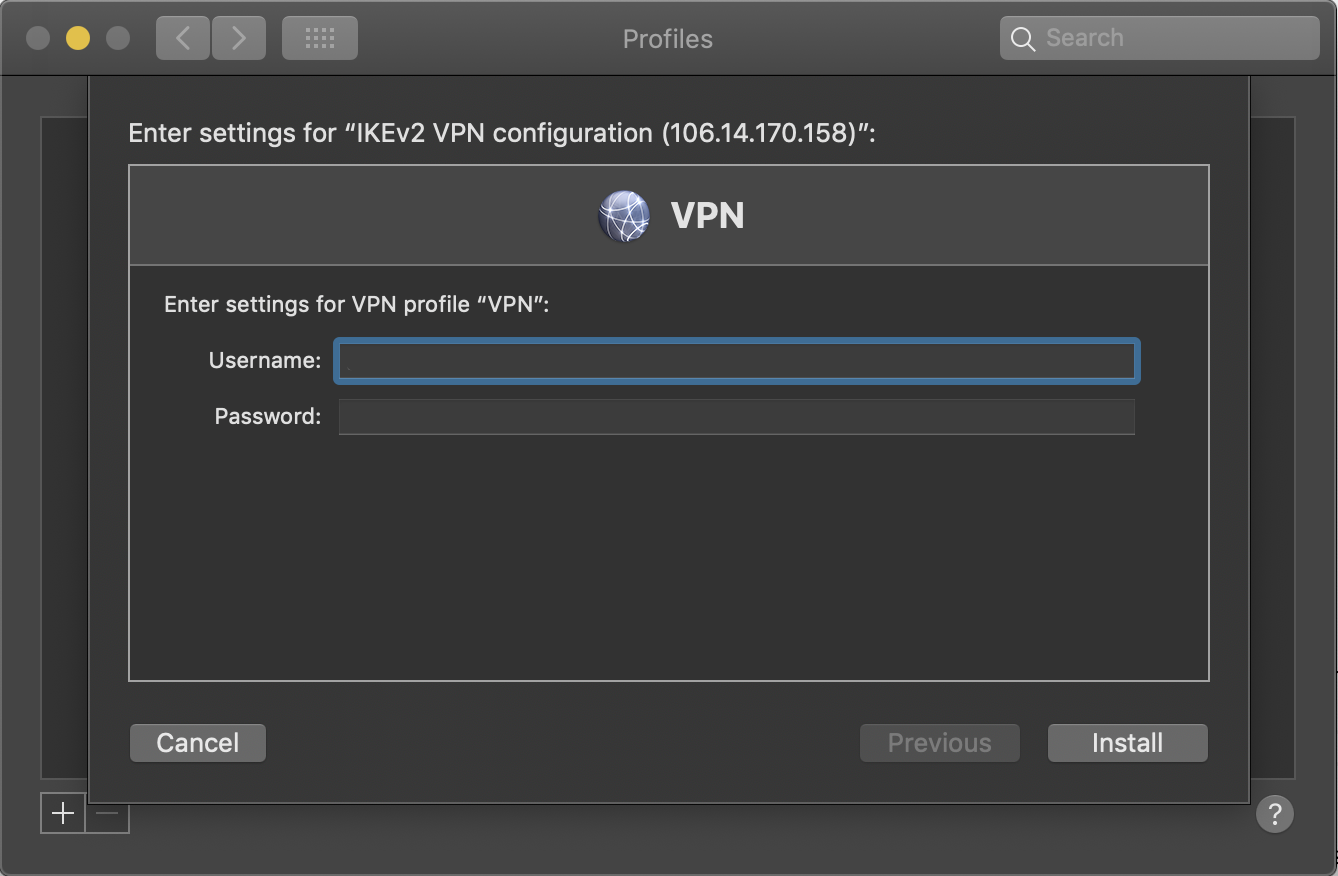
- Enter the username and password. Click Install.
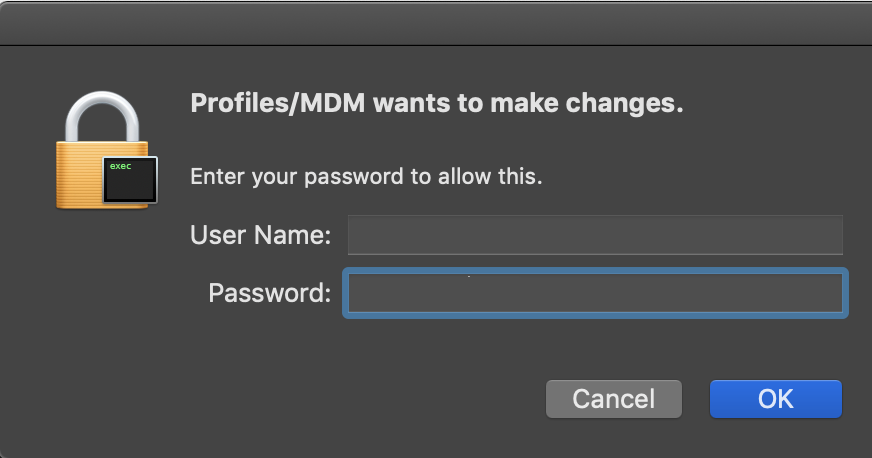
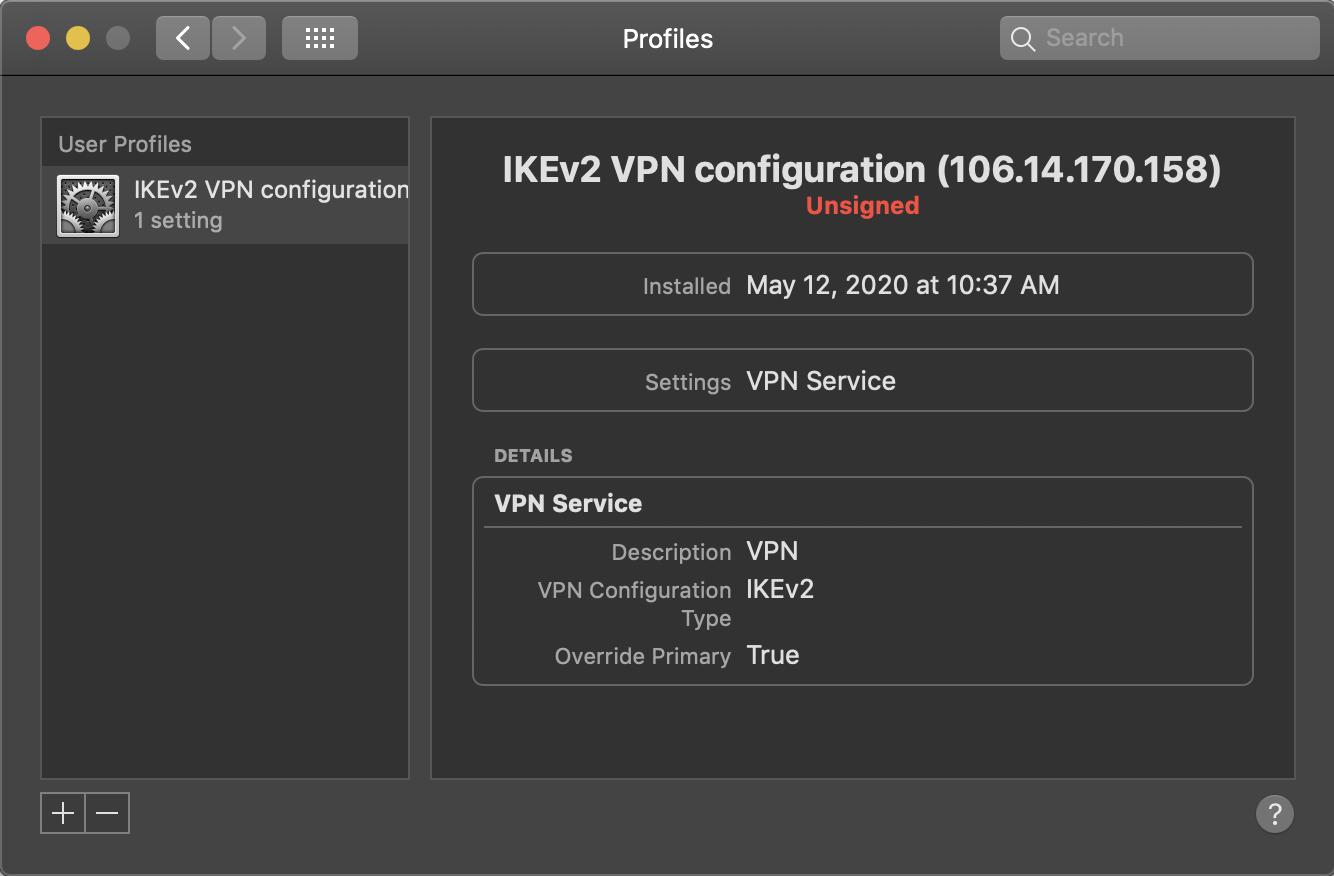
- If prompted, enter your computer username and password to allow for changes to be made. The profile will then be added.
How to connect
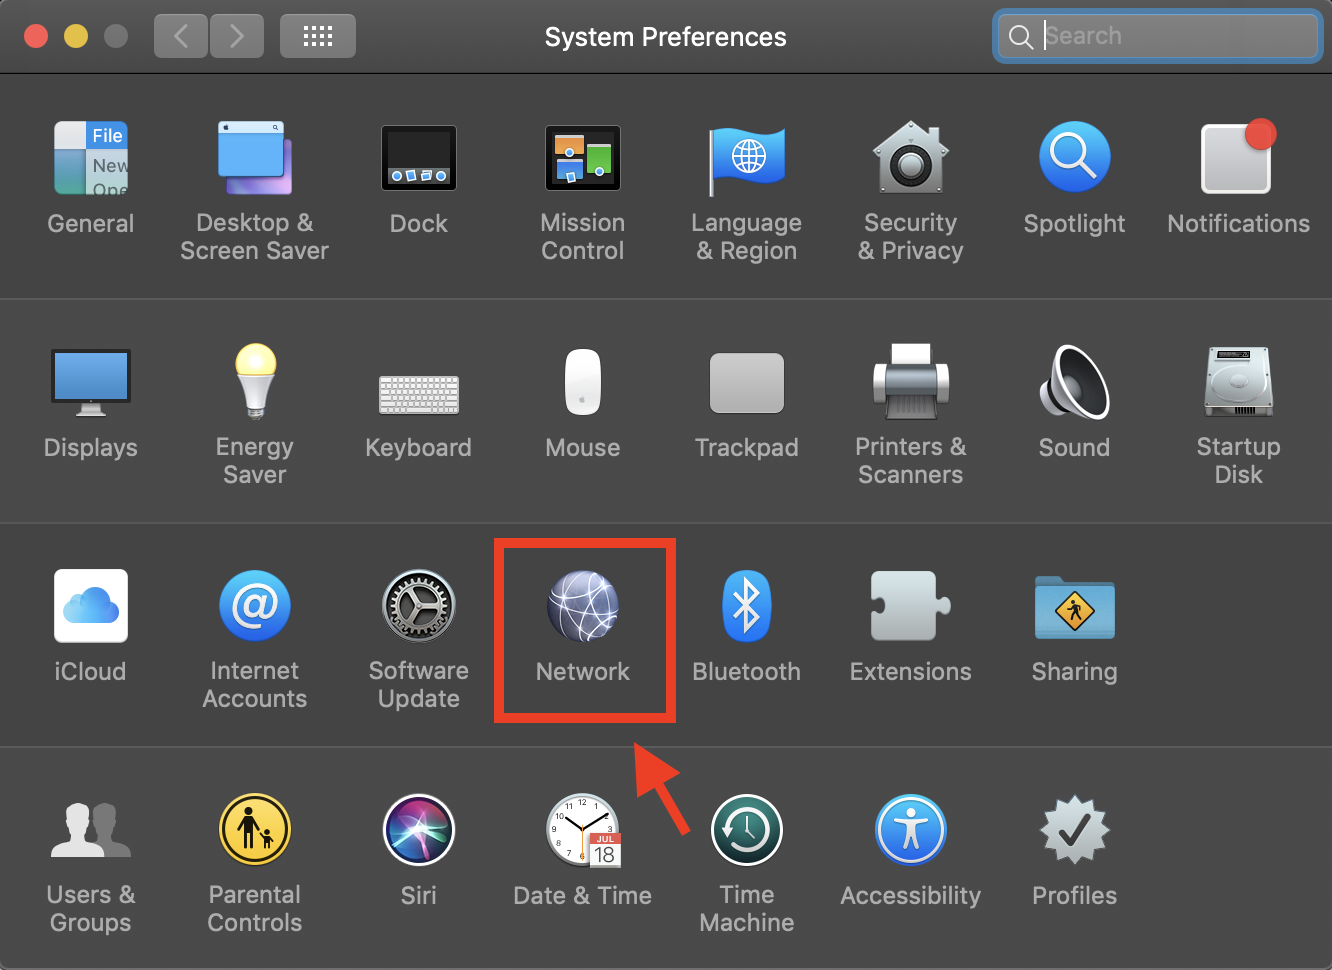
- To the Apple menu > System Preferences.
- Click and open Network.
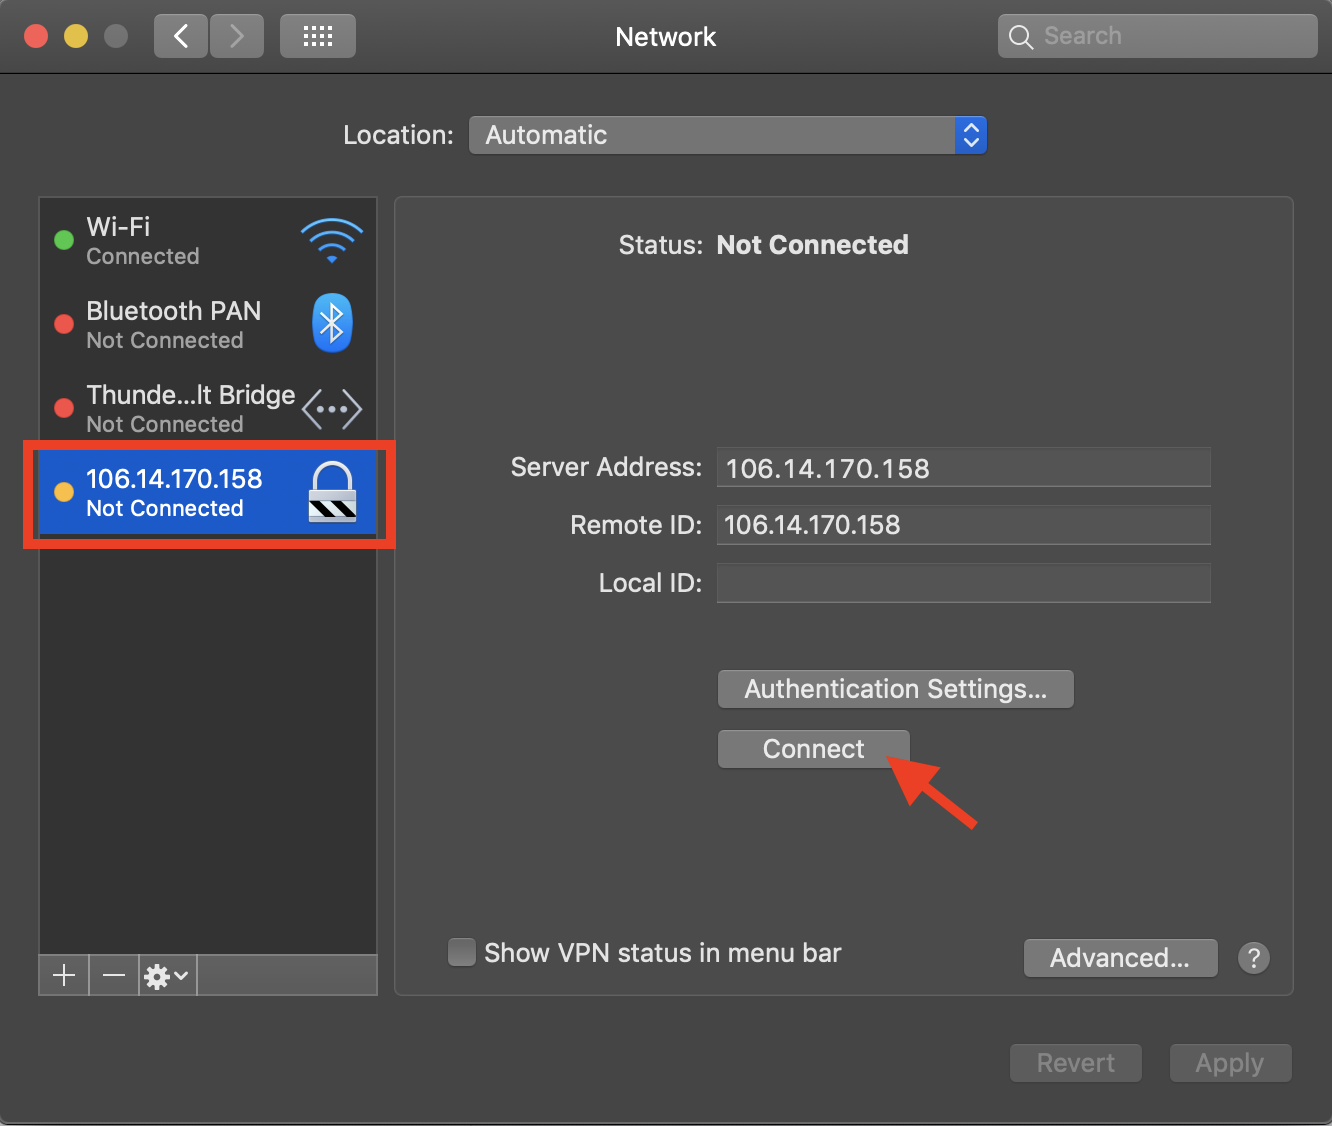
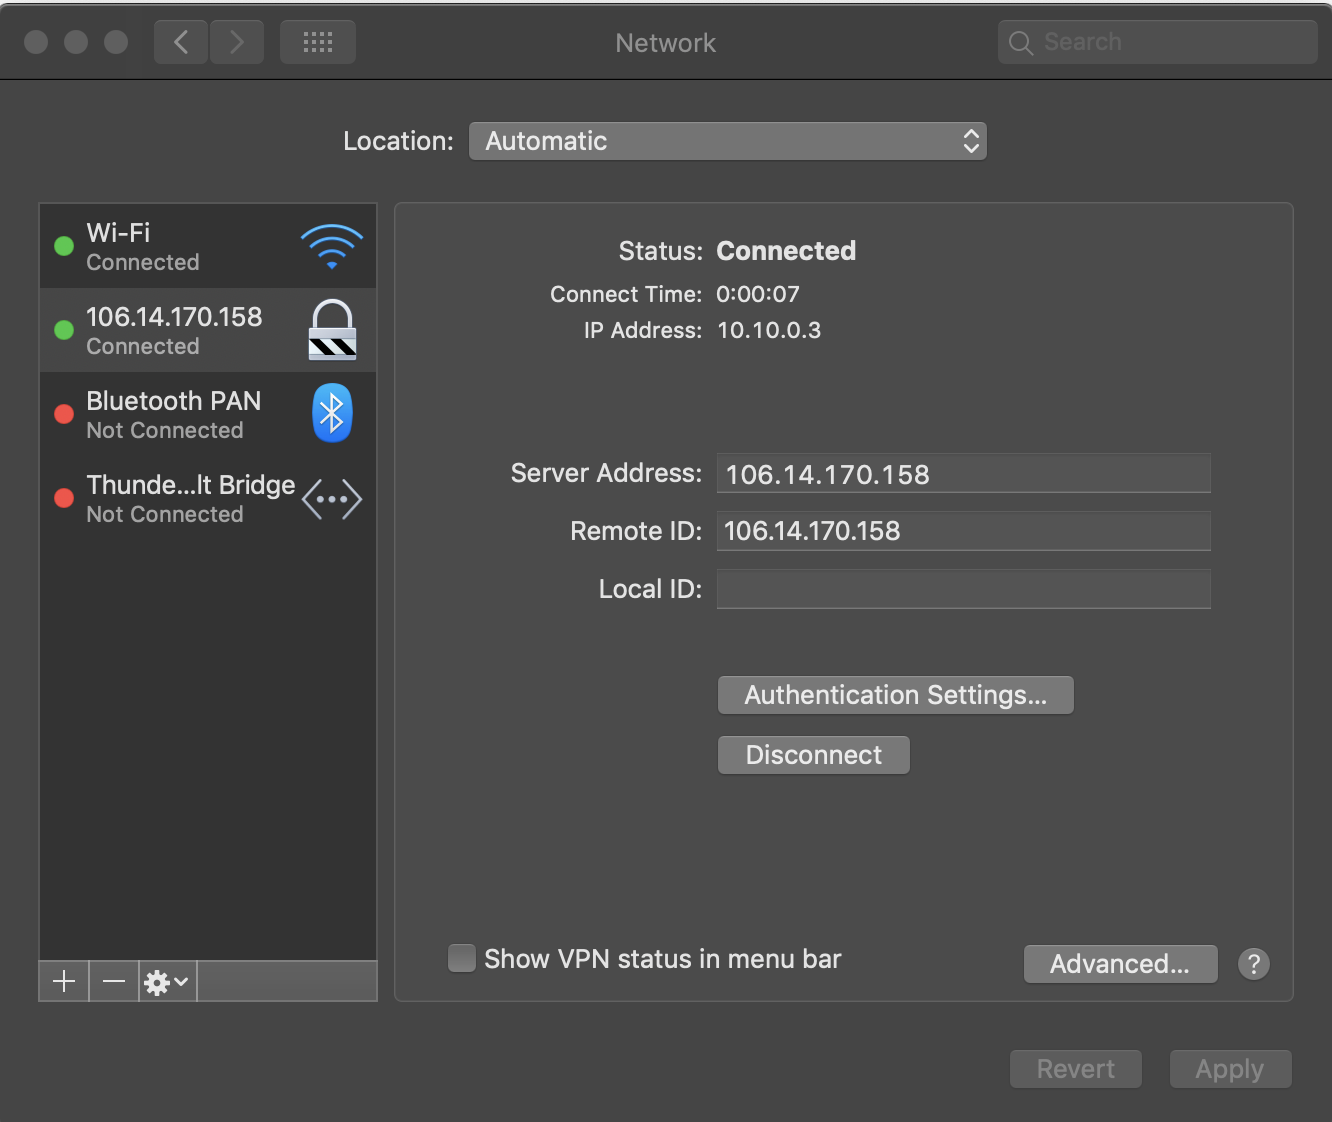
- Select the connection named '106.14.170.158' and click Connect. You will now be connected to the VPN.
How to connect on Ubuntu
This guide will only work if the APT package manager is available on your system (eg. Ubuntu or another Debian based distribution). For other distributions of Linux, contact helpdesk@uwaterloo.ca for support.
Installation
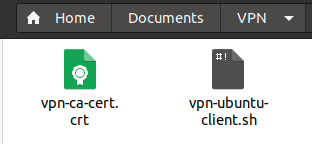
- Download the 'vpn-ubuntu-client.sh' and 'vpn-ca-cert.crt' files and save them in the same directory. In this guide, they've been saved to ~/Documents/VPN/.
- Navigate to the directory where you downloaded the files.
- In your file manager, go to that directory, right-click on the background (not the files) and choose Open in Terminal.
- In your file manager, go to that directory, right-click on the background (not the files) and choose Open in Terminal.
Check for updates to your programs with:
sudo apt update
You will be prompted for your computer password. Type it in and press Enter. This will run for a few minutes.
Change the permissions of the shell script (.sh file) using:
chmod +x vpn-ubuntu-client.sh
Run the shell script as root using:
sudo ./vpn-ubuntu-client.sh
- Enter your VPN username.
- Enter your VPN password.
Your computer will now install strongSwan and some dependencies. This may take several minutes. Once you see the text as below, you have successfully installed the VPN client.
To disconnect: ipsec down ikev2vpn
To resconnect: ipsec up ikev2vpn
To connect automatically: change auto=add to auto=start in /etc/ipsec.conf
- Restart your computer.
How to connect
- Open a new Terminal window.
Run:
sudo ipsec up ikev2vpn
Enter your computer password. You will now be connected to the VPN.
Connection Failure
If you are experiencing failure when connecting to VPN on ubuntu, you will also need to run the following code:
sudo apt install resolvconf
This will install resolvconf and you will be able to connect. Remember to reboot before you connect again.
For more ubuntu VPN connection troubleshooting, see https://github.com/trailofbits/algo/issues/805
How to connect on iOS
Installation
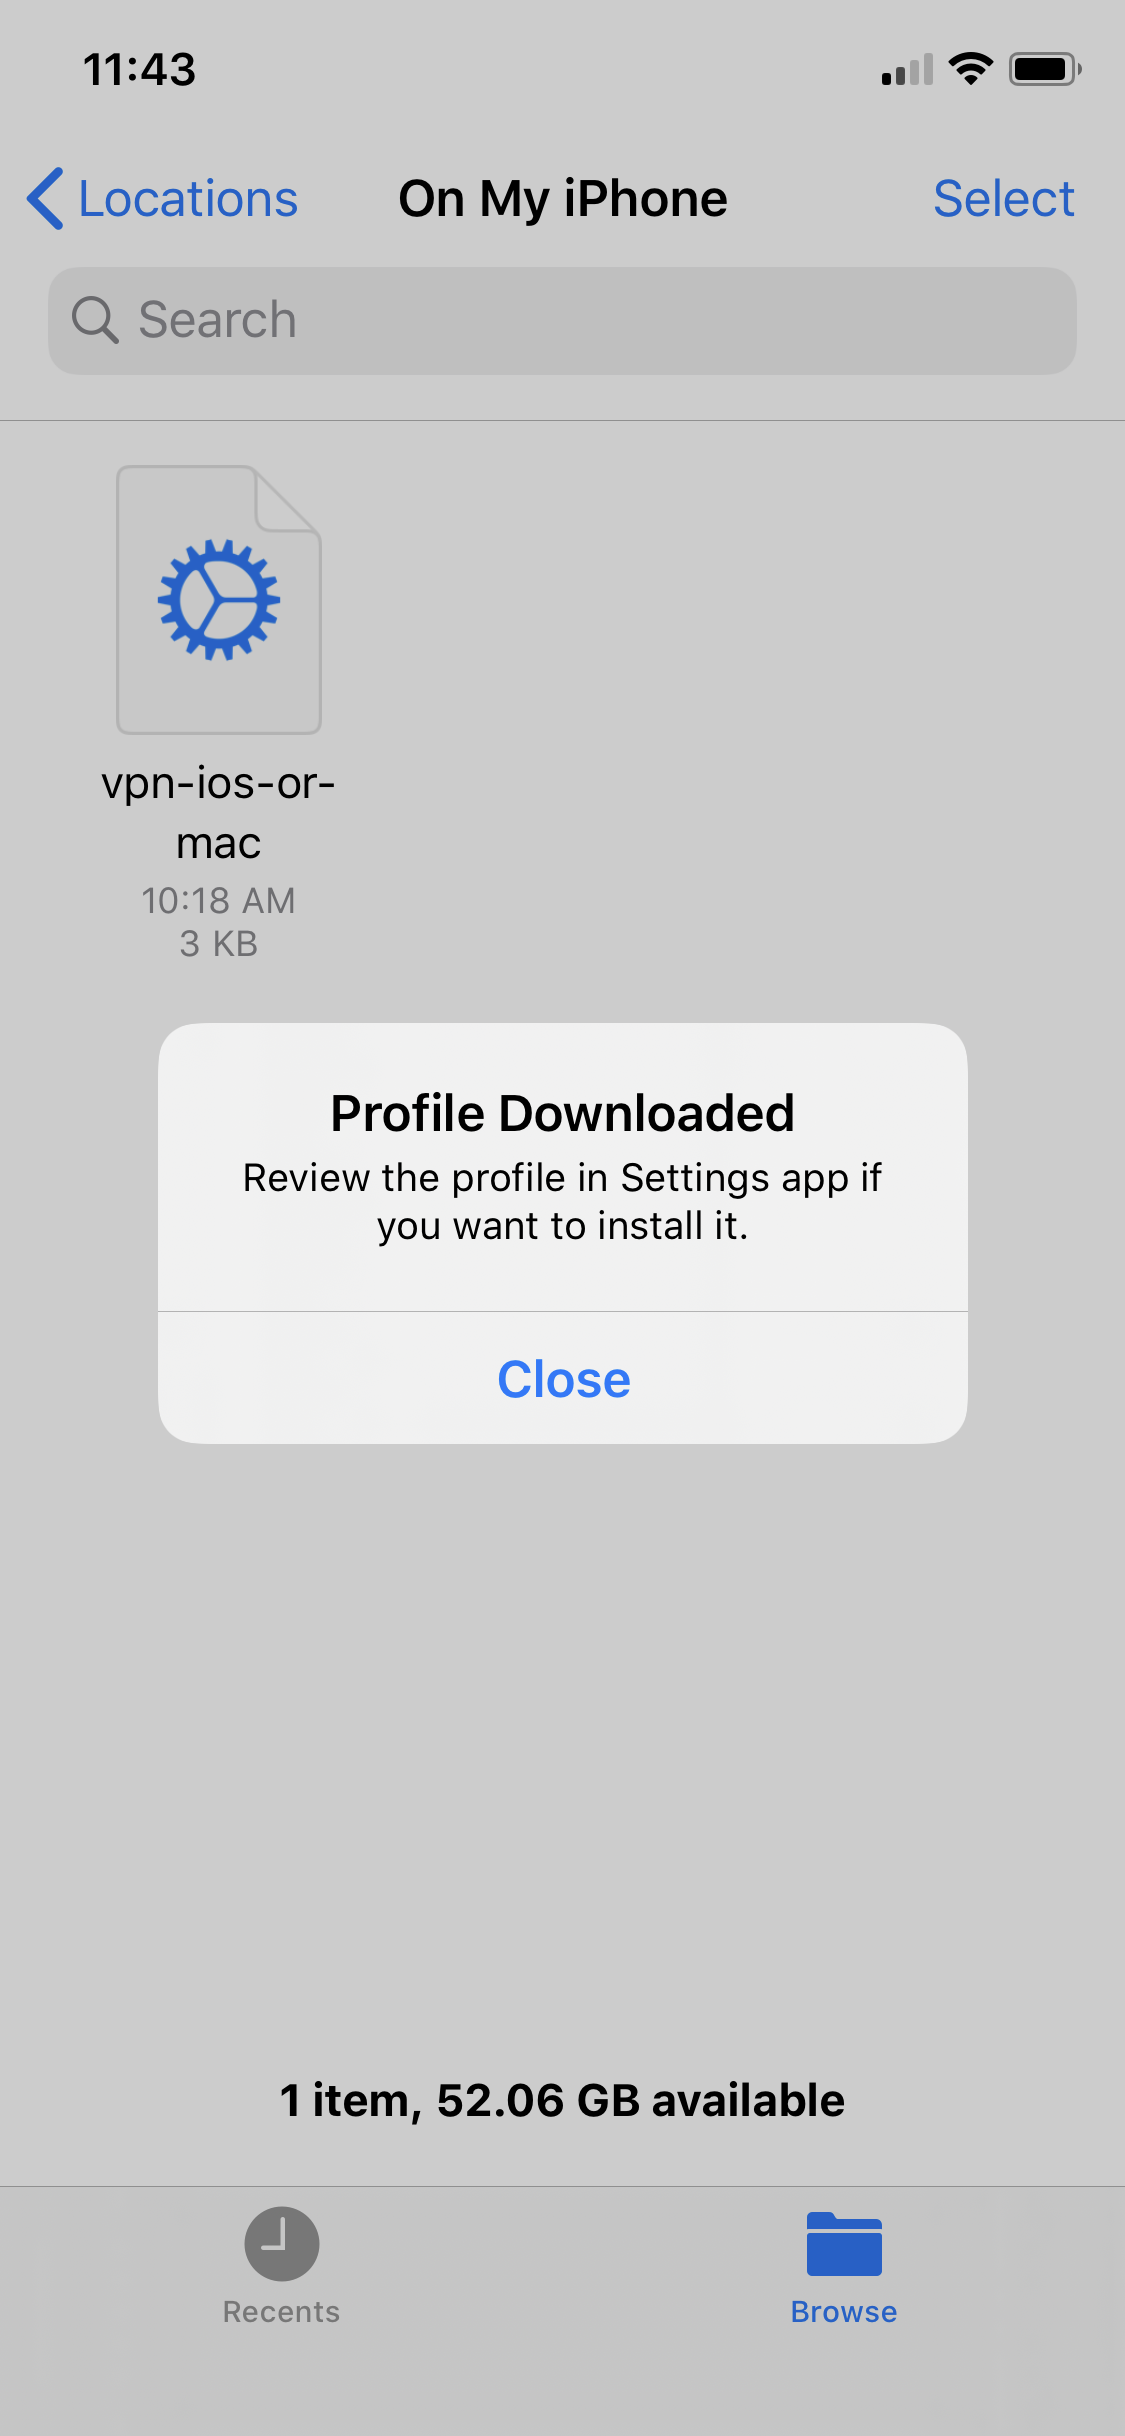
- Download the 'vpn-ios-or-mac.mobileconfig' file onto your device. Click the file. A pop-up will appear asking you to review the profile in your device Settings.
- Go to the Settings app > General > scroll down and click on Profile. Click on the downloaded profile, 'IKEv2 VPN configuration'.

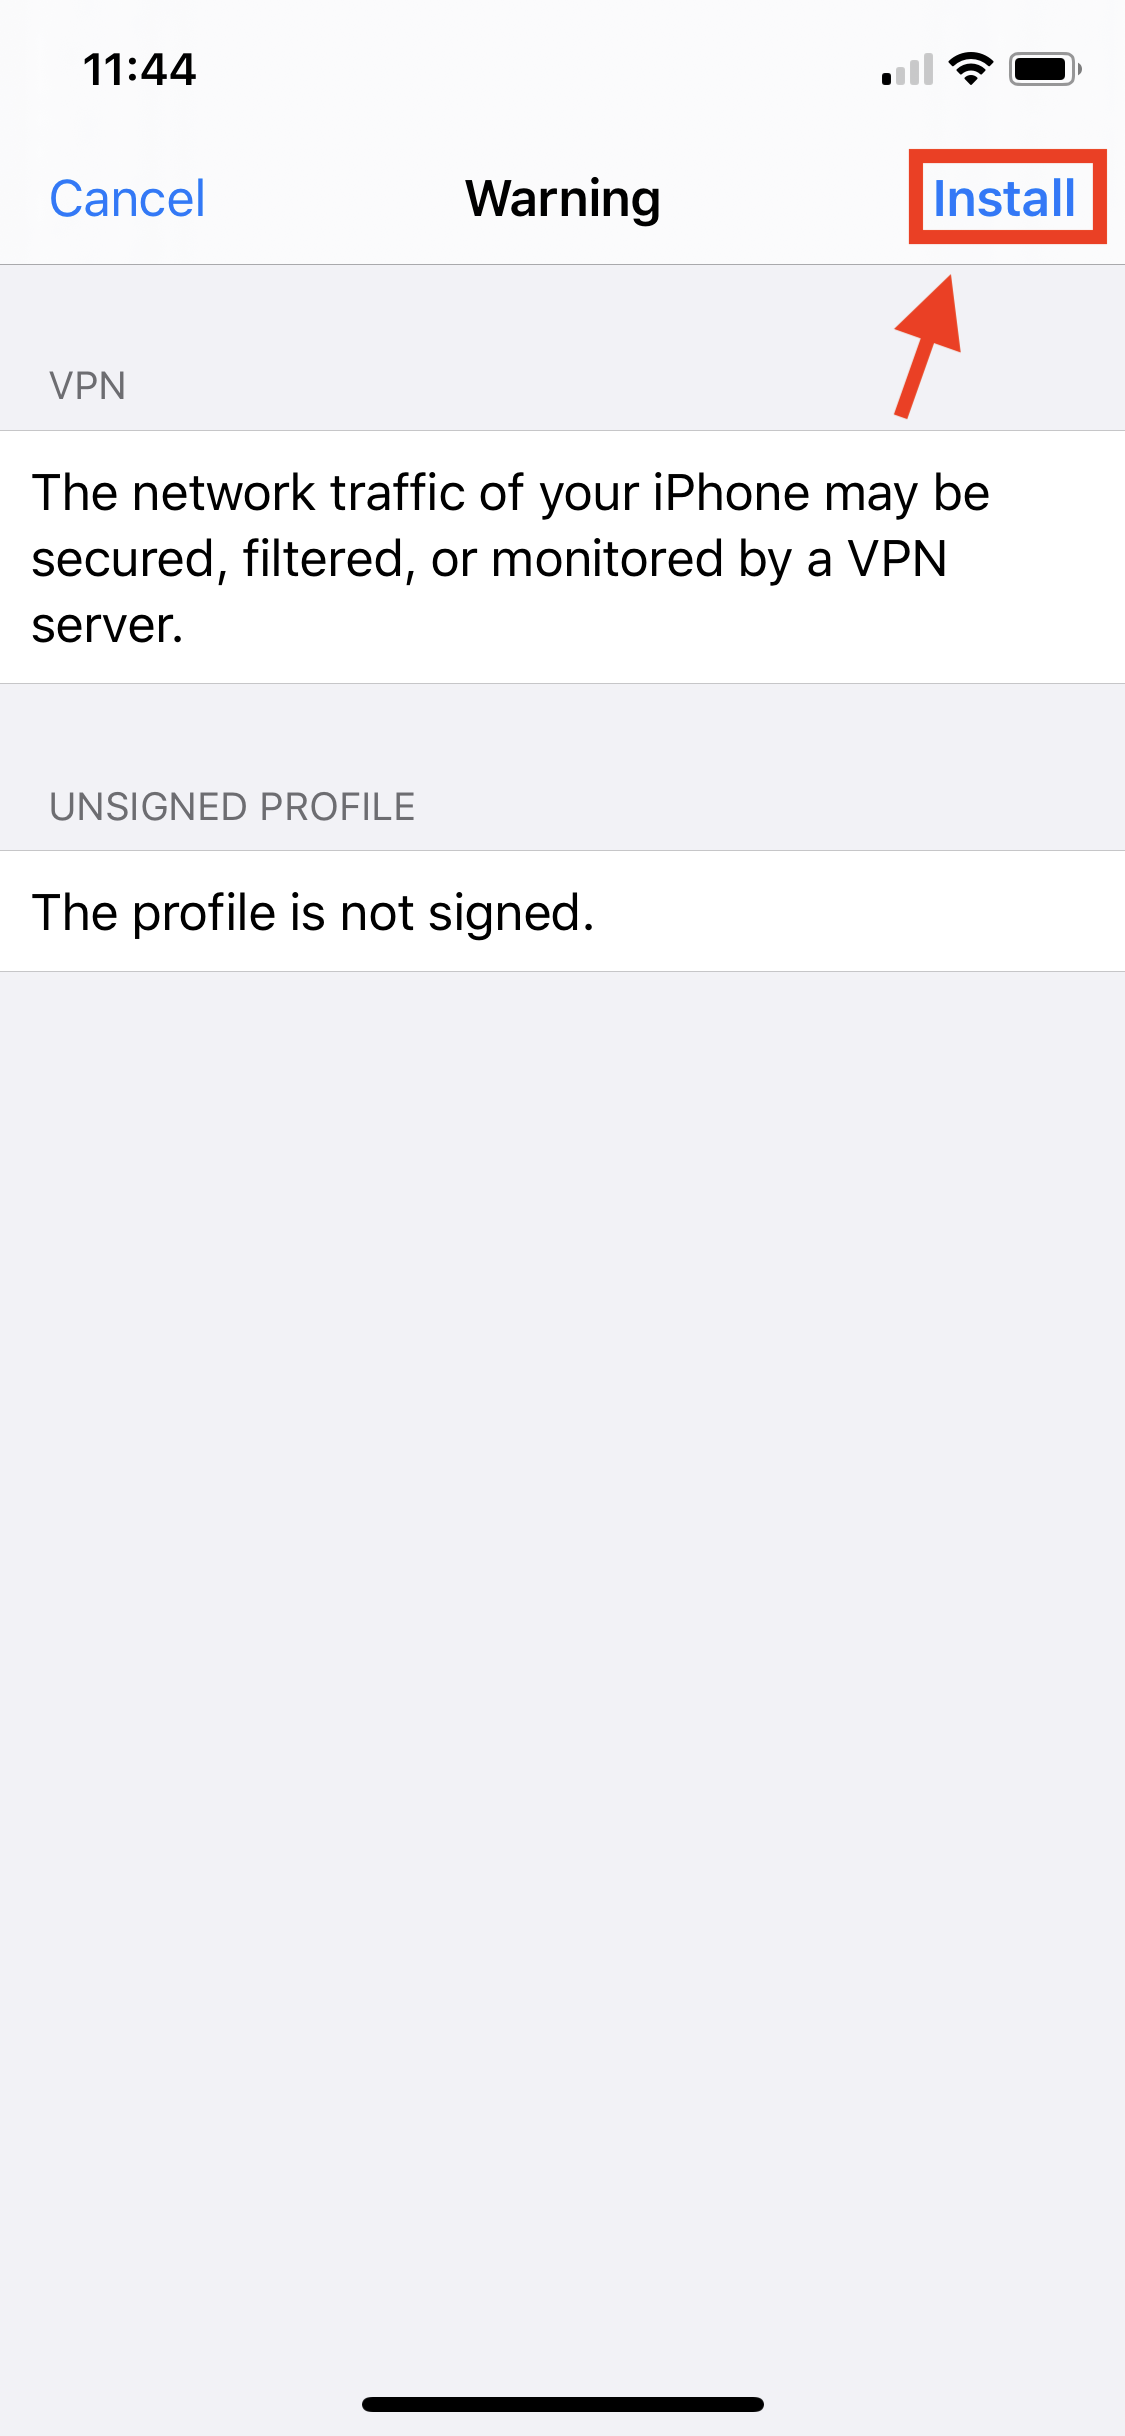
- Click Install. Enter your passcode if prompted.

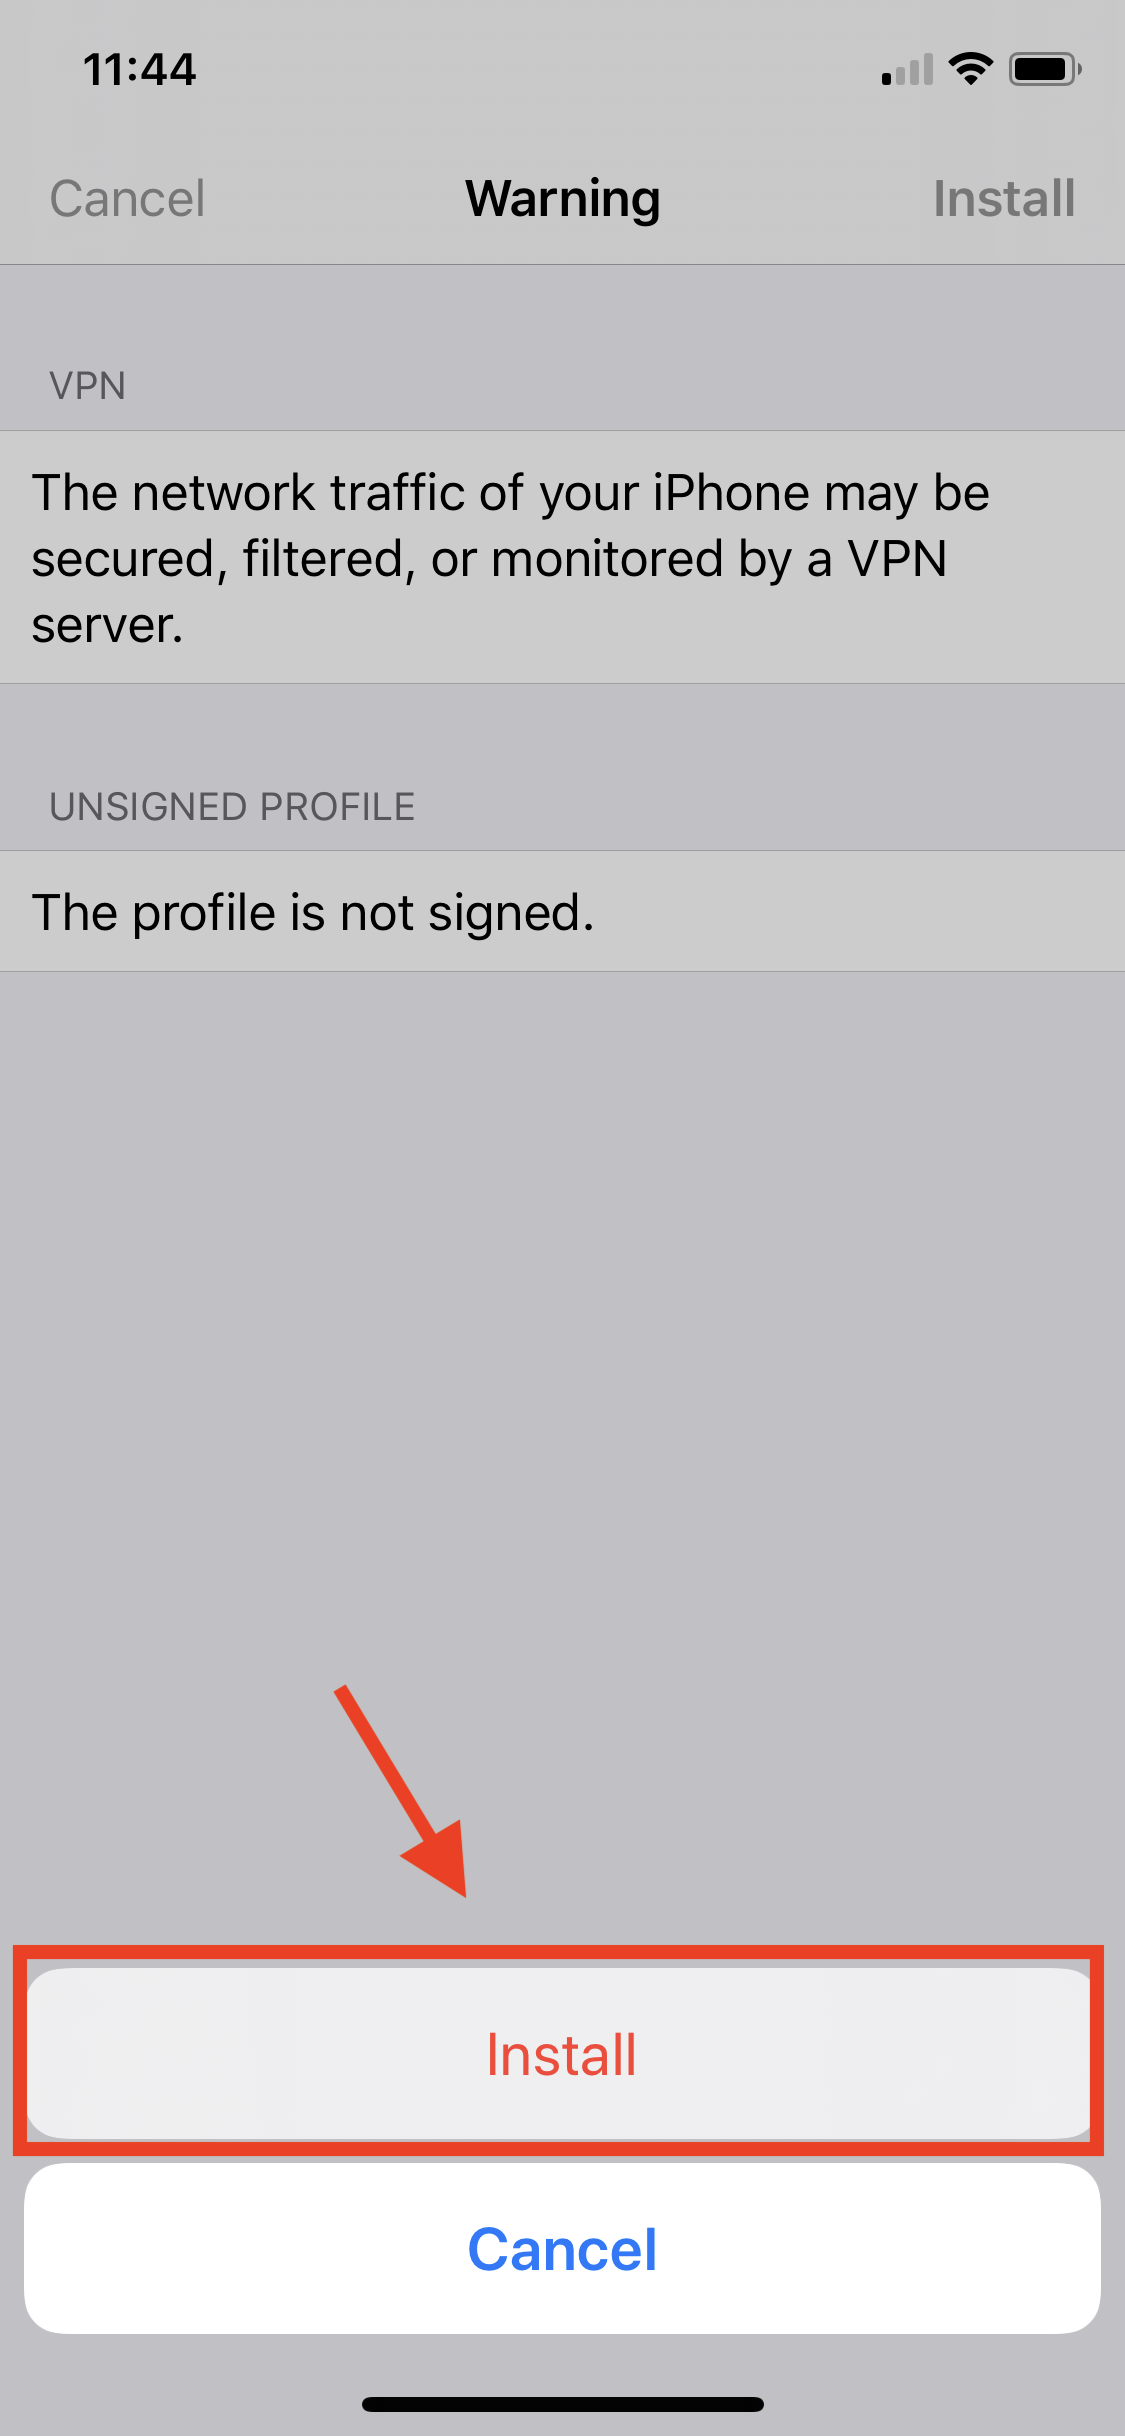
- On the Warning screen, click Install.
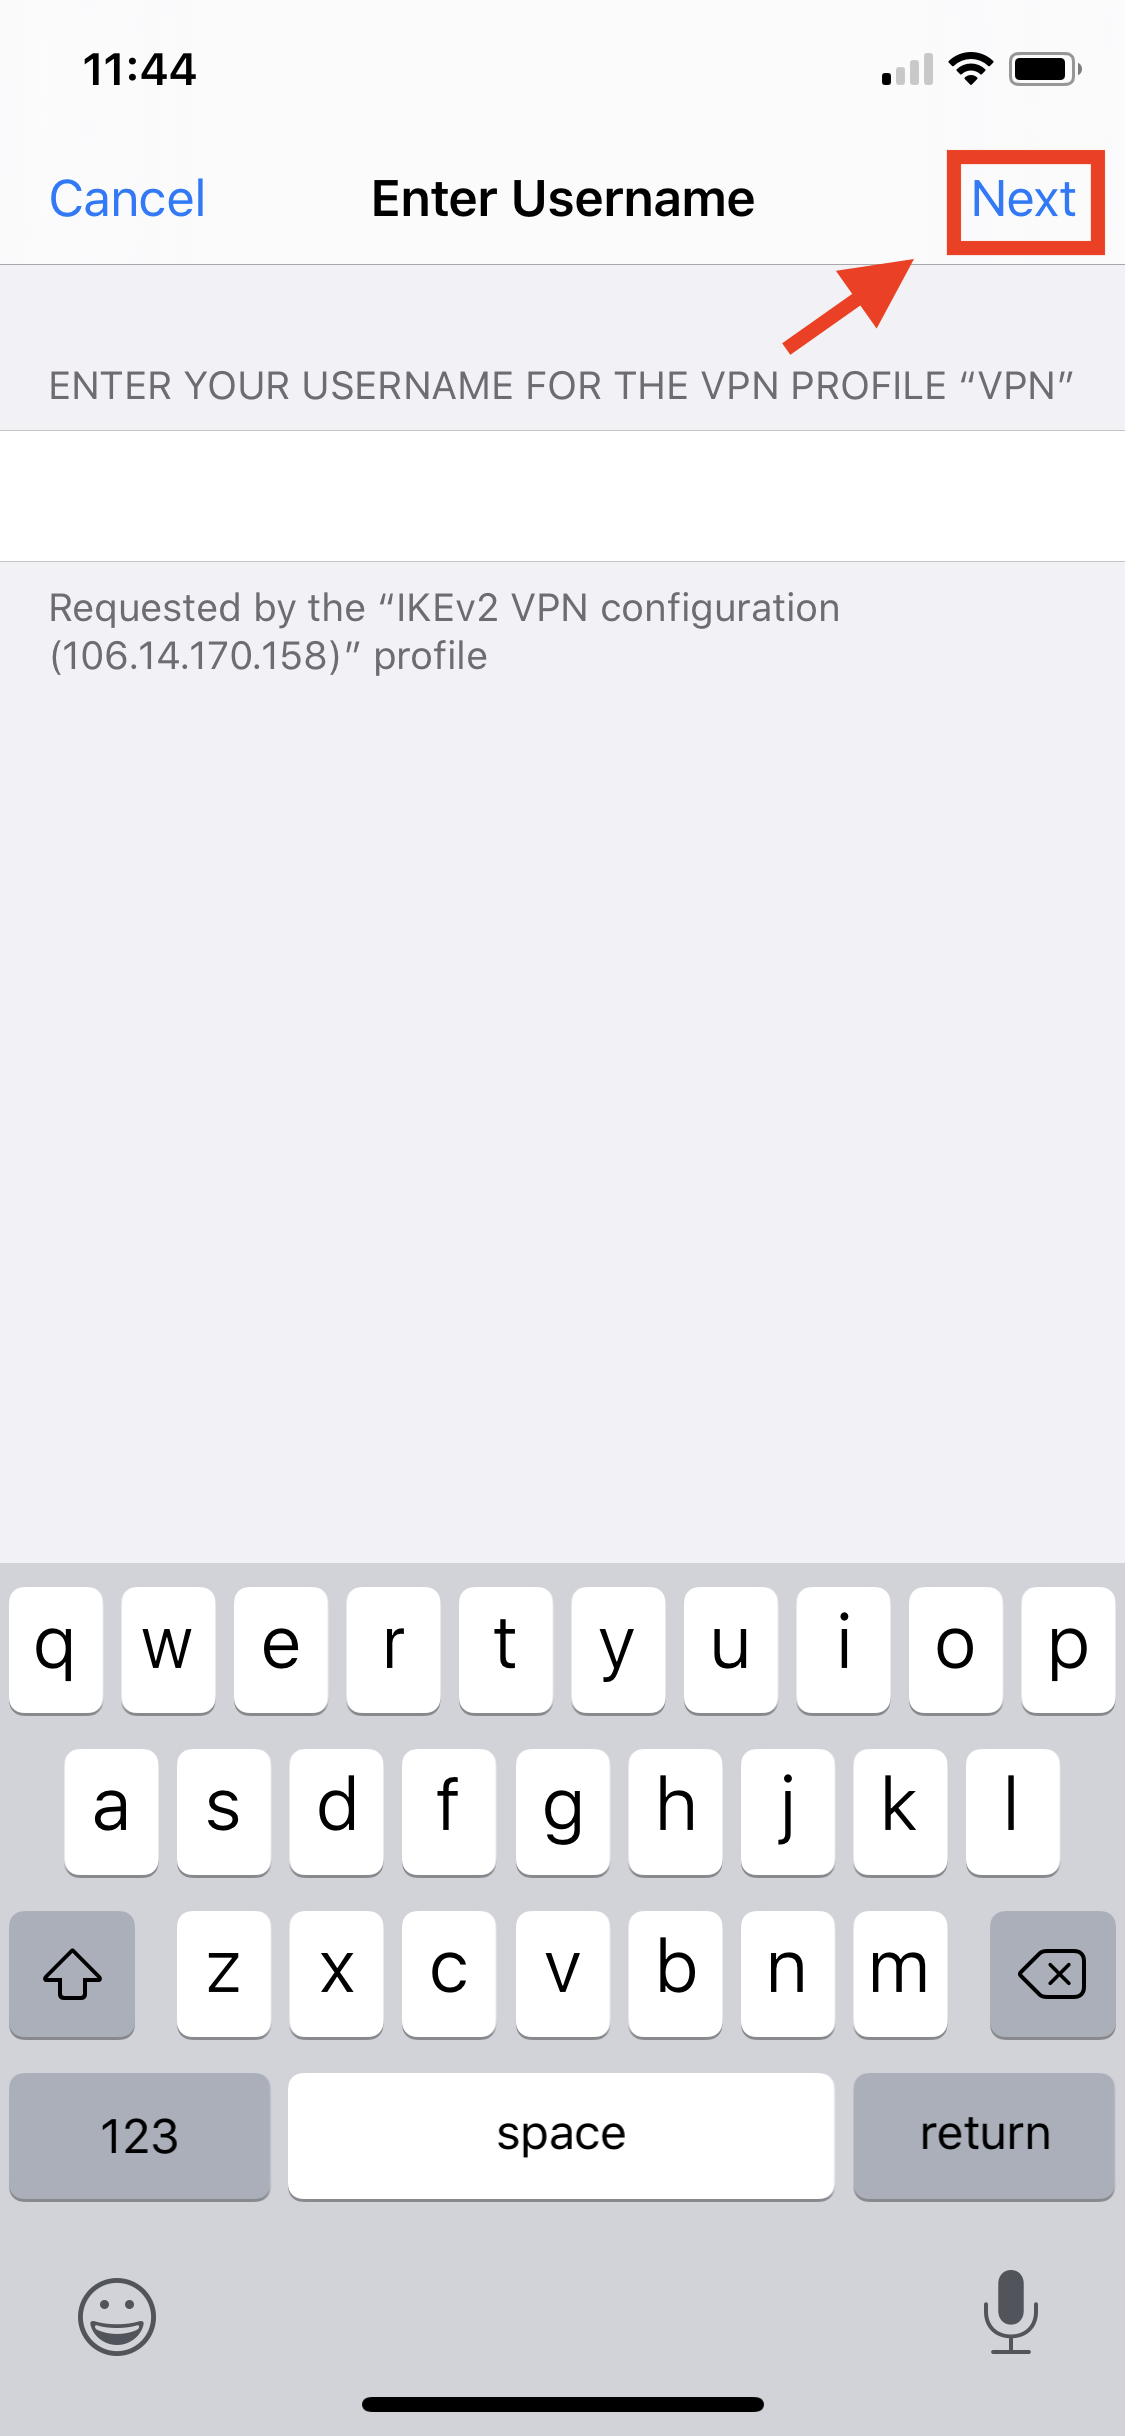
- Enter the username and click Next.
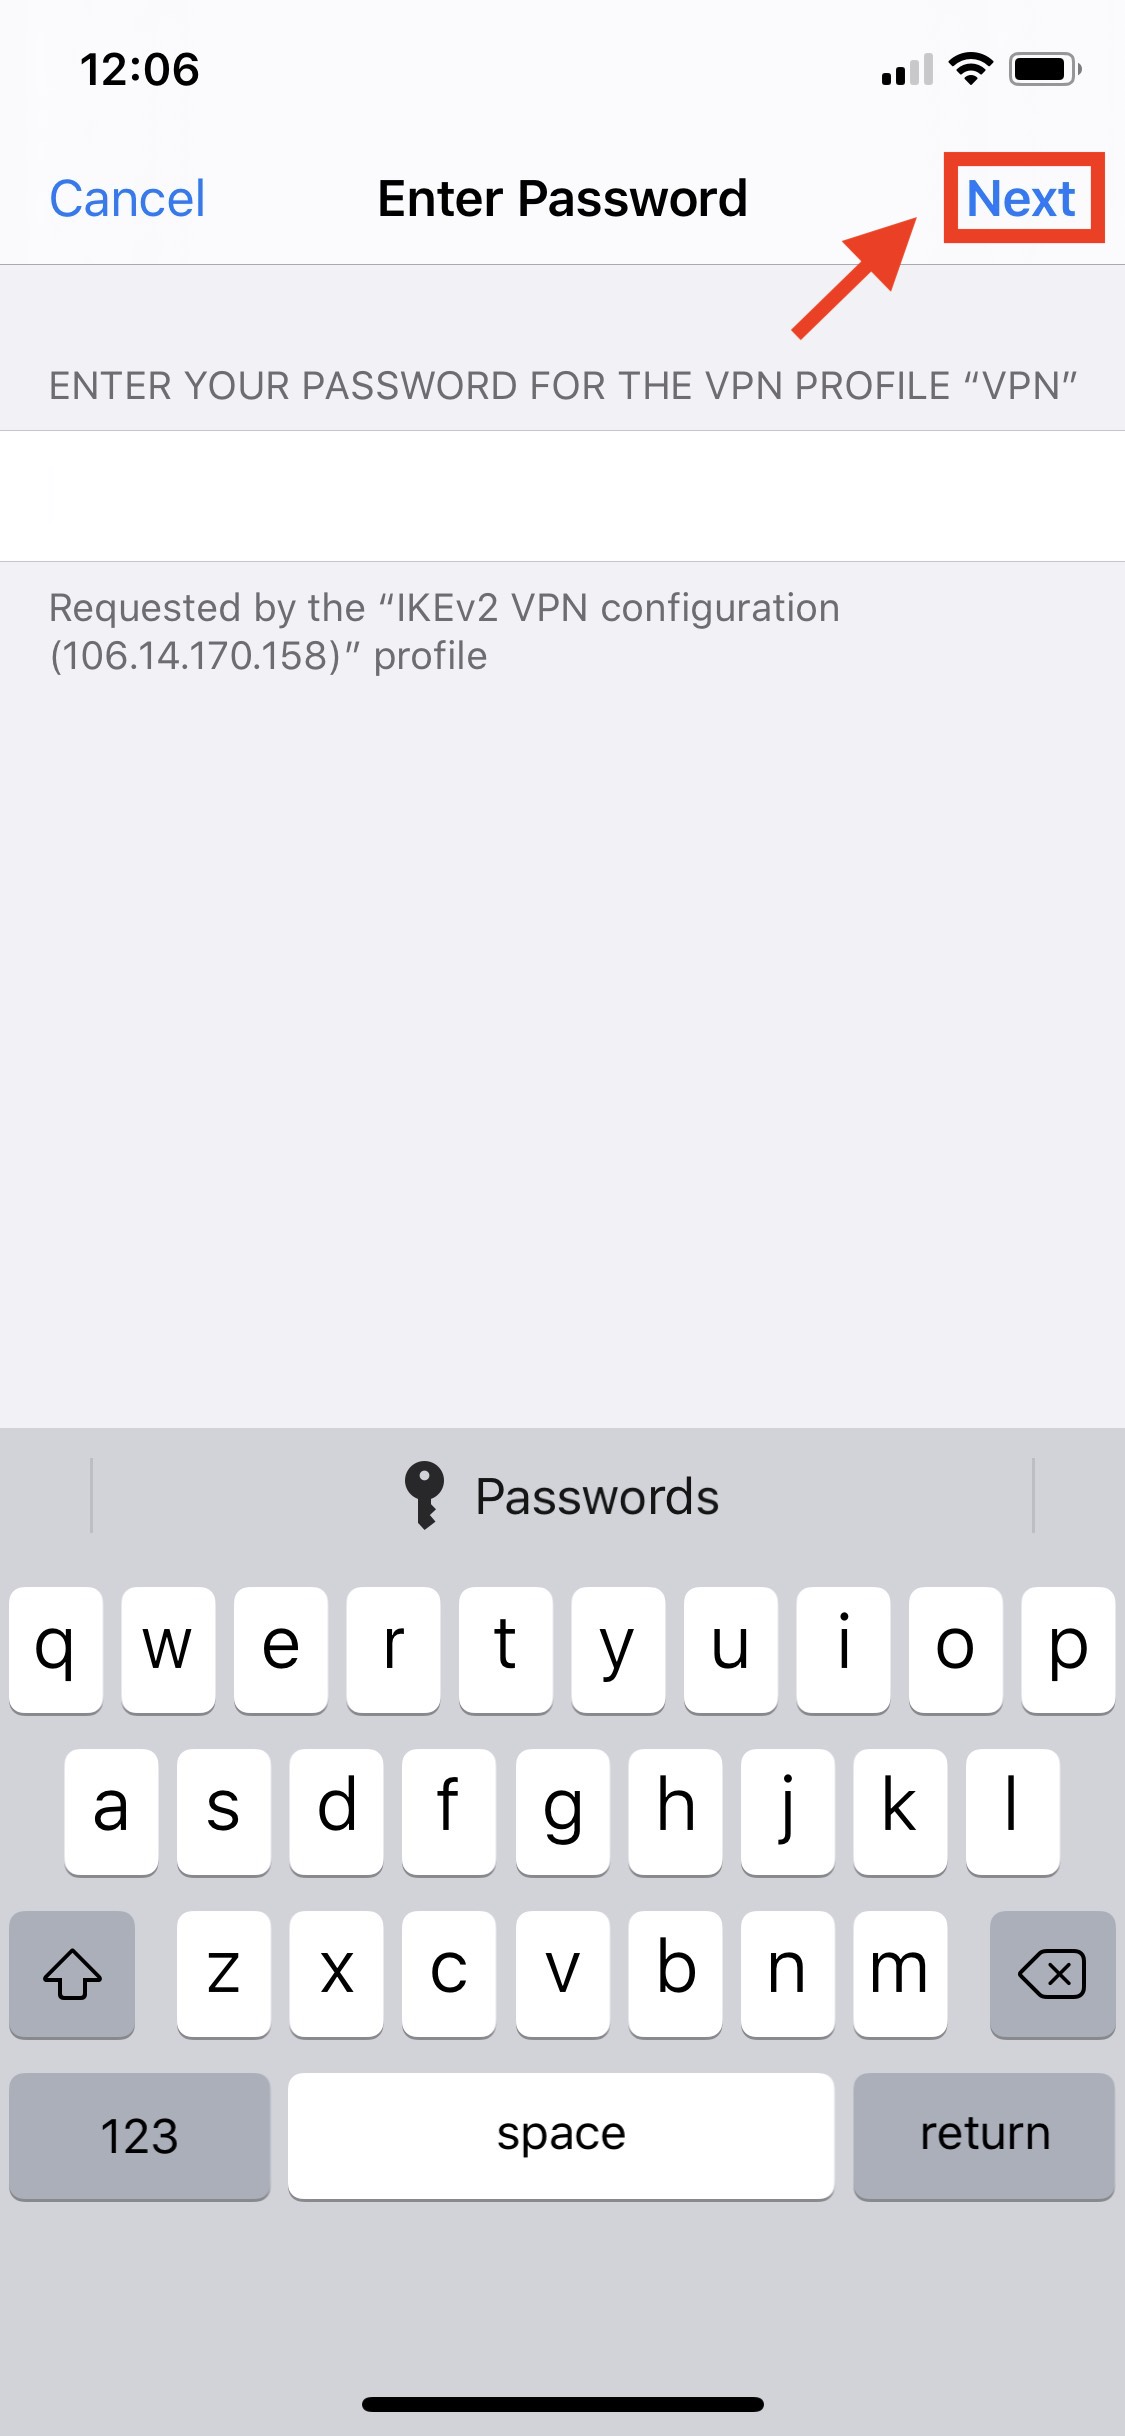
- Enter the password and click Next.
- The profile is now installed. Click Done.
How to connect
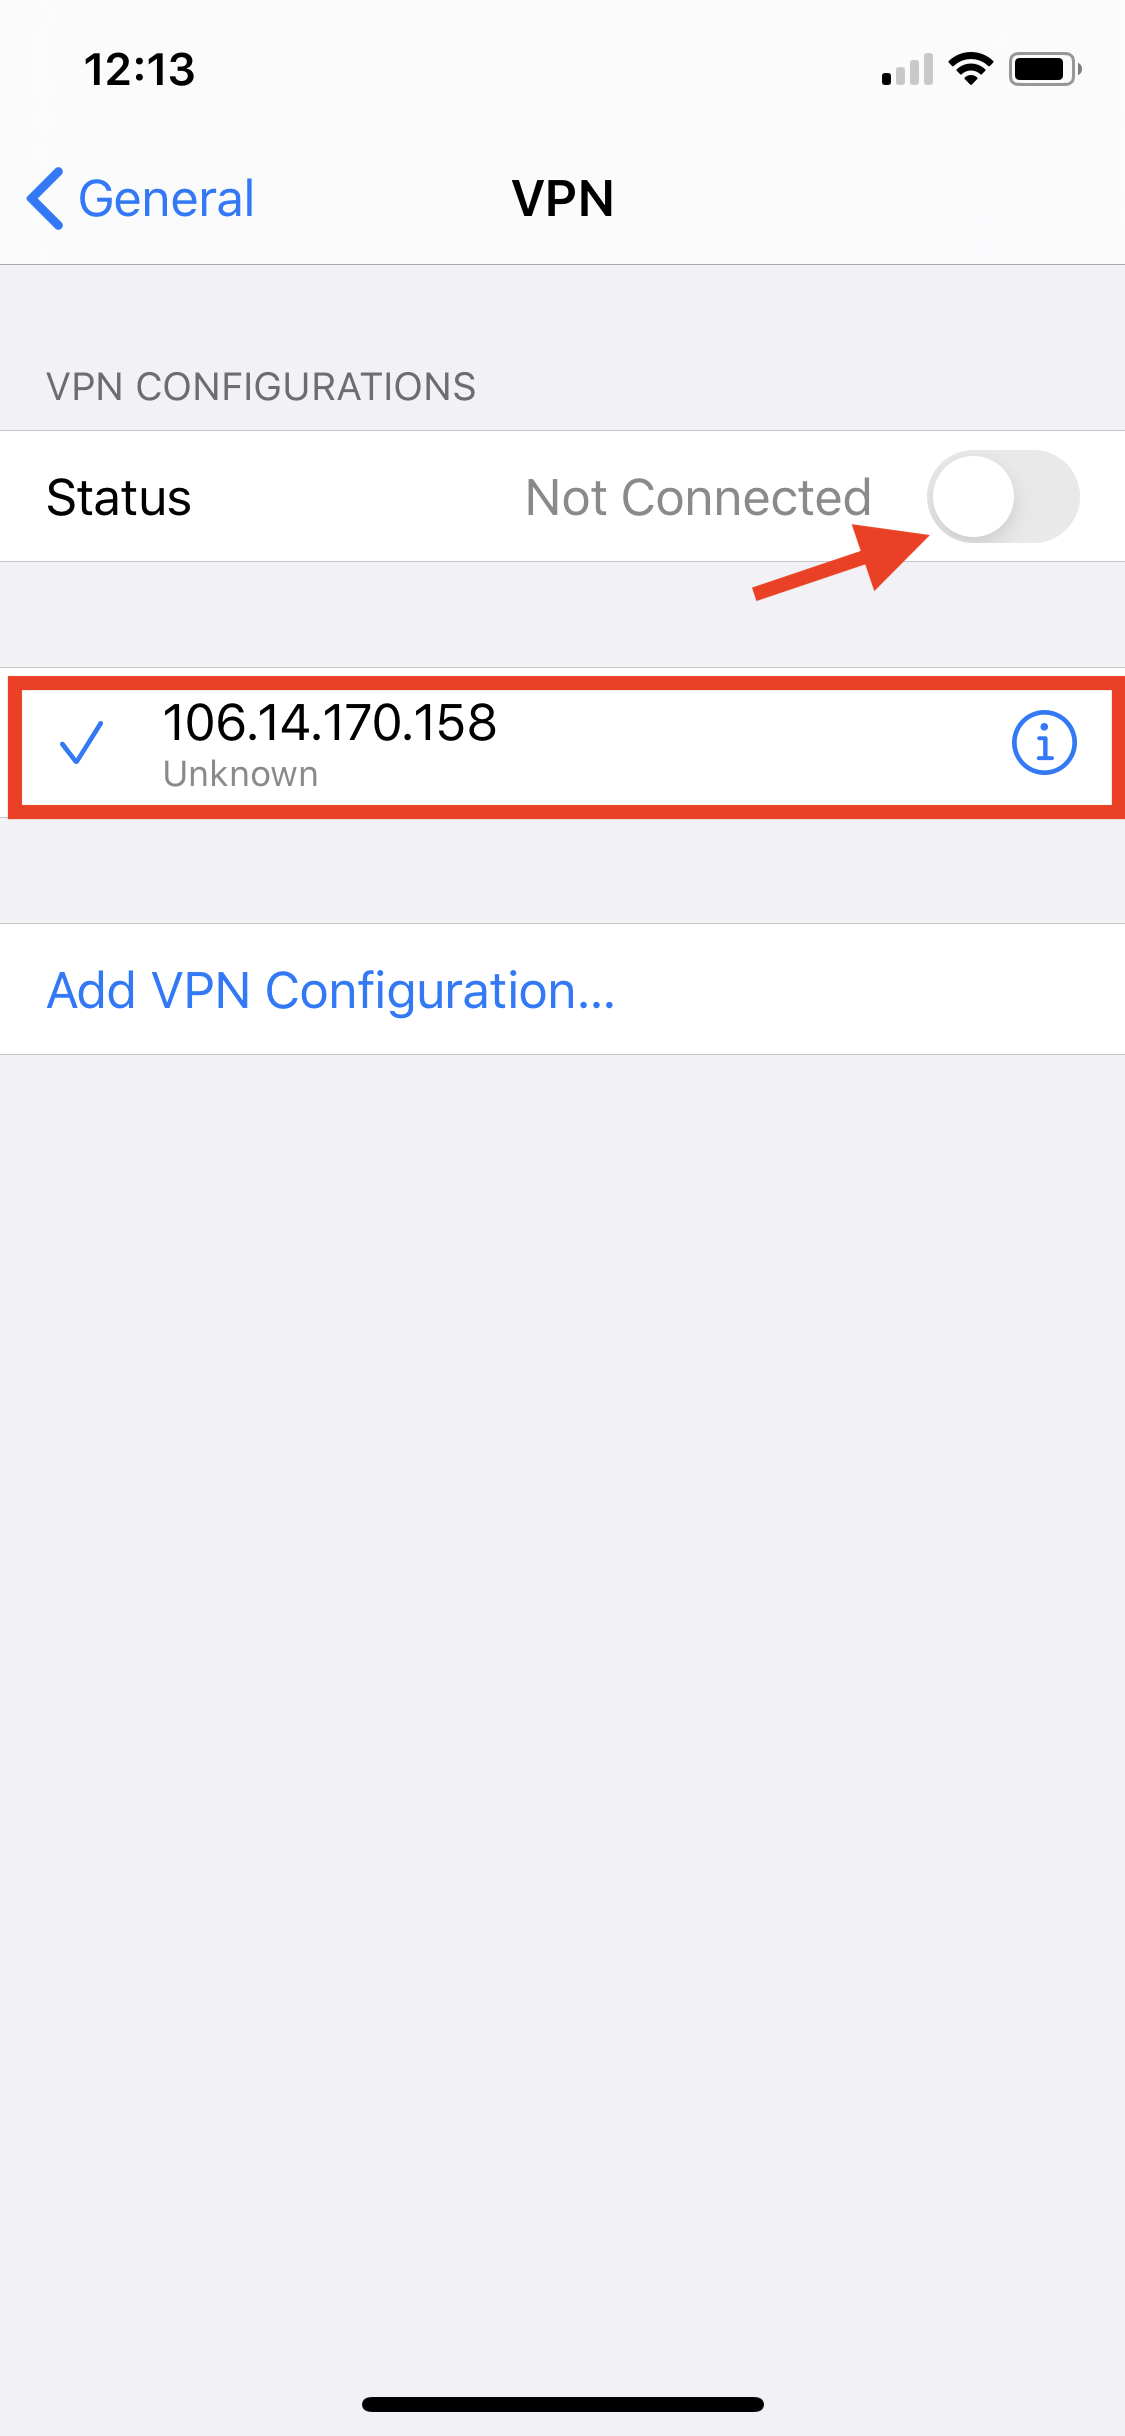
- Go to the Settings app > General > scroll down and click on VPN.
.jpeg?version=1&modificationDate=1589285769873&cacheVersion=1&api=v2&width=184&height=400)
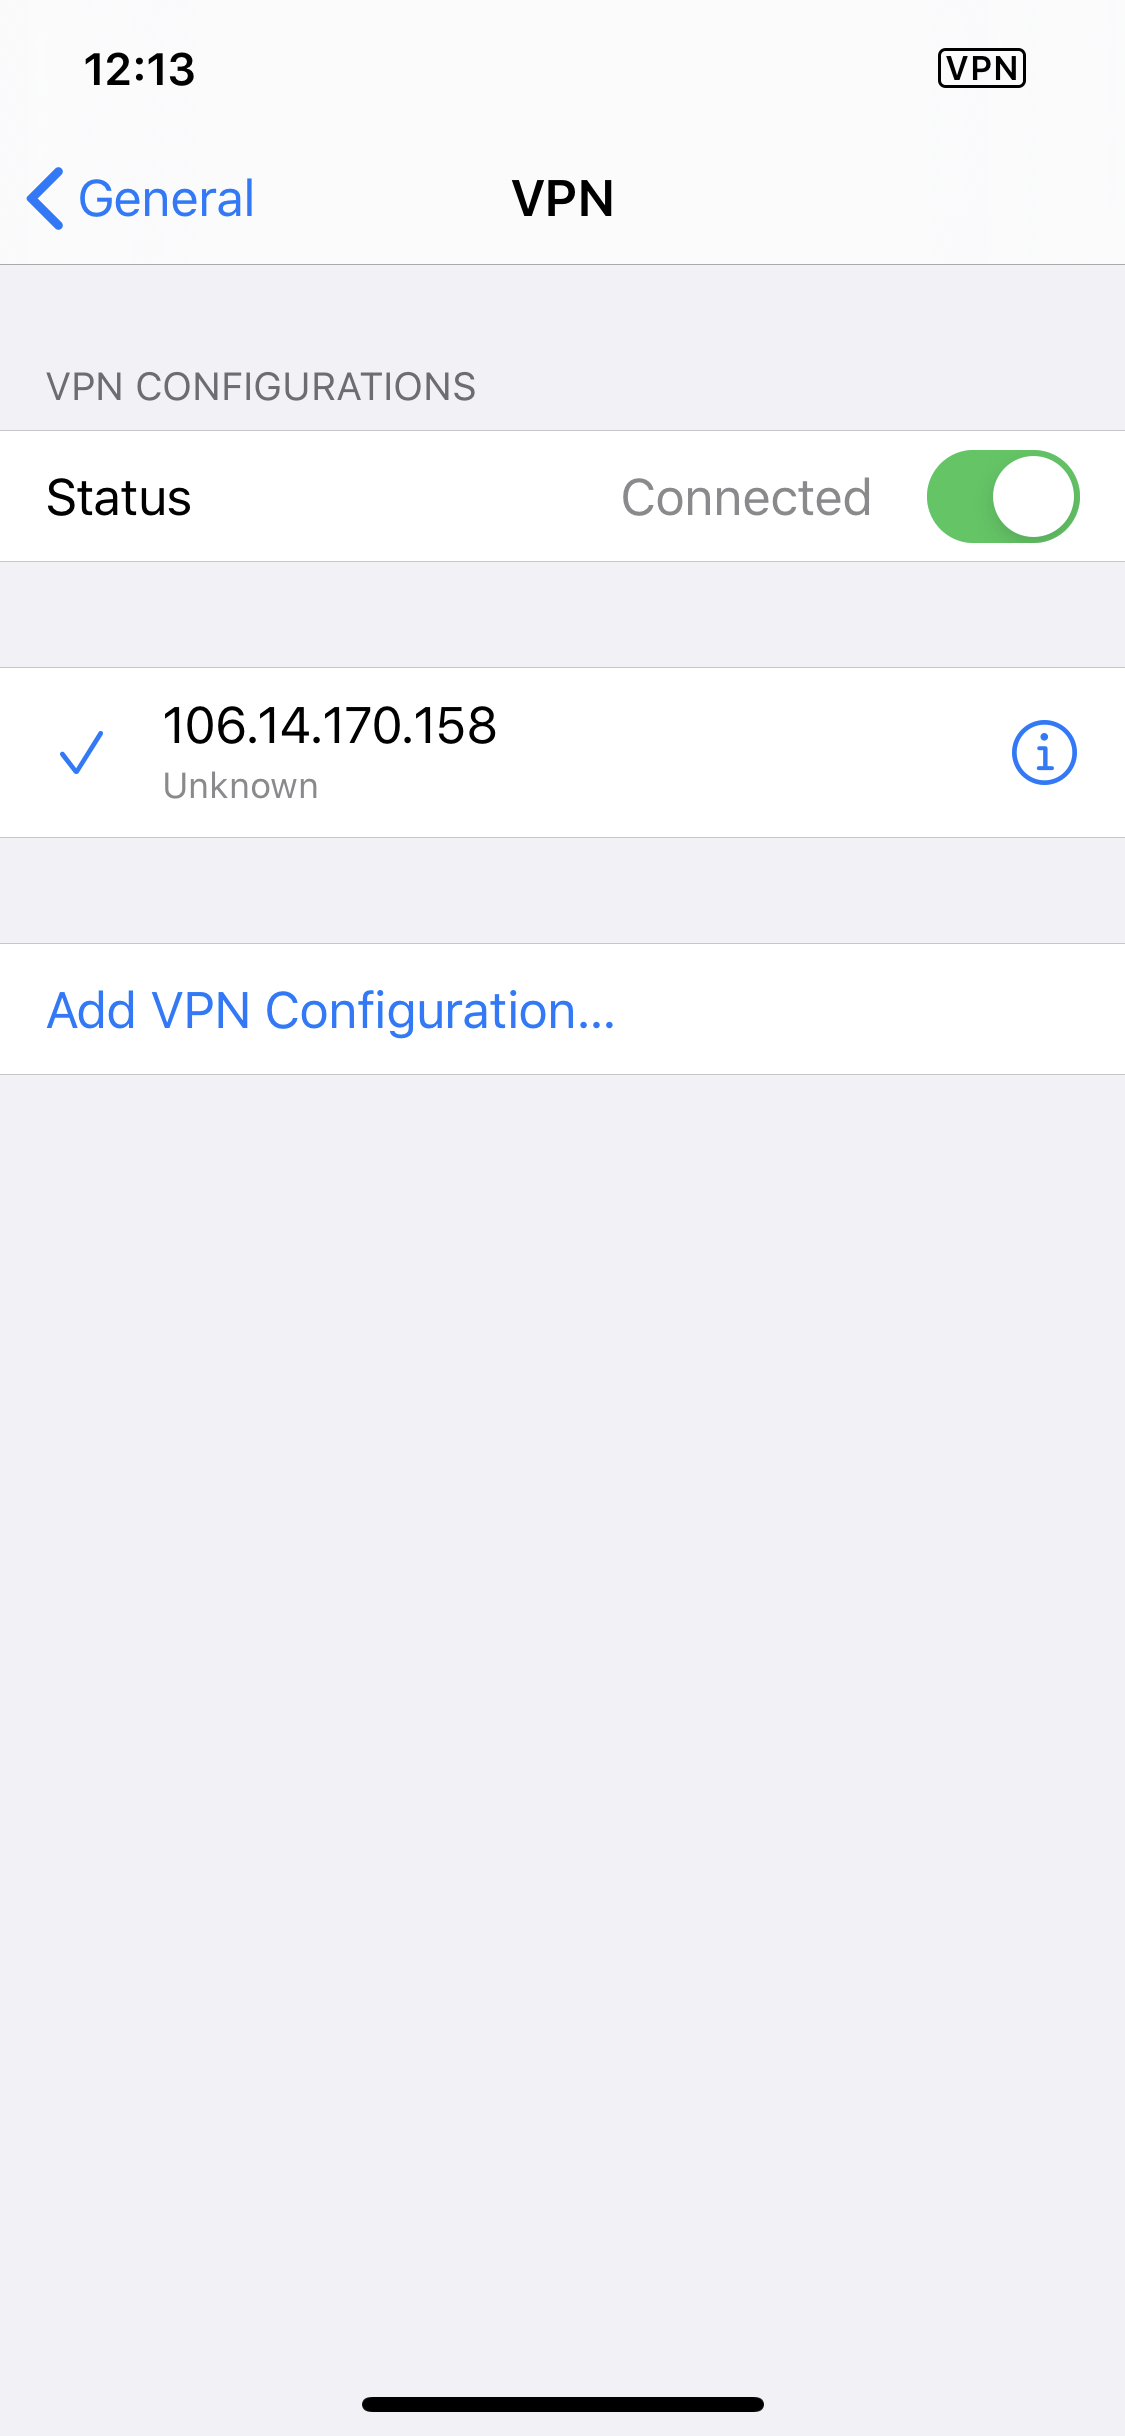
- Make sure '106.14.170.158' is selected from the VPN list and switch the Status toggle from Not Connected > Connected. You will now be connected to the VPN.
How to connect on Android
Installation
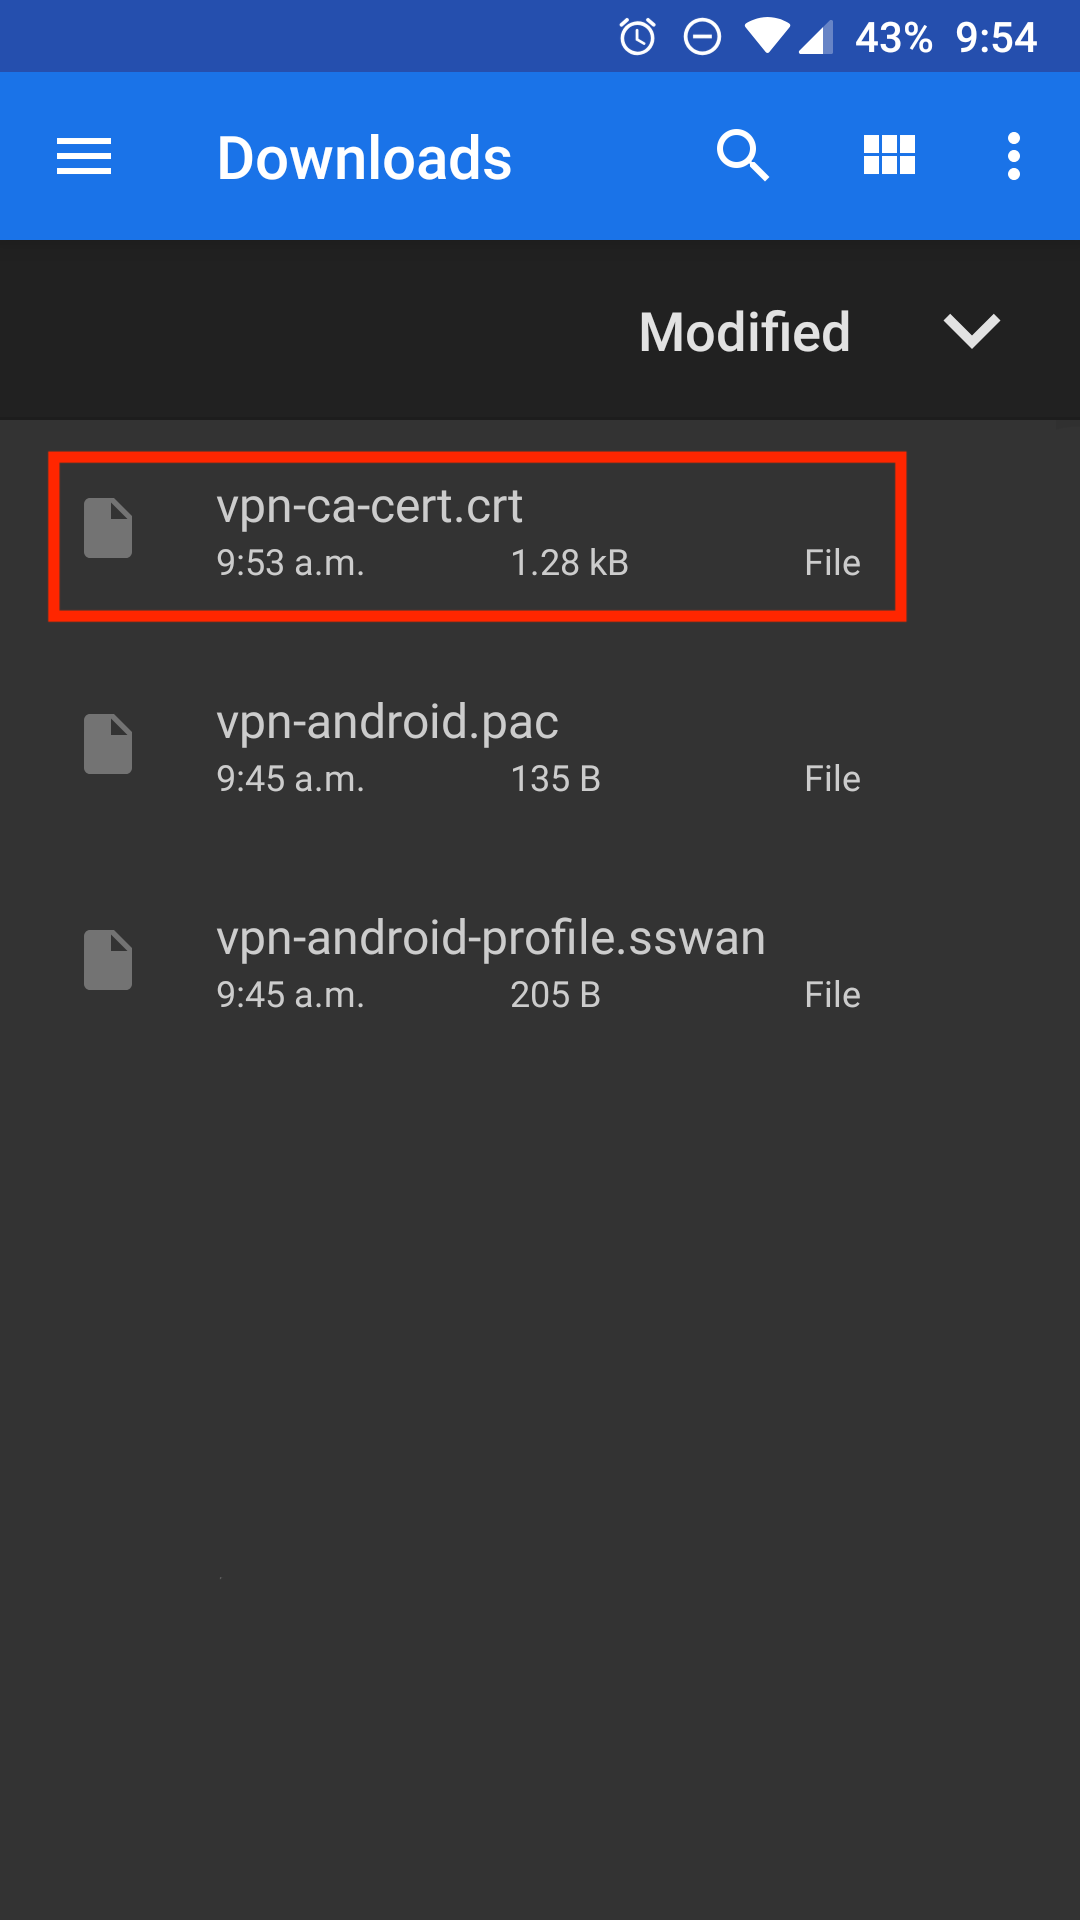
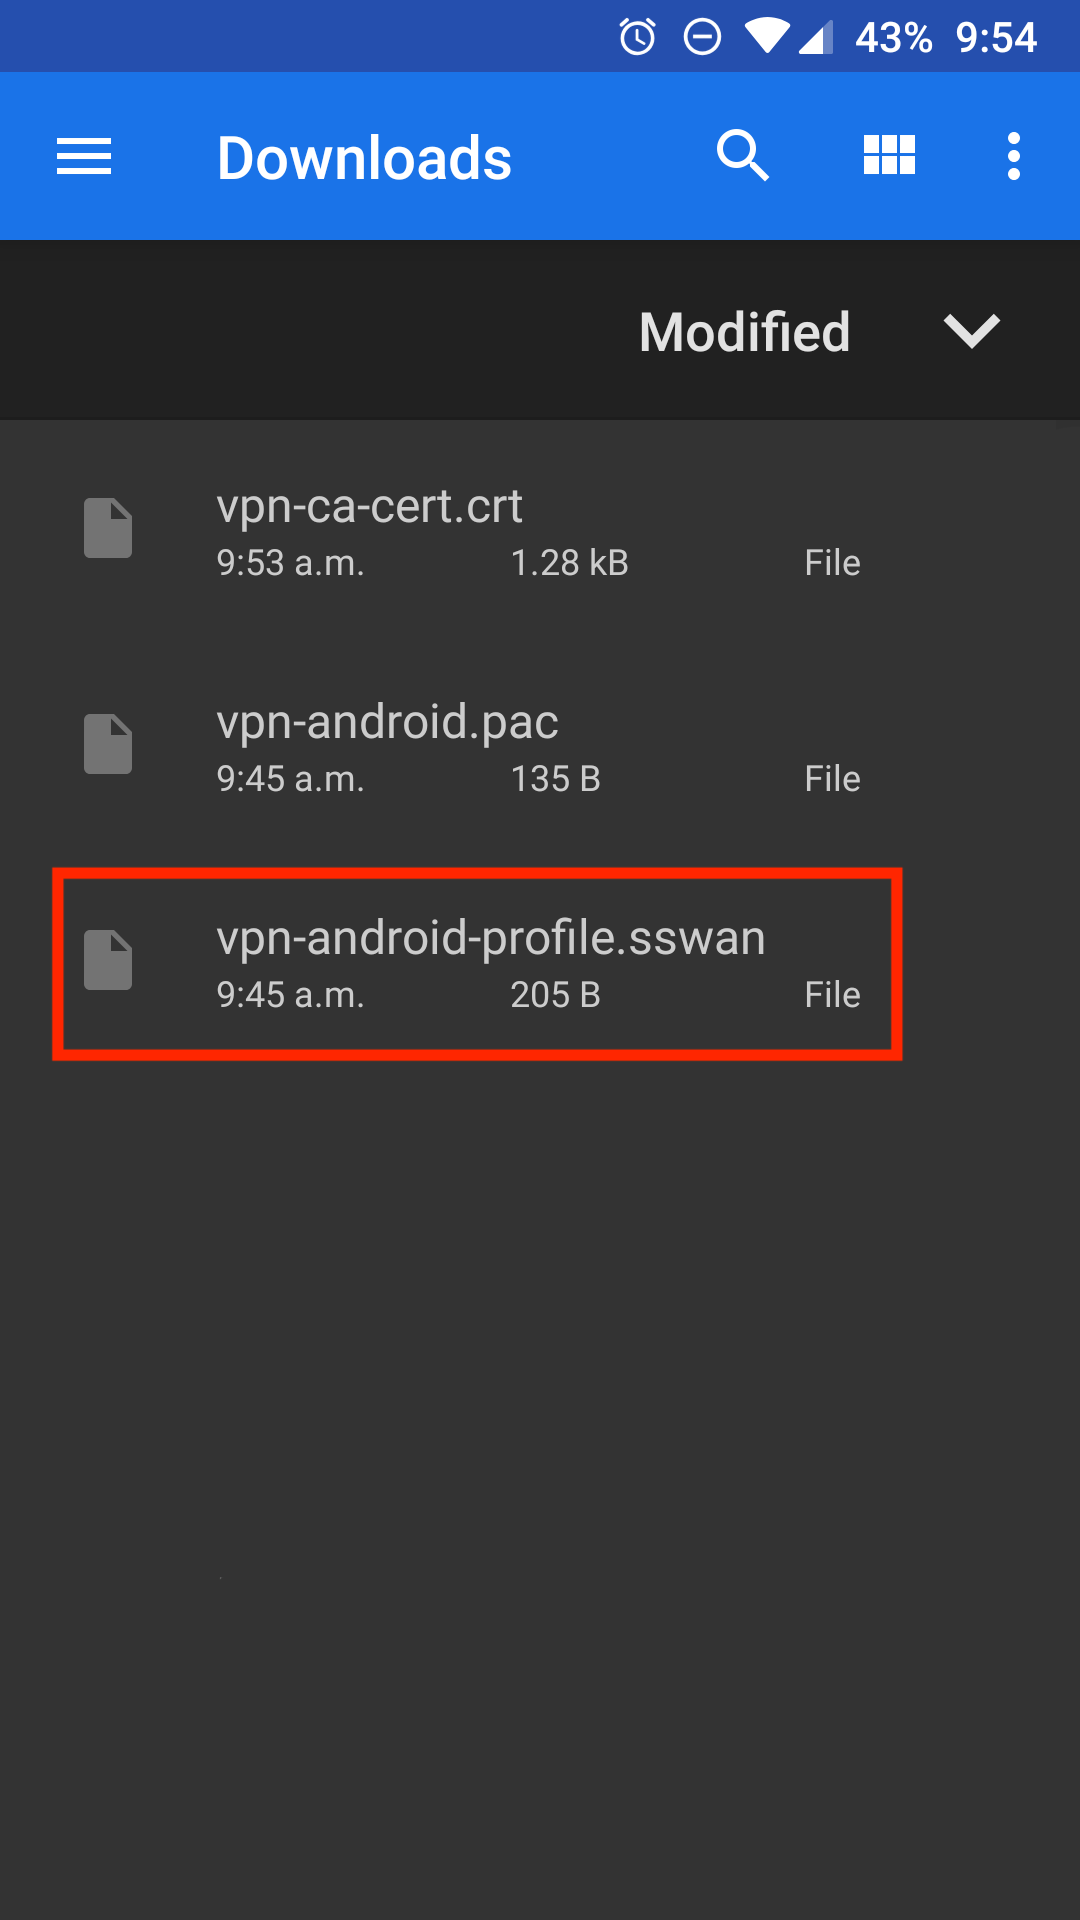
- Download the 'vpn-ca-cert.crt' and 'vpn-android-profile.sswan' files onto your device.
- Install the latest strongSwan VPN client app from the Google Play Store.
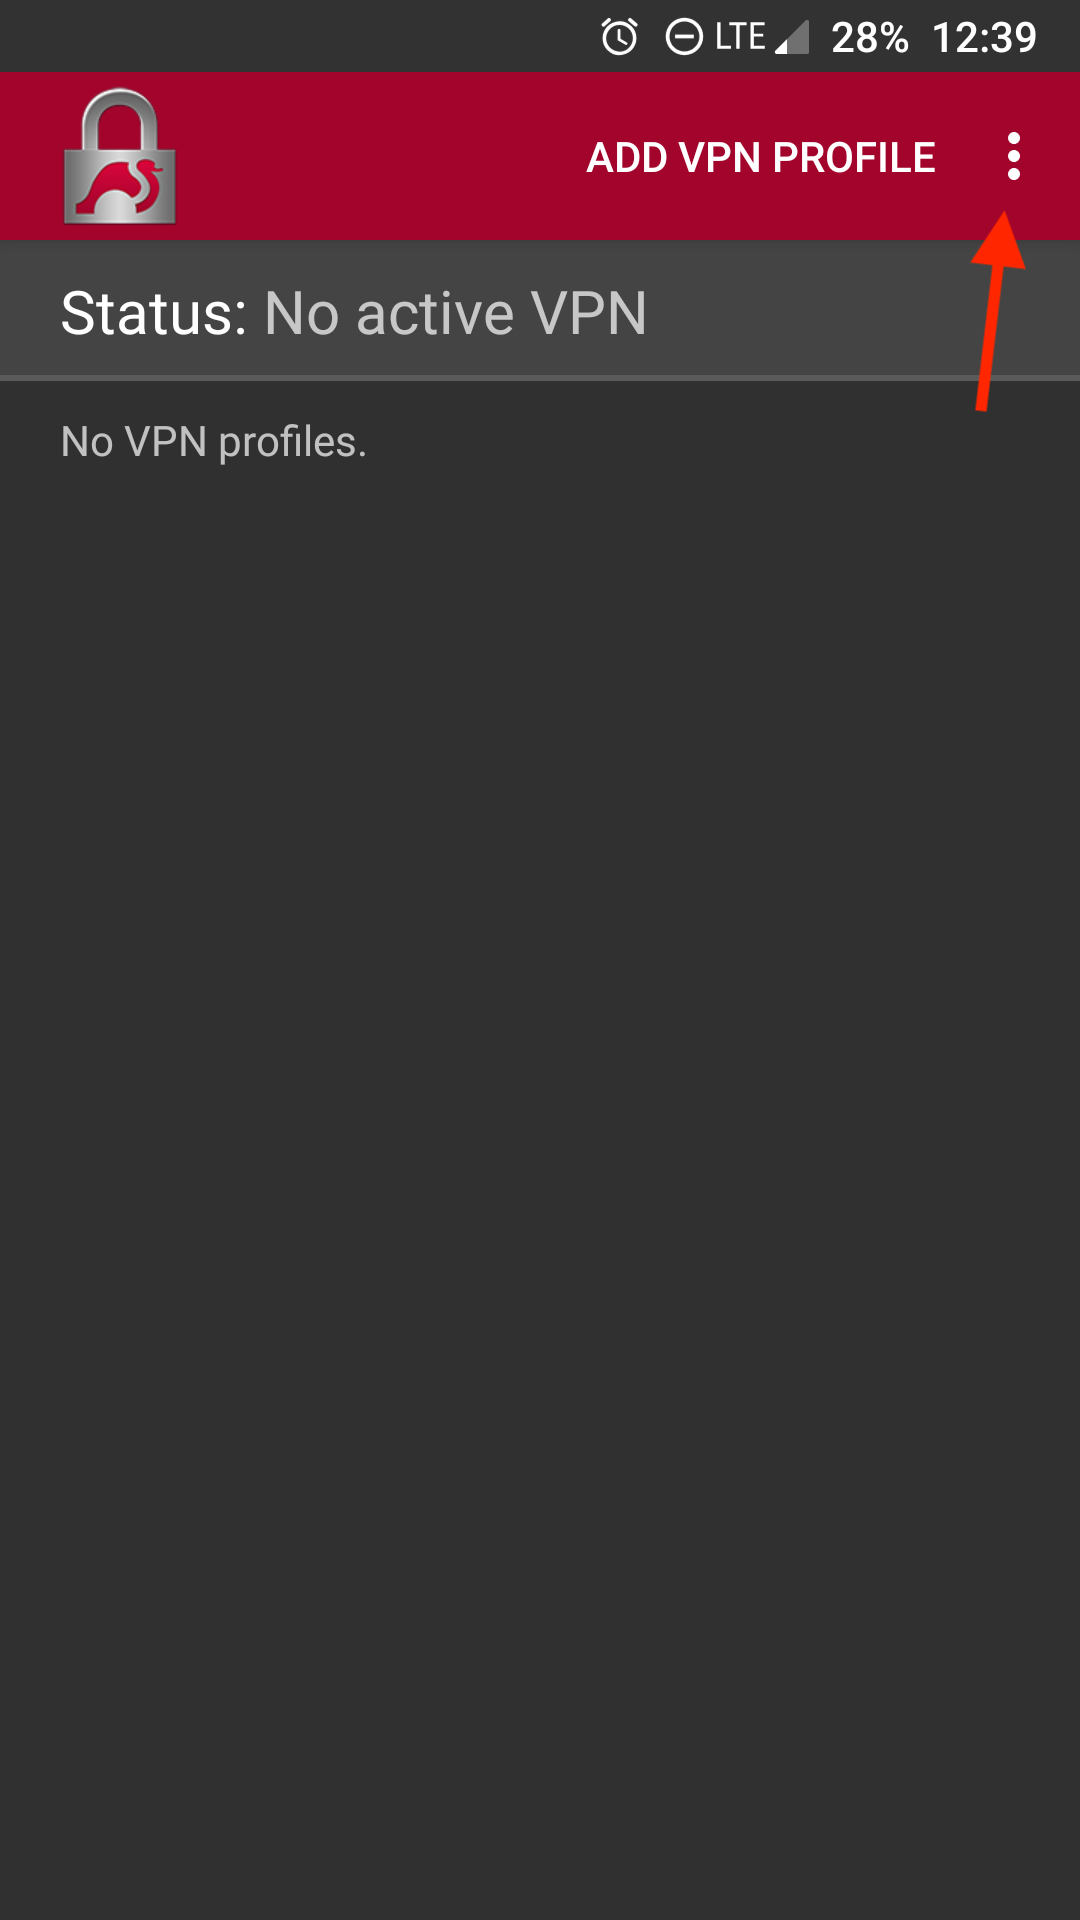
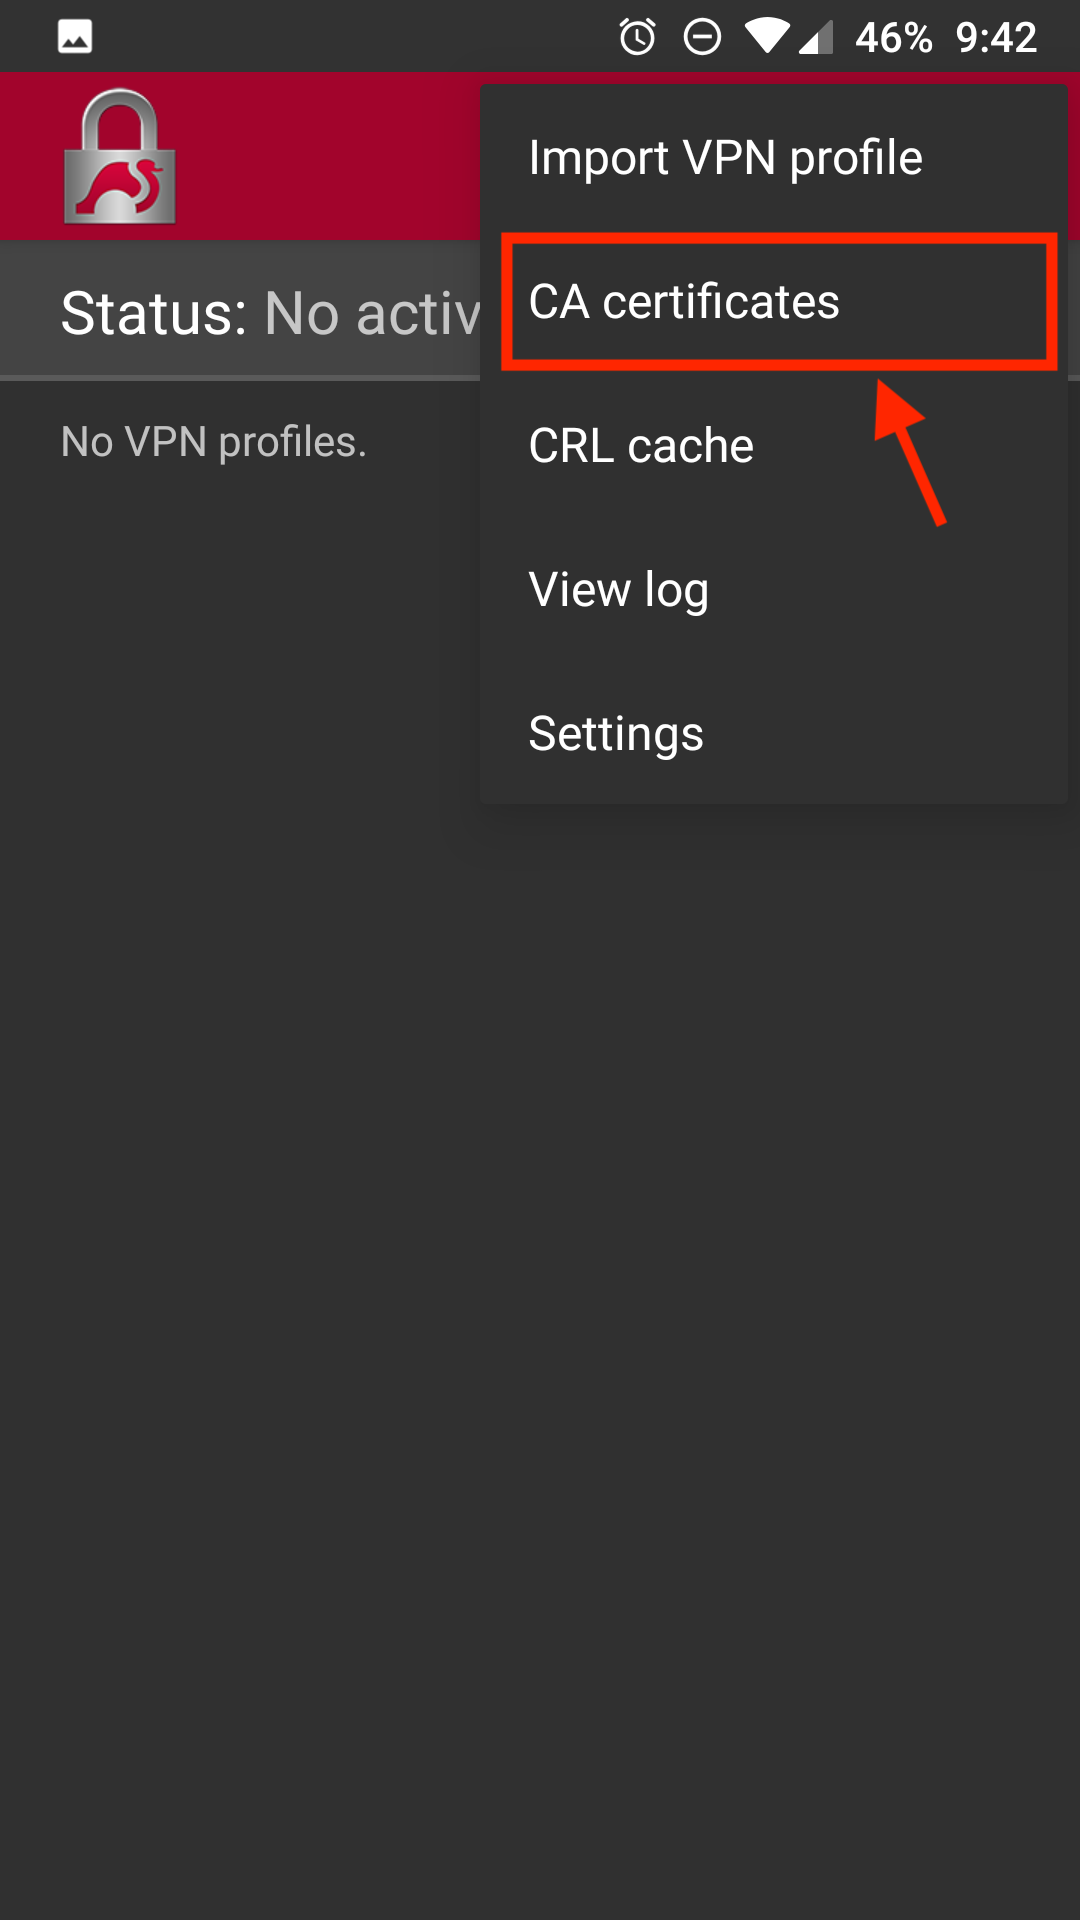
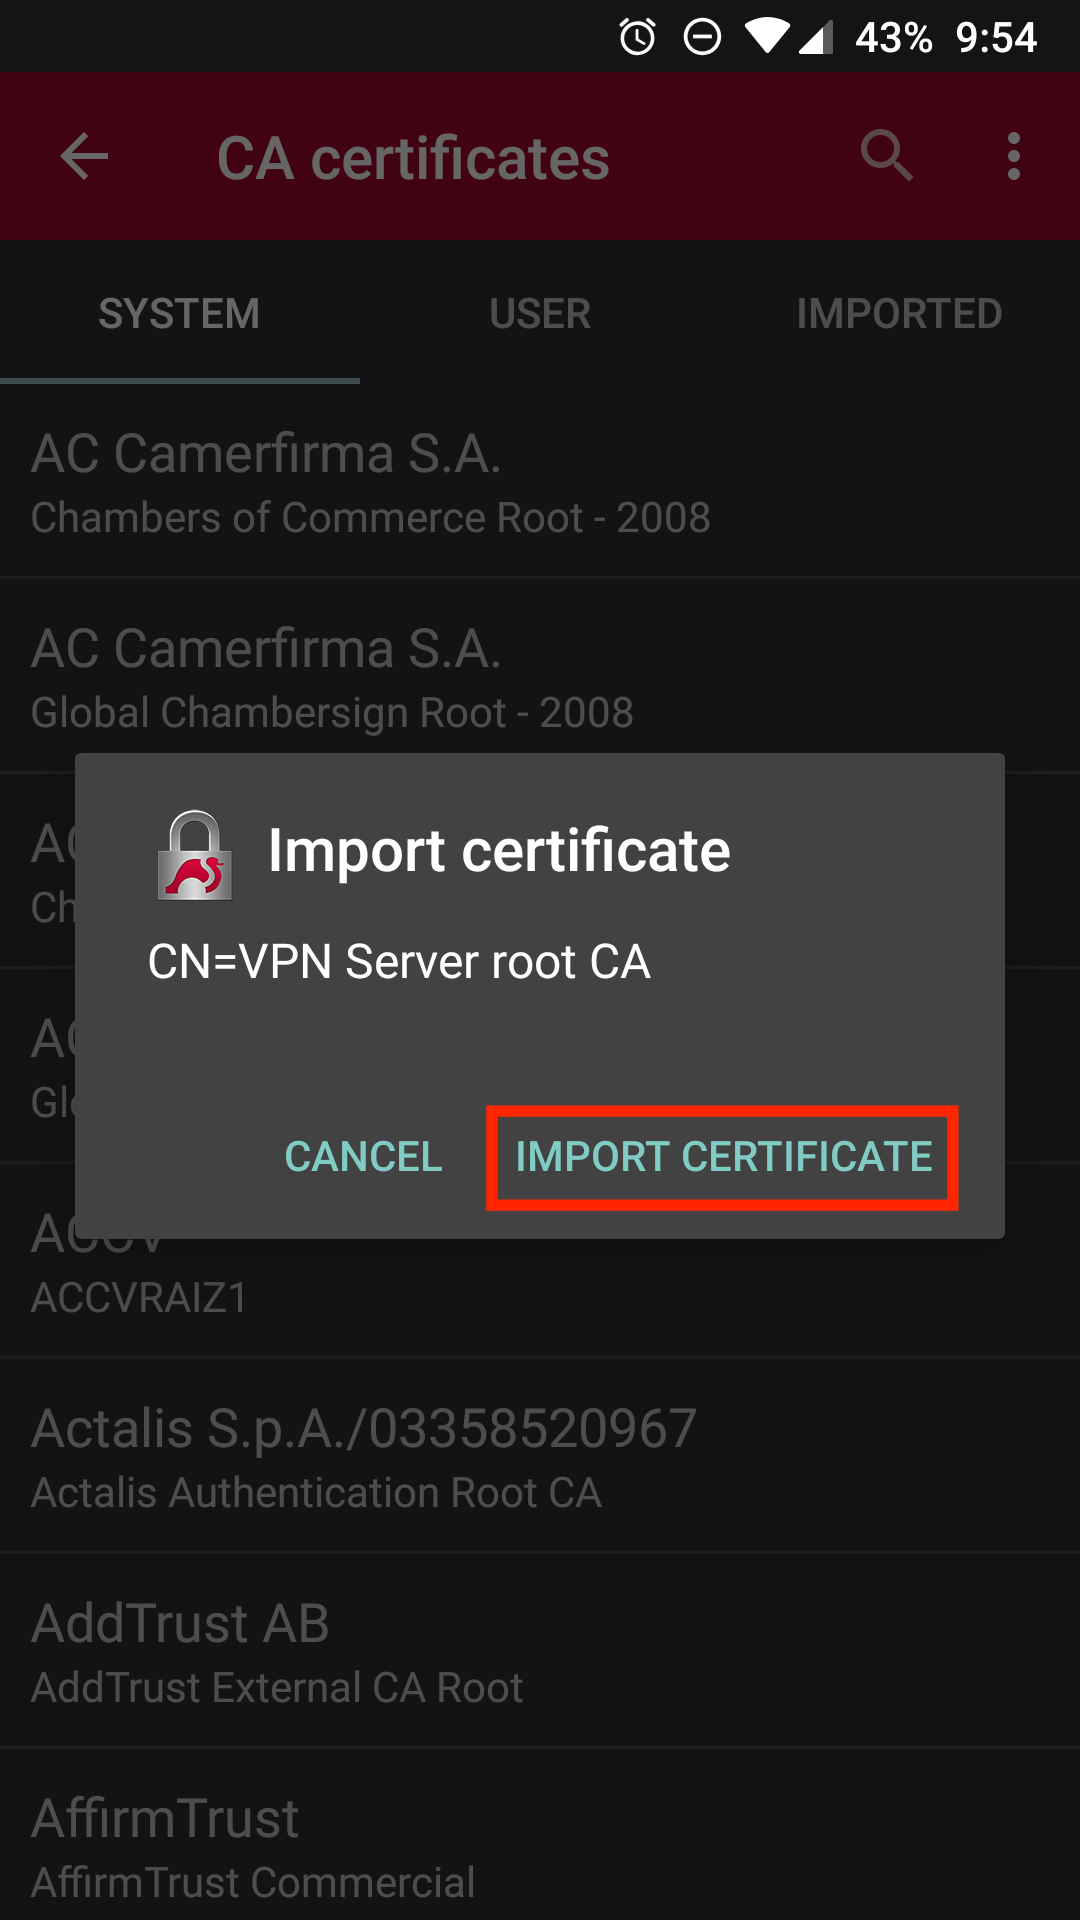
- Open the strongSwan app. Click on the ellipses > select CA Certificates.
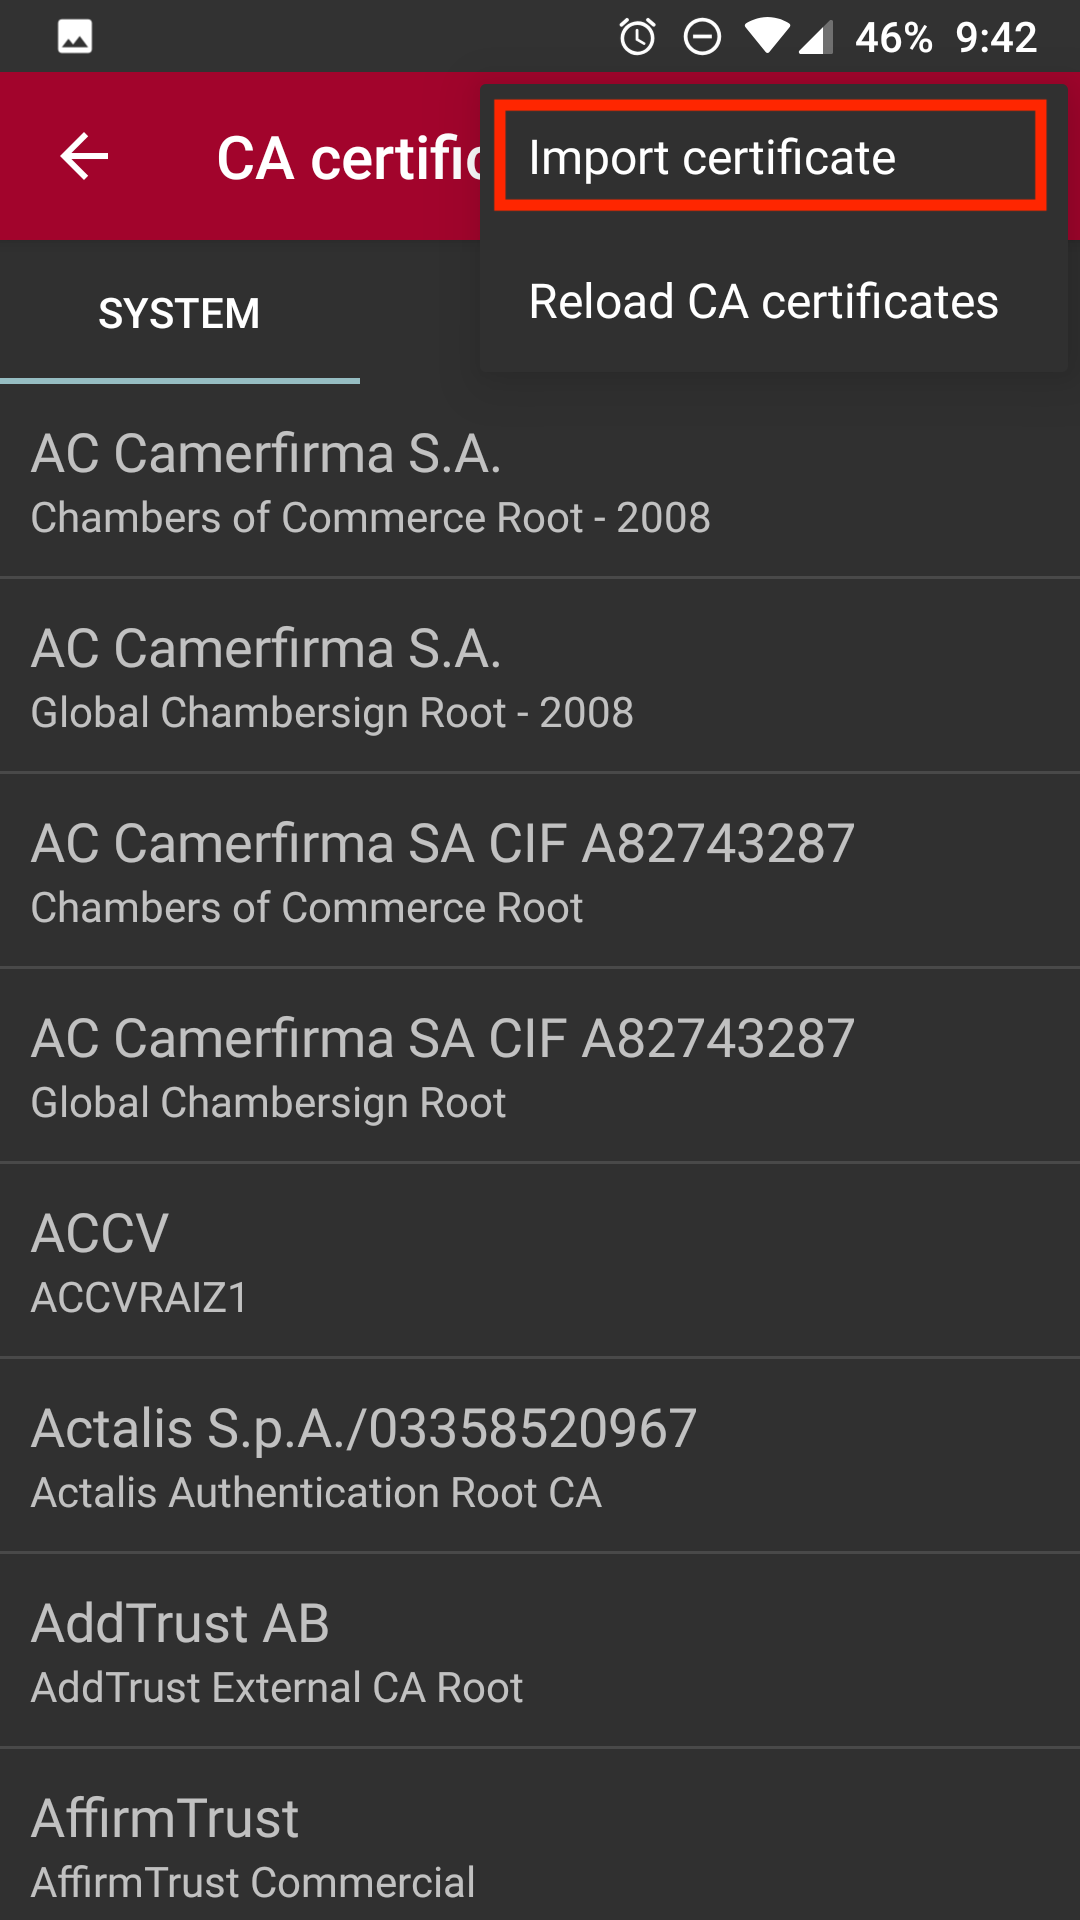
- Click on the ellipses again > select Import certificate.
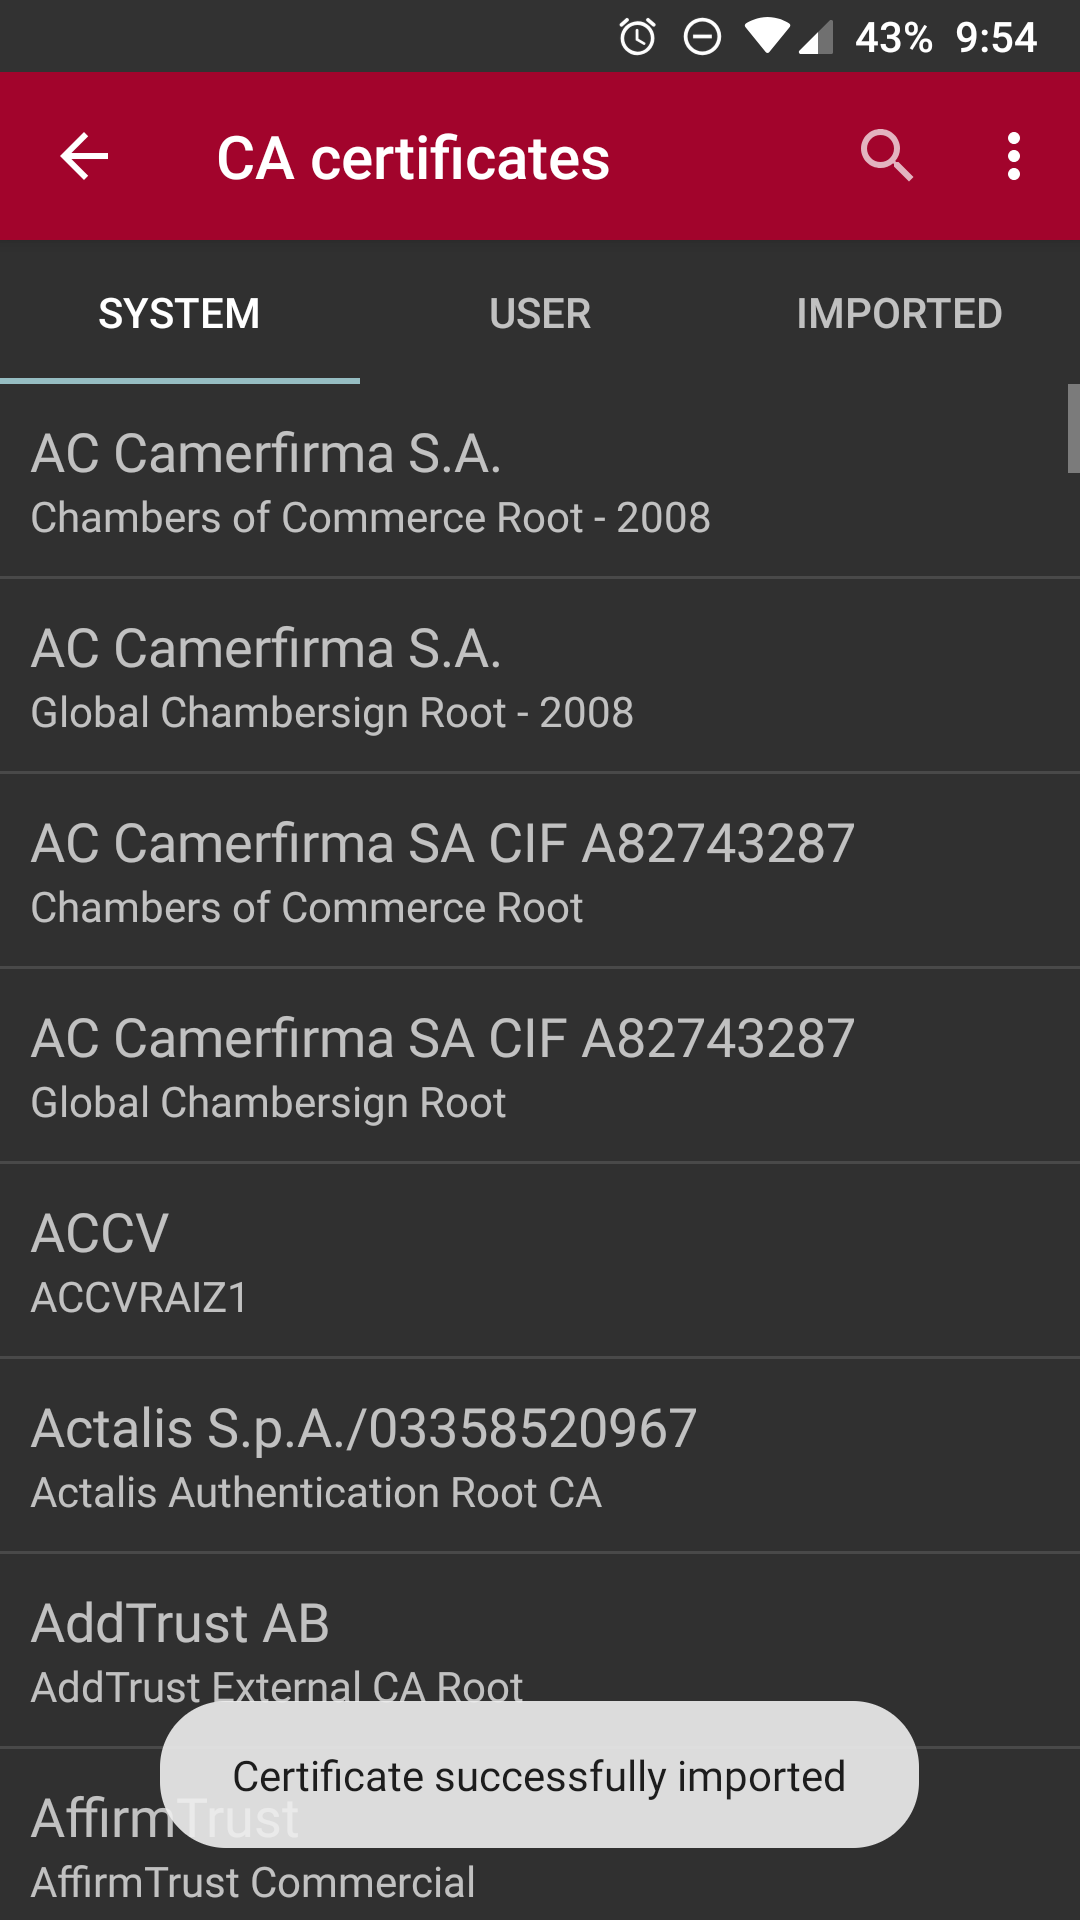
- Locate and select 'vpn-ca-cert.crt' from the File Browser. Select Import Certificate.
- In the strongSwan app homepage, click on the ellipses > Import VPN profile.
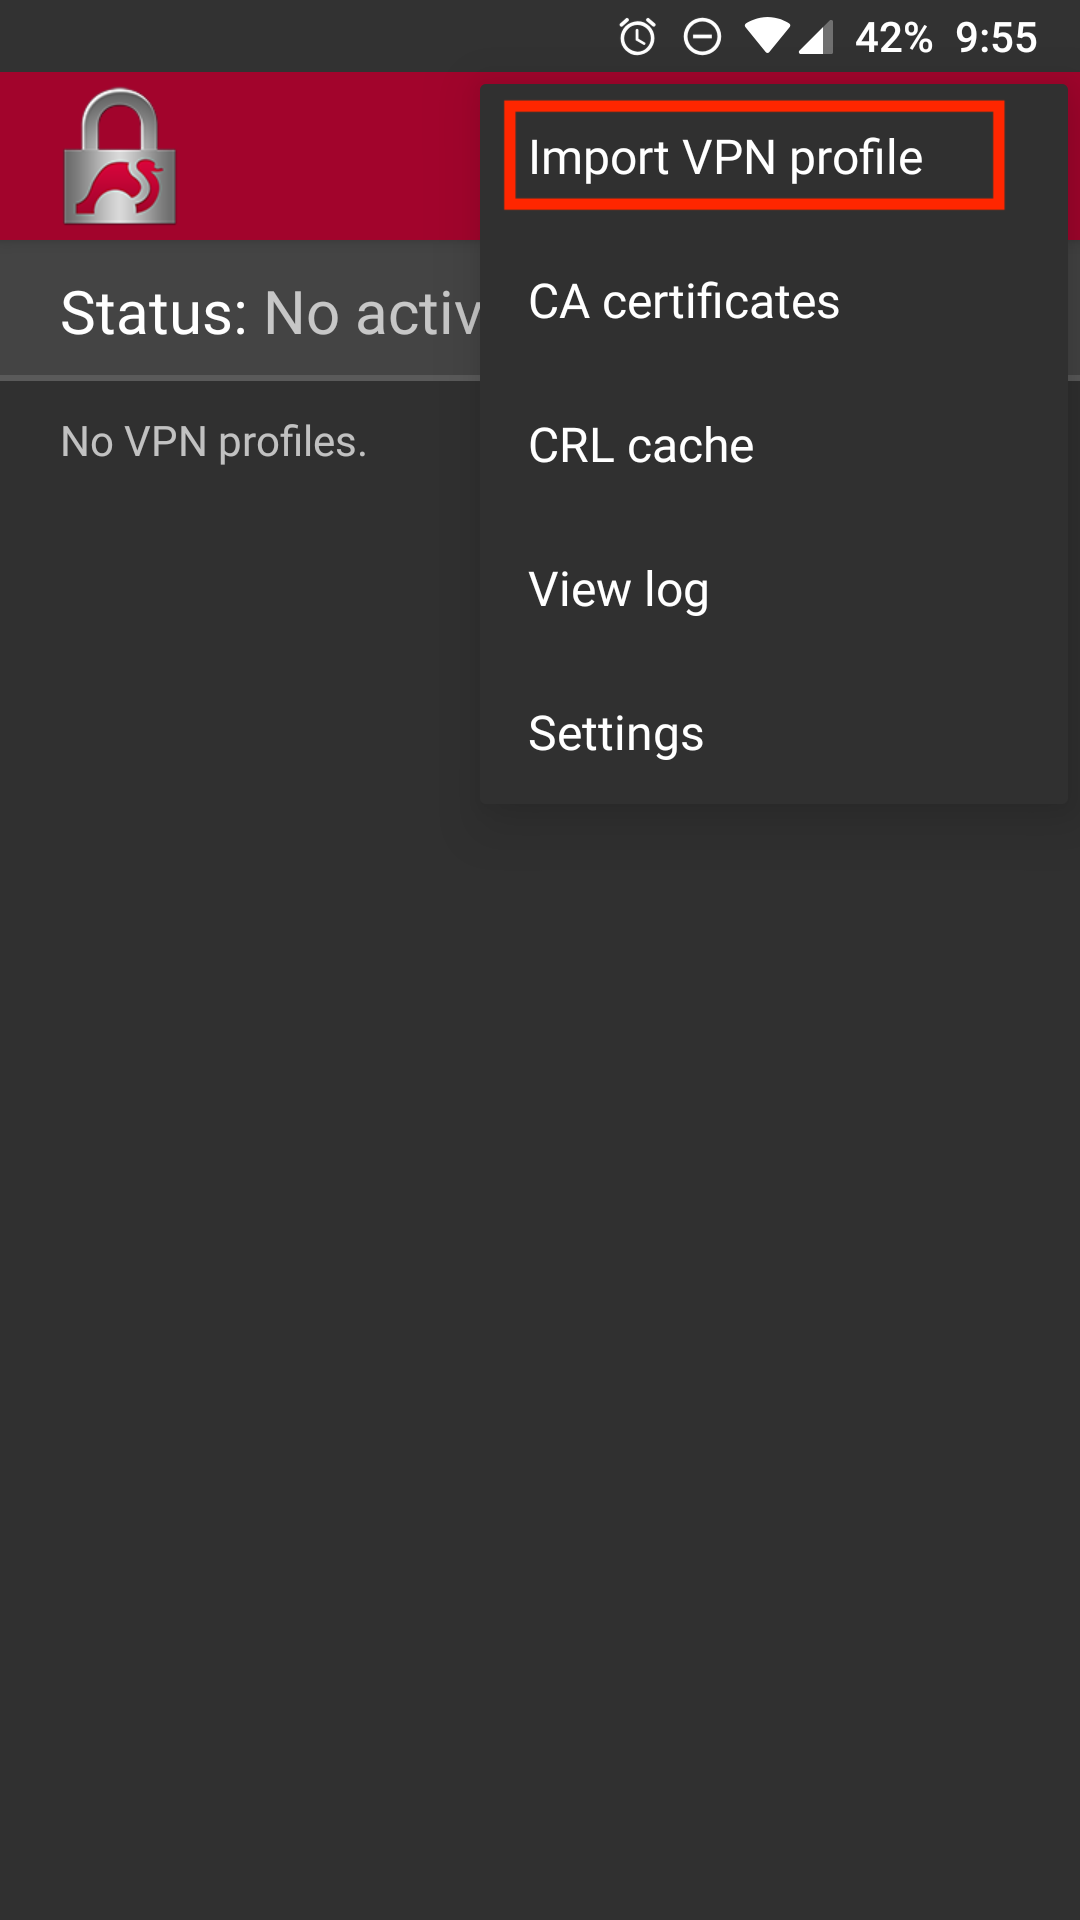
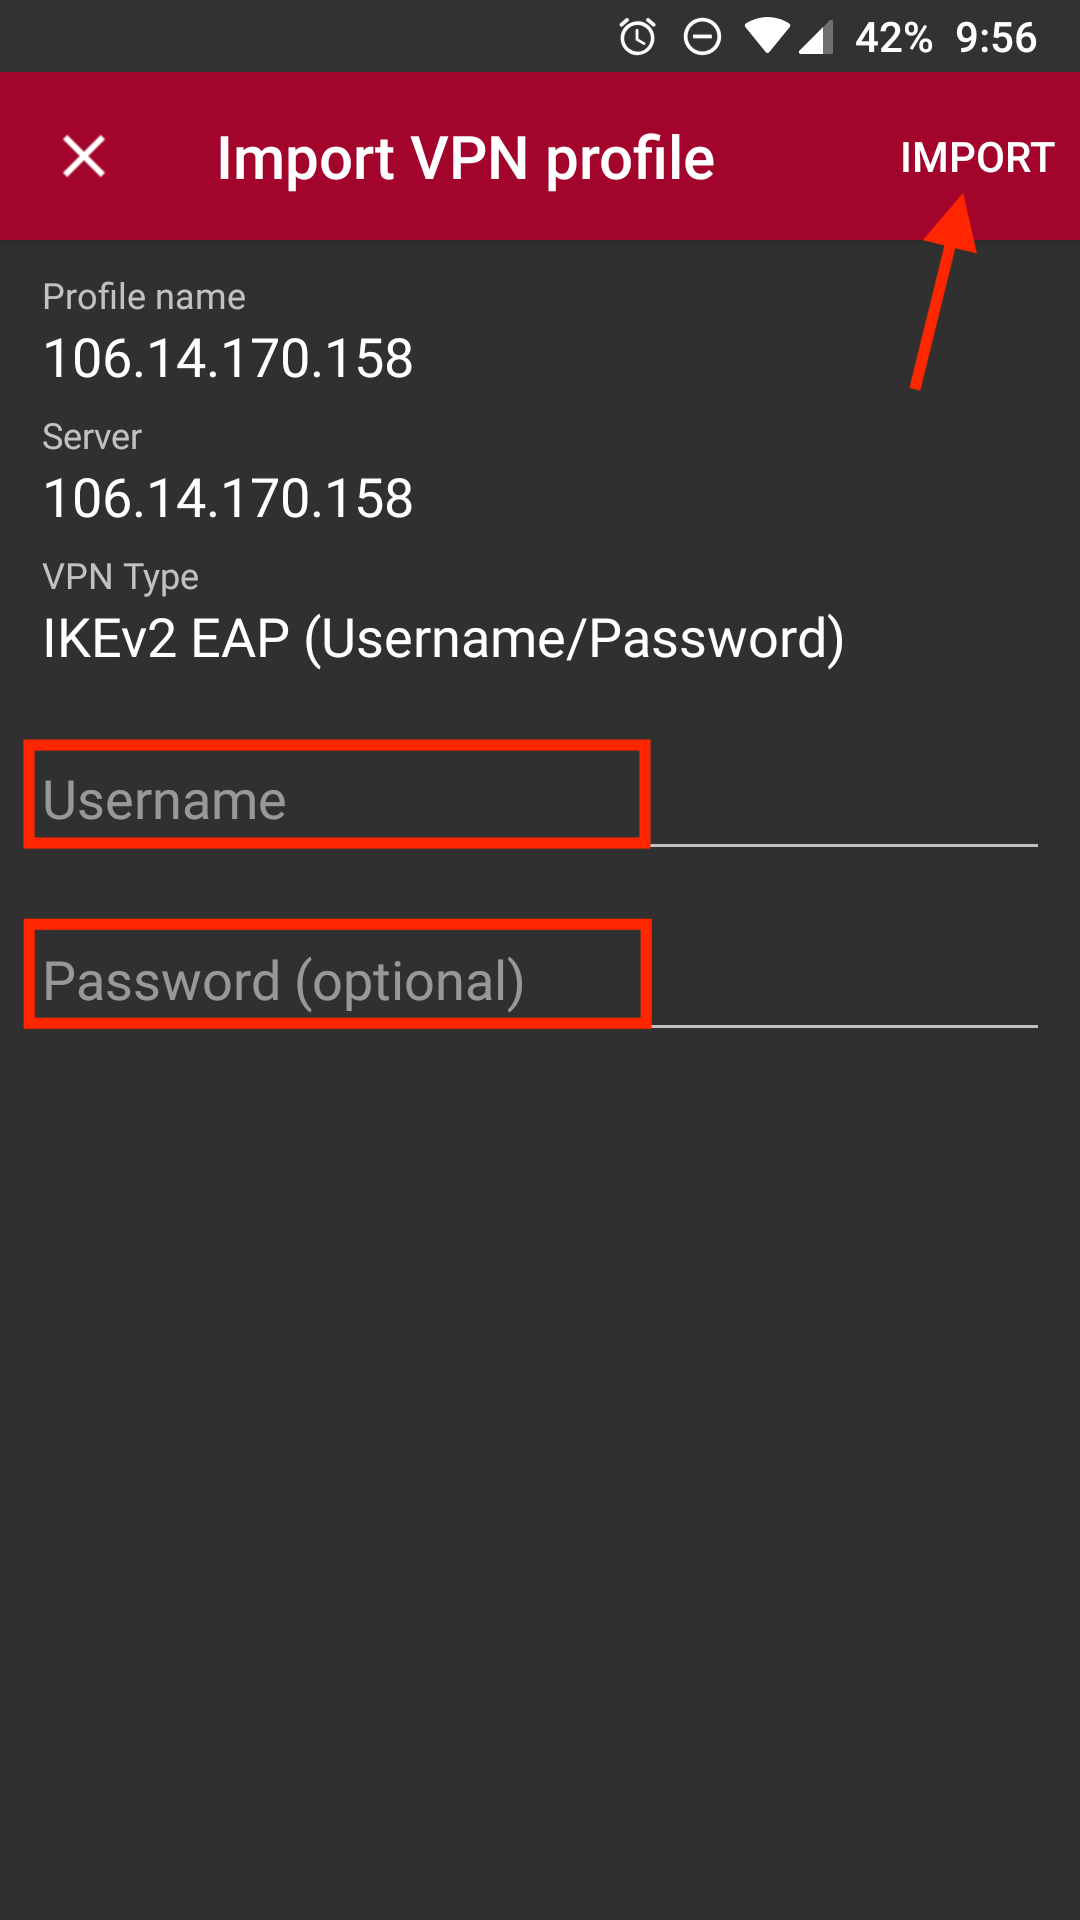
- Locate and select 'vpn-android-profile.sswan'. Enter the username and password. Click Import.
- Go to the Settings app > Network & Internet > Wi-Fi > select the gear icon beside your connected Wi-Fi network > click the pencil icon on the top-right.
- In the pop-up window, scroll down to Proxy. From the drop-down menu, select Proxy Auto-Config.
- In the PAC URL field, enter 'https://pac-bucket.oss-cn-shanghai.aliyuncs.com/vpn-android.pac'. Click Save.
How to connect
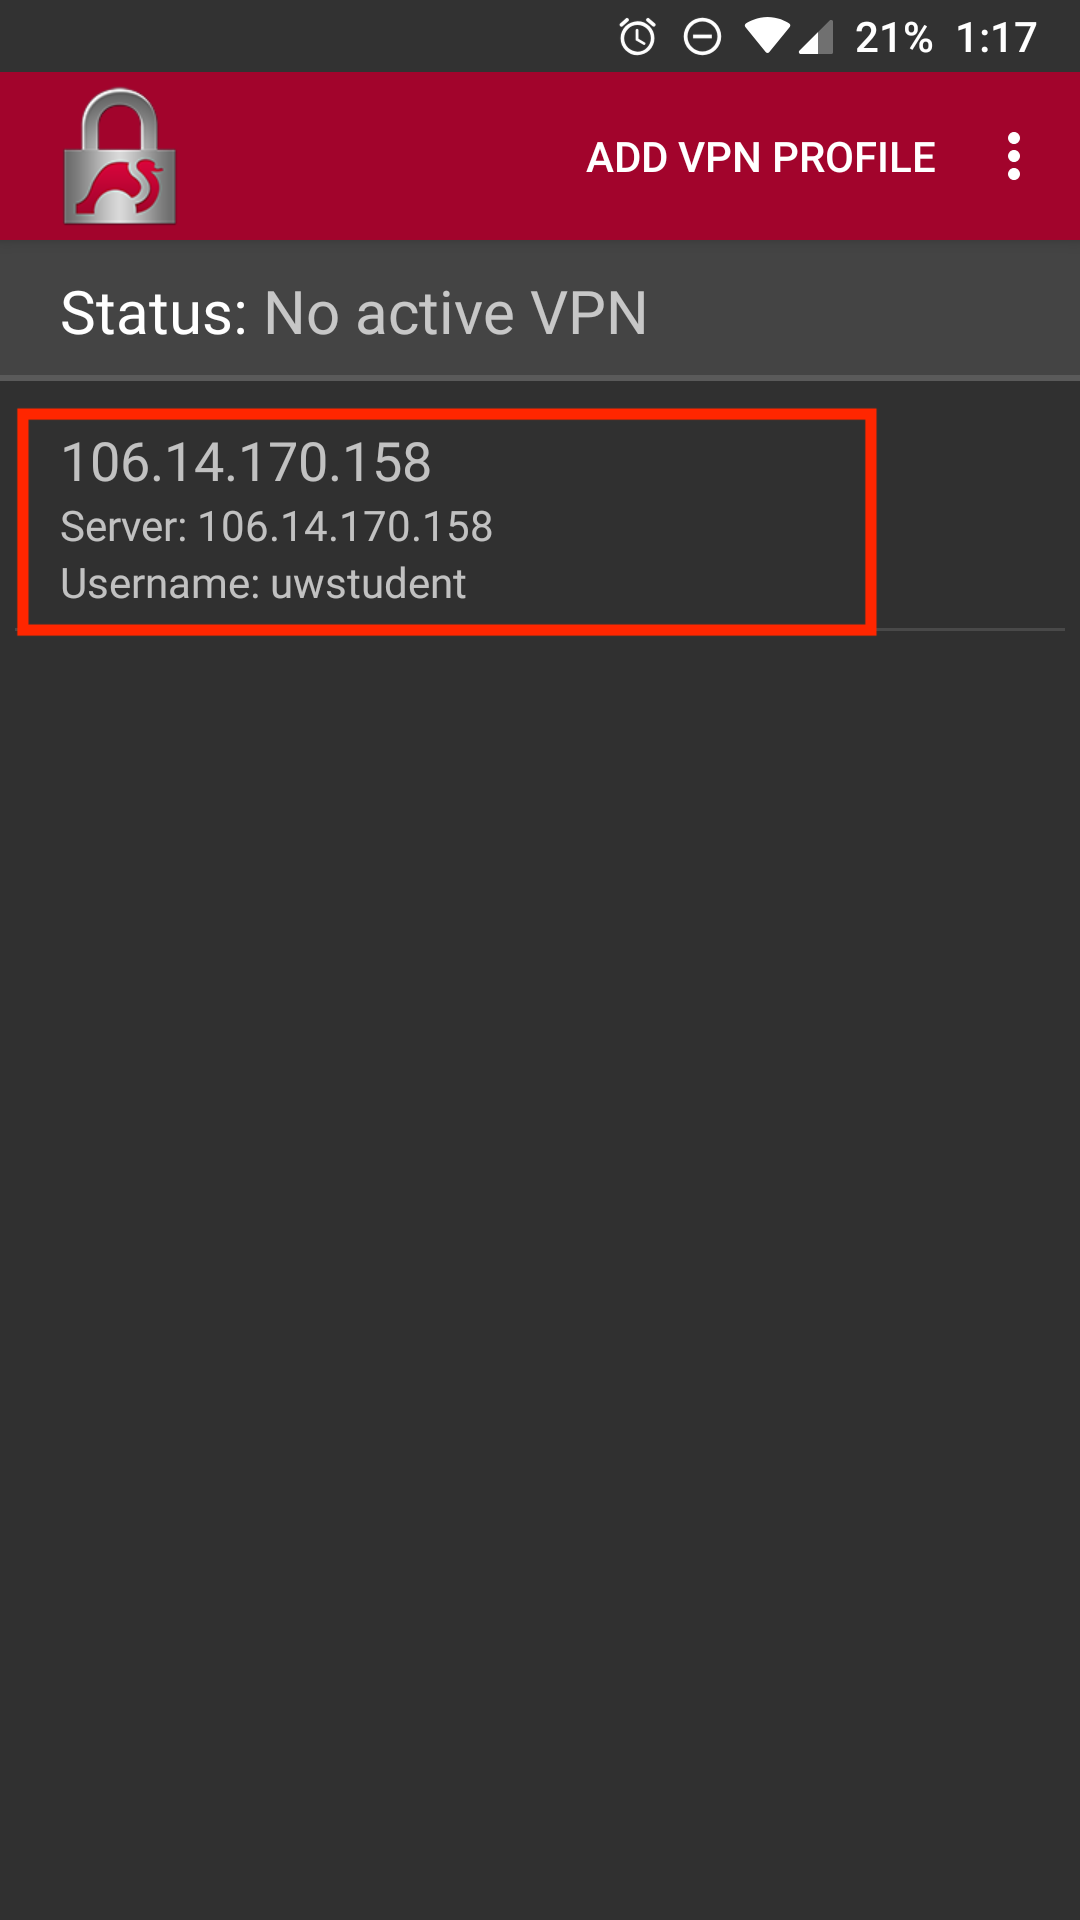
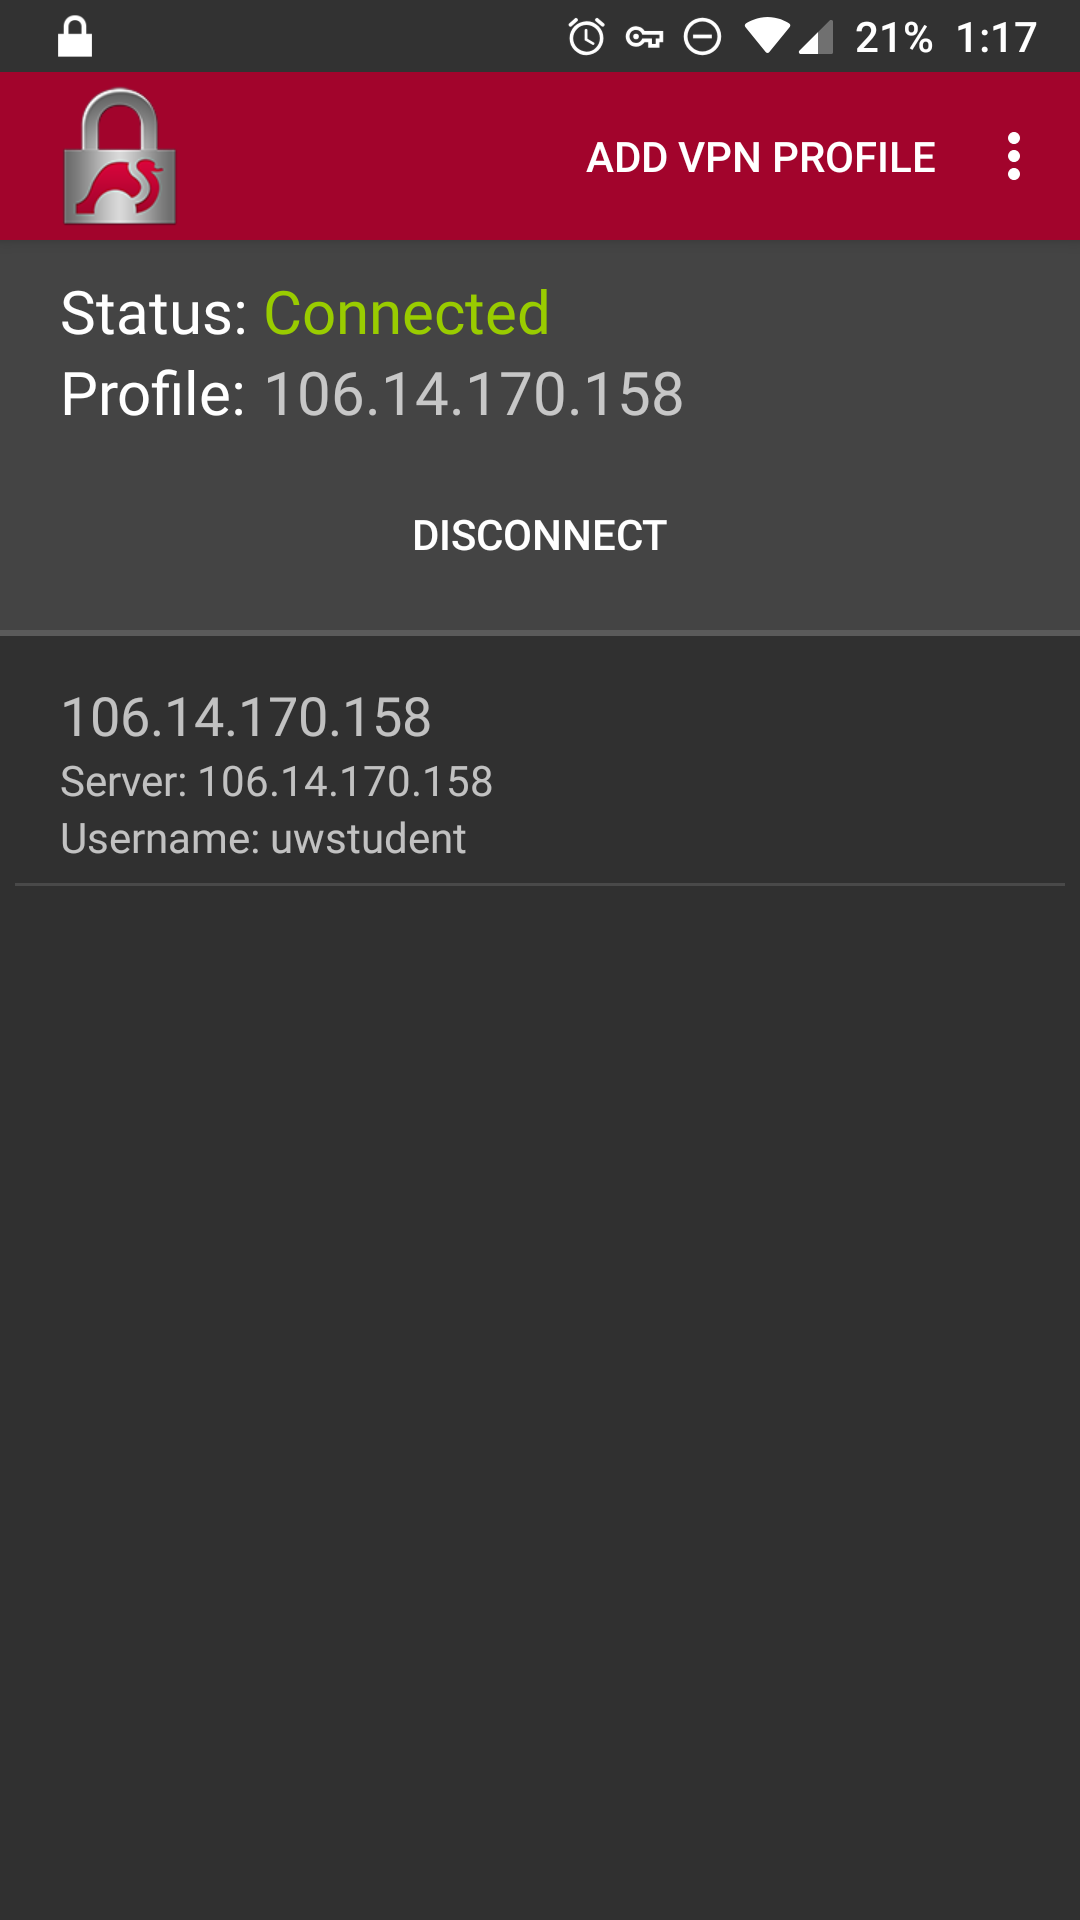
- Open the strongSwan app. Select the '106.14.170.158' network to connect. You will now be connected to the VPN.
Related articles