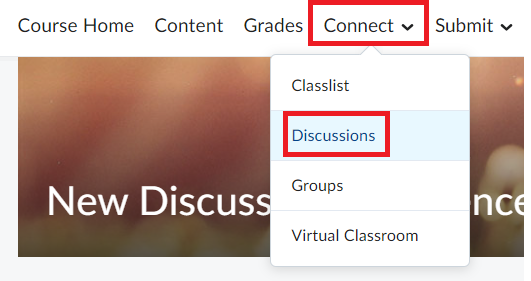
The Discussions tool is a collaboration area for you and your students. You can set up discussions to allow students to post, read and reply to messages on different topics, share thoughts about course materials, ask questions, share files, or work with their peers on assignments and homework. To access the discussions tool click the Connect menu on your course navbar and select Discussions.
| Table of Contents |
|---|
Types of Discussions
Discussion Forums and Topics with no restrictions are visible to all users in a course.
Group Discussions are Forums with Topics restricted to groups within your course. Group Discussions can also be created when you create your groups; these topics will automatically be restricted to the corresponding groups. For more information on creating Group Discussions from the Groups area of the course please see the Groups documentation.
Moderated Discussion Forums require all messages to be approved by the instructor/teaching assistant before they will be visible to other members of the course.
Post First Discussions are Discussions that are not visible to students until after the student has posted to the discussion.
Anonymous Discussions are Discussions that do not identify the poster of the message to other students or the instructor, and anonymous posts cannot be graded.
Creating a Discussion Forum
Before you create a discussion topic you must create at least one Discussion Forum. You can use forums to organize your discussion topics into categories.
...
You have created a Discussion Forum using the Discussions tool
Create a discussion topic using the Discussions tool
To create a discussion topic using the Discussions tool
...
Toggle the Visibility ON or OFF in the bottom left.
Click Save and Close.
...
Edit a discussion topic using the Discussions tool
To edit a discussion topic in Discussions
...
Toggle the Visibility ON or OFF.
Click Save and Close in the bottom left.

Copying Forums and Topics
From your course navbar, navigate to Connect/Discussions.
Click the More Actions button and select Copy from the drop-down menu.
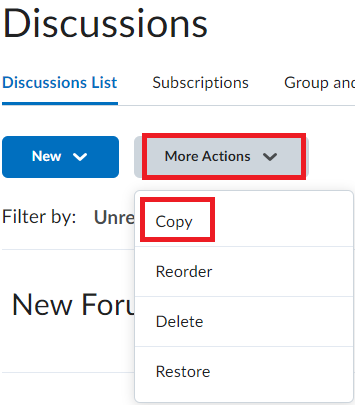
From the Copy Forums and Topics page, select either Copy a Forum or Copy a Topic.
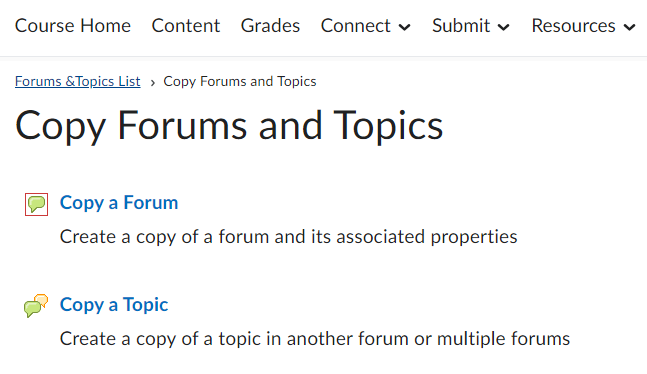
If you select Copy a Forum.
Select the Forum you would like to copy from the Forum to Copy drop-down menu.
Enter the Title of the New Forum, select the Copy topics checkbox if you are also copying the Topics associated with the Forum.
If you have pinned a message to any of the Topics you are copying, select Copy pinned threads.
Click Copy.
If you select Copy a Topic.
Select the Forum that contains the topic to create a copy of from the Forum to Copy drop-down menu.
Select the Topic you would like to copy from the Topic to Copy drop-down menu.
Enter the New Topic Title and select the Destination Forum that you want the topic associated with.
If you have pinned a message to any of the Topics you are copying, select Copy pinned threads.
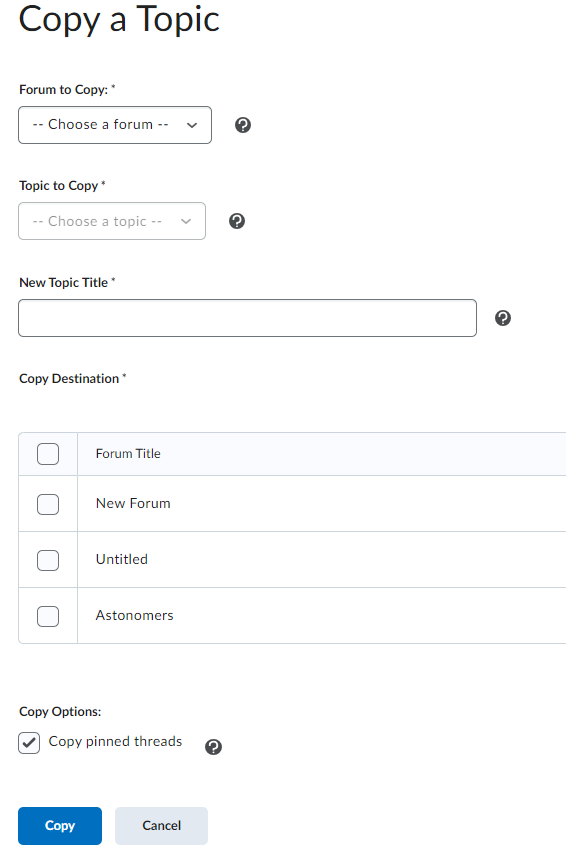
Click Copy.
Reordering Forums and Topics
From your course navbar, navigate to Connect/Discussions.

...
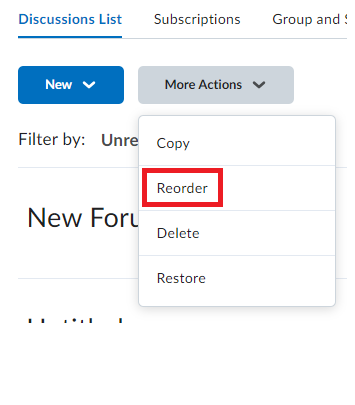
Click the More Actions button and select Reorder from the drop-down menu.
Change the corresponding order in the Sort Order to determine the new order of the Forums and Topics.
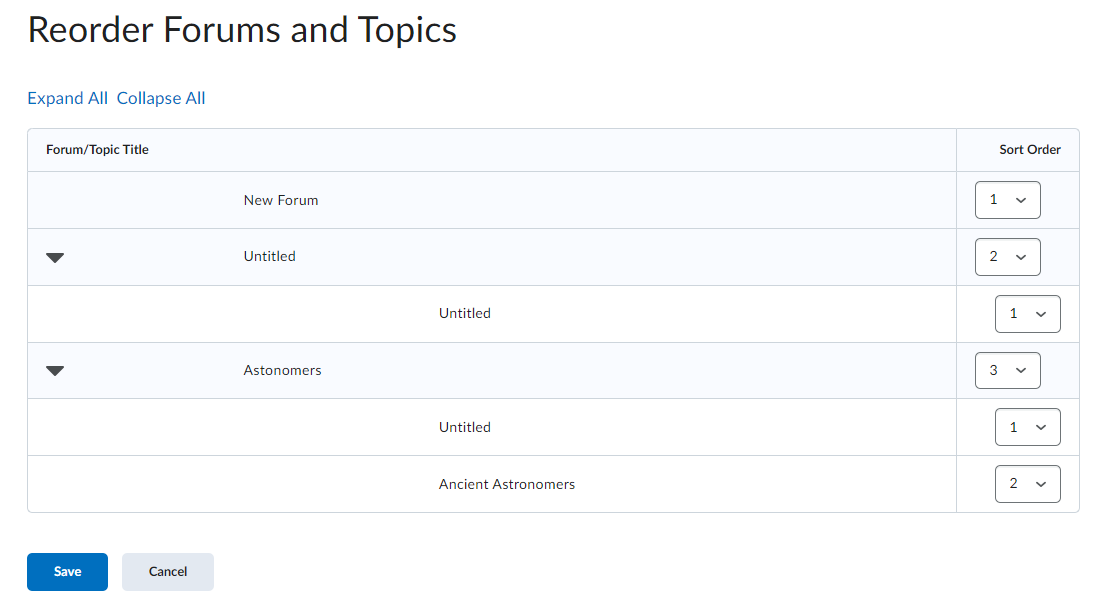
Click Save.
Restricting Forums and Topics
There are many options and criteria that can be used to restrict a Discussion Forum and/or Topic. For more information on these options please see the Release Conditions documentation.
Deleting discussion forums, topics, threads, or posts.
| Info |
|---|
Important: When you delete a post, any replies to that post are also deleted. |
...
To confirm the deletion, click Yes.
Restoring deleted Forums or Topics
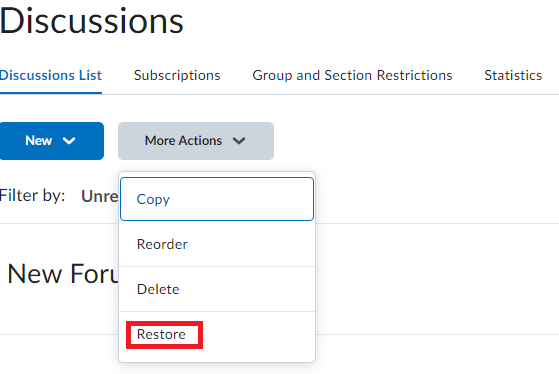
From your course navbar, navigate to Connect/Discussions.
Click the More Actions button and select Restore from the drop-down menu.
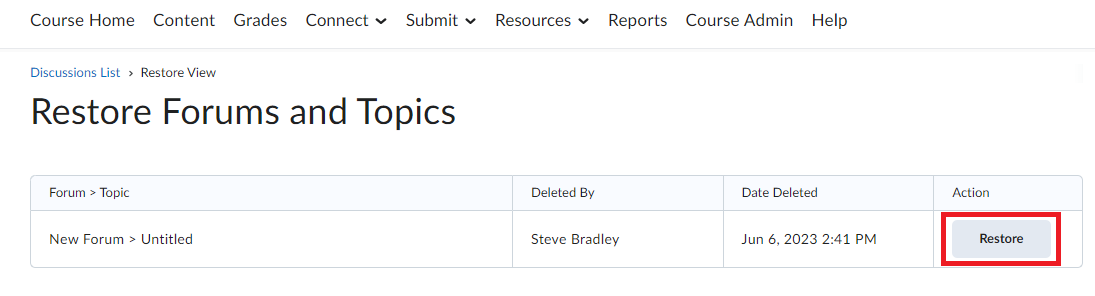
You will be taken to a page with a list of all the Forums and Topics that have been deleted from the course.
Click the Restore button to the right of the Forum or Topic that you would like to restore.
Grading Forums and Topics
To grade a Discussion Topic you must first associate the topic with a Grade item. For more information on creating Grade items see the Grades documentation.
Associating a Discussion Topic with a Grade Item
From your course navbar, navigate to Connect/Discussions.
Click the down arrow beside the Topic you want to associate with a Grade Item.
Click Edit Topic.
Assign a Grade Out Of score and then choose In Grade Book and choose whether to create a Grade Item or Link to Existing.
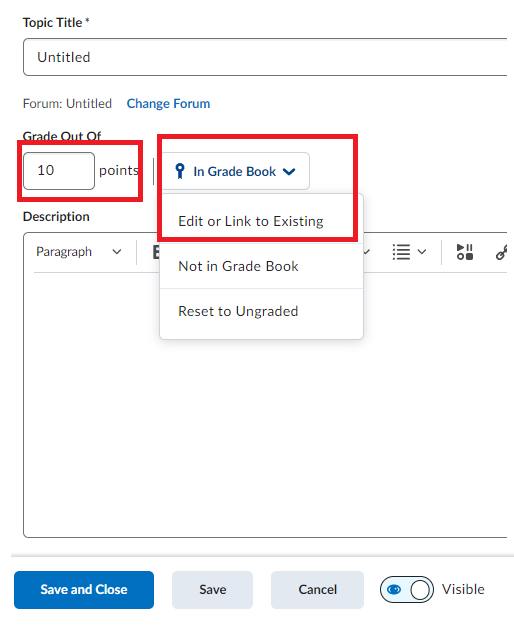
Click Save and Close, or Save.
Assessing a Discussion Post
Below the Discussion Topic Title, you will see an icon of a Rosette. This indicates topics that can be assessed.
...
Click on the Assessments tab.
Select the name of the student you want to assess.
This will open a new window where you can enter the Overall Grade any Feedback.
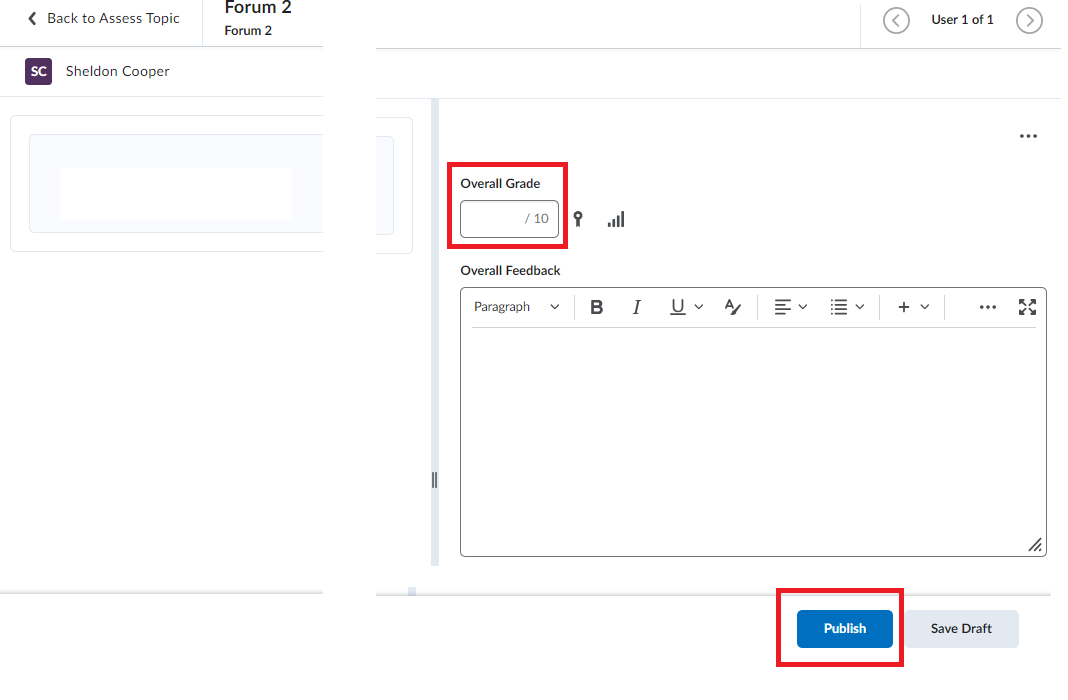
If you want the score and feedback to be available immediately, click the Publish button, or to publish all feedback later, click the Save Draft button. This will save the assessment and return to the Assess topic page.
To publish the Topic scores and Feedback for all students, select Publish All Feedback and click Save and Close.
...
Composing, Reading, Replying and Deleting Messages
Composing Messages
From your course navbar, navigate to Connect/Discussions.
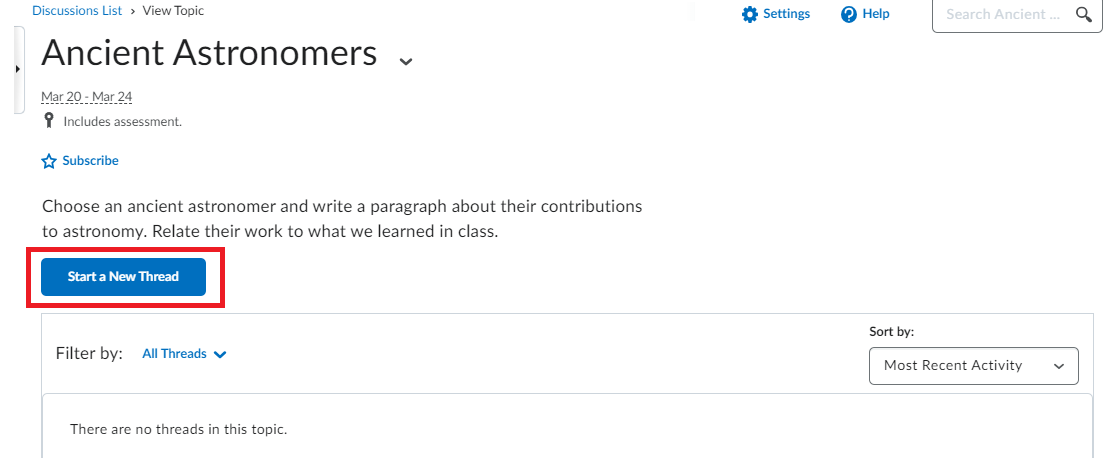
From the Discussions list page, click the Topic title of the Topic thatyou would like to post to.
Click the Start a New Thread button.
...
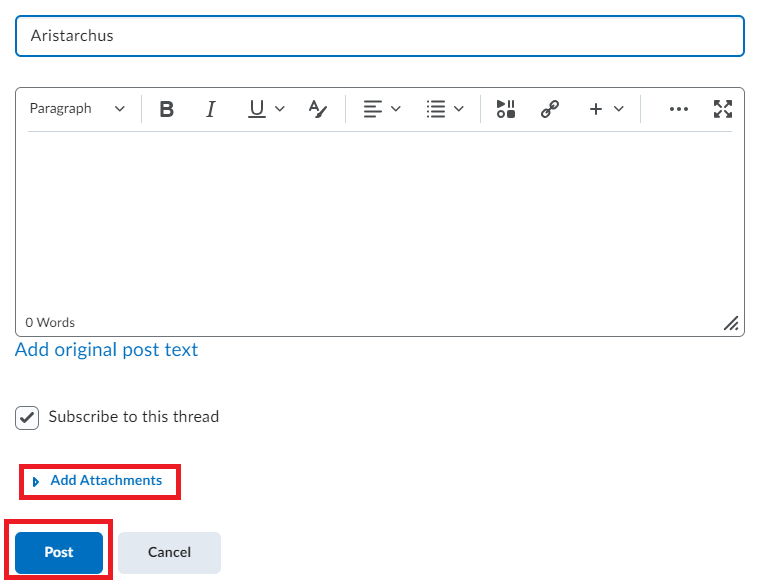
A compose window will open where you can add the subject line of your message and compose your message. Click the arrow to the left of Add attachments to upload a file, record audio, or record video. If this message is important and you want it to remain at the top of the Discussion Topic list you can select Pin Thread to keep it at the top and subscribe to this thread.
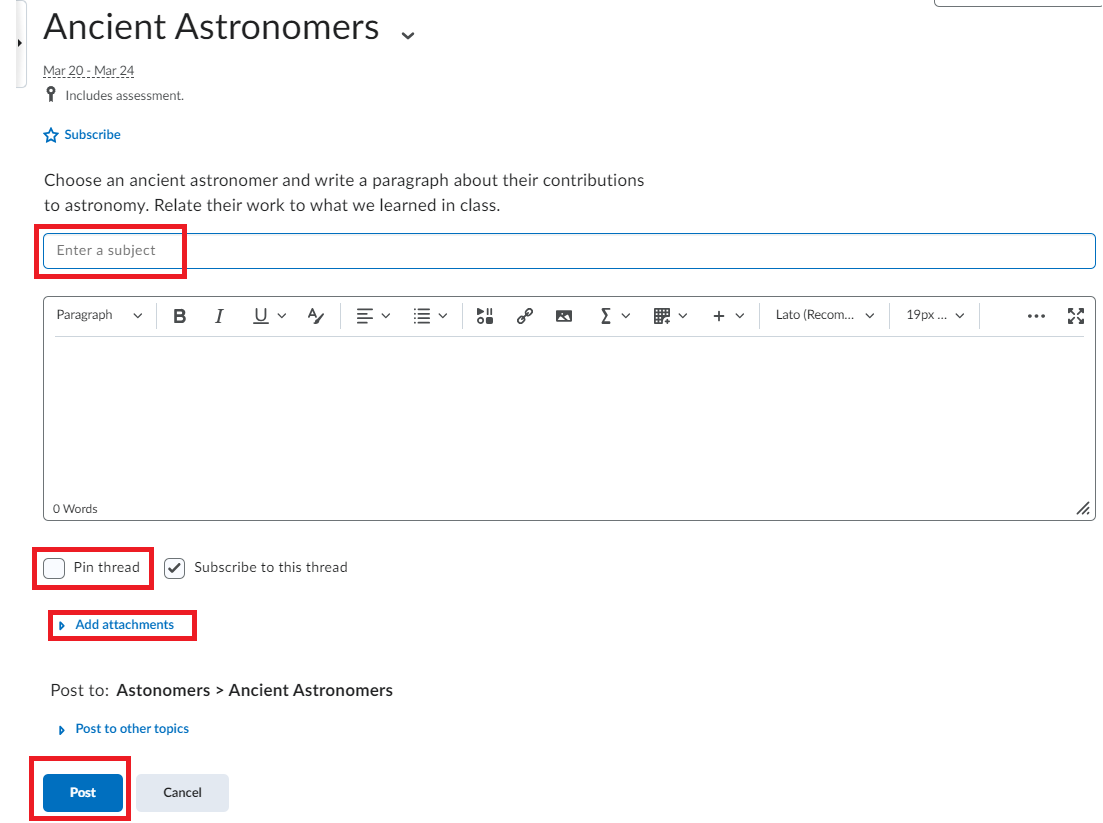
Click Post.
Reading Threads
From your course navbar, navigate to Connect/Discussions.
Click the title of the Discussion Topic you want to read.
The Discussion Topic will show you the messages that have been posted. If the full message is not displaying on your screen, click the down arrow beside more in the message window.
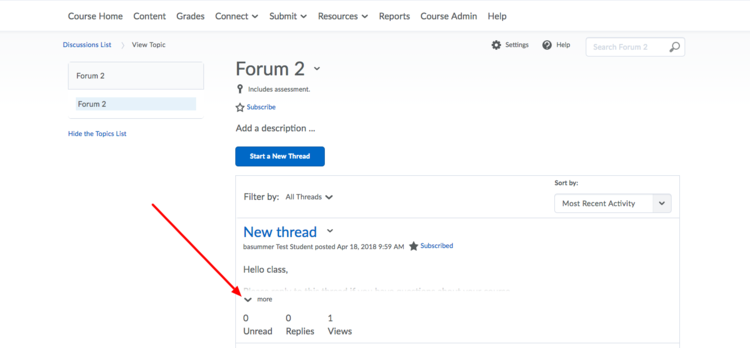
Depending on the Discussion Topic View you have set, you will see the option to Mark individual messages as Read or Mark all Read.
Replying to Messages
From your course navbar, navigate to Connect/Discussions.
Click the title of the Discussion Topic you want to reply to.
Select the message you want to reply to by clicking its subject line.
Click the Reply to Thread button.

A compose window will open where you can add the subject line of your message and compose your message. Click the arrow to the left of Add attachments to upload a file, record audio, or record video.
Click Post to add the reply.
Deleting Messages
You delete messages posted by yourself and other users.
From your course navbar, navigate to Connect/Discussions.
Click the title of the Discussion Topic that the message you want to delete is in.
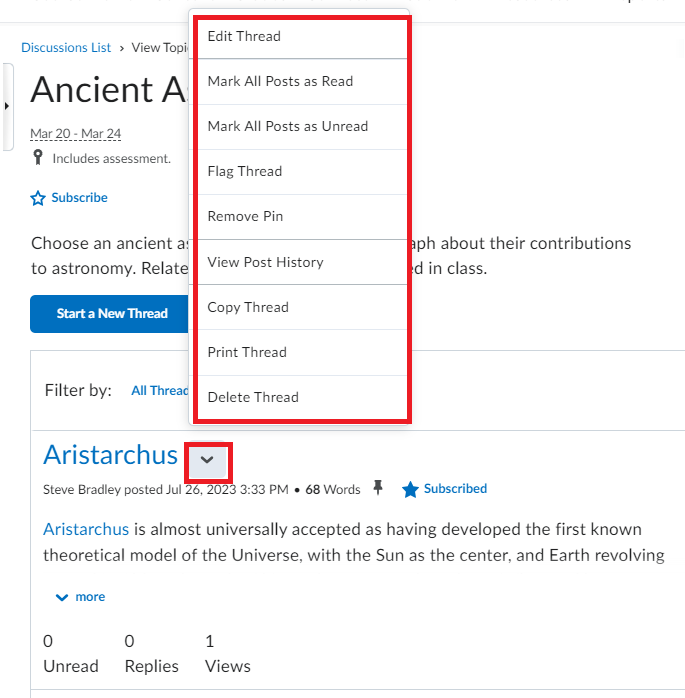
Click the down arrow to the right of the thread or reply you want to delete and select Delete Thread or Delete Post.
Subscribing to Forums and Topics
From your course navbar, navigate to Connect/Discussions.
Select the Blue Star Below the Forum name or to the right of the Topic name and select Subscribe.

A new window will open allowing you to set your notification. From this window, you can determine the notification method by choosing either to include the notifications for this Topic in your mini bar only, summary of activity or as an Instant notification.
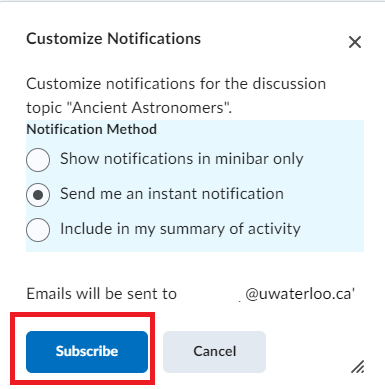
Click Subscribe.
Discussion Settings
For more information regarding Discussion and other Account settings please see the Account Settings documentation.