Exchange Calendar folder permissions
...
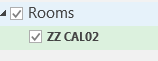
In calendar view, click Open Calendar, then Room List
Select the room and click OK
The room now shows up in your list of calendars
Access permissions
Right-click on the calendar name and choose Properties.
Click into the permissions tab
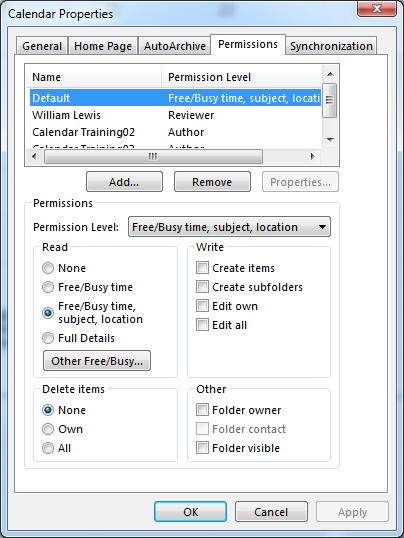
Click Add and choose the person who needs permission.
Ensure the right person is selected.
Choose the permission level from the drop-down menu.
Settings calendar permissions in Outlook Web App
...
For resources or shared calendars you must first open the calendar
Click the icon in the top-right and choose Open Other Mailbox
Type the name of the mailbox and click Open
Click the icon with nine squares and then Calendar
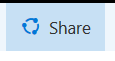
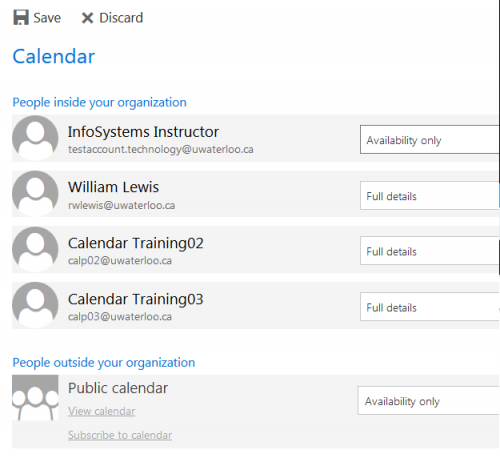
Add a person to the permissions list
To add permissions click Share
Enter email address and Search directory
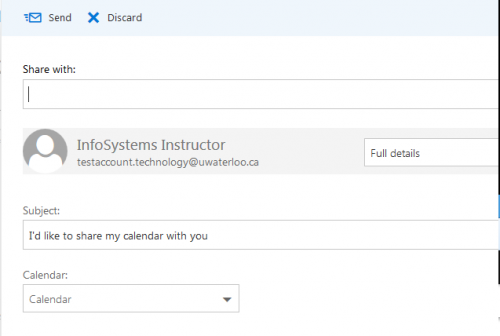
Set permission level
Availability only - default
Limited details - subject line only
Full details - Reviewer - read-only
Editor - can change meetings
Delegate - will receive your meeting invitations - do not use for resources
Change existing permissions
Right-click on Calendar and choose Permissions
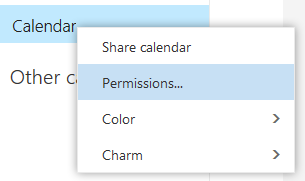
View and change permissions as required
Related articles
| Filter by label (Content by label) | ||||||||||||||||||
|---|---|---|---|---|---|---|---|---|---|---|---|---|---|---|---|---|---|---|
|
| Page Properties | ||
|---|---|---|
| ||
|
| Info |
|---|
Need help?Contact the IST Service Desk online or 519-888-4567 ext. 44357. |
| Tip |
|---|
Article feedbackIf you’d like to share any feedback about this article, please let us know. |