WebEx Training for Live Online Classes outside LEARN
WebEx is an online, live presentation and collaboration tool that shares audio, video, and presentations in a virtual class or meeting room. Recordings can be made of sessions so they can be reviewed later.
In this article
- Section 1: Getting started with WebEx – necessary step if you have not gone to WebEx before
- Section 2: Create a new virtual room – This shows you how to create a new live online classroom using WebEx portal
- Section 3: Edit your existing classroom – To modify your previously created classroom
- Section 4: Sharing your WebEx links – necessary step for your students to access the meeting
Section 1. Getting started with WebEx
Before using WebEx for classes, you as a WebEx meeting host need to adjust a few settings on your WebEx account.
- Go to: uwaterloo.webex.com/ and click on the blue Sign in button on top right.
- Use the same UW login as you would for LEARN (watiam@uwaterloo.ca).
- If you see a login error message (and are sure you’ve entered your login name and password correctly, stop here and email rt-ist-itms-collab@rt.uwaterloo.ca with subject line: “Need a WebEx account” to request an account Note: Undergrad and graduate students already have accounts.
- Click on Preferences in left panel.
- Click on the Audio and Video tab in the middle of page.
- Scroll down to Default call-in number, in the drop-down menu.
- For the first number, select Canada Toll free and click the Save button at the bottom of the page.
- To edit an existing virtual classroom (including those created using the LEARN widget) go to Section 2. Edit your exiting classrooms. To create a new virtual classroom, go to Section 3. Create a new virtual room.
Section 2. Create a new virtual room
- To create a new room, from the default landing page of uwaterloo.webex.com (using the Modern view … see upper right, and Modern view is showing, click it, otherwise you are already using Modern), go to left panel, at bottom left of the page, and click WebEx Training.
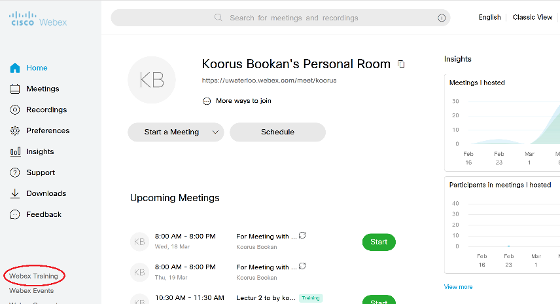
- On the new page, under the Host a Session section on the left panel, click on Schedule Training. Fill in the form:
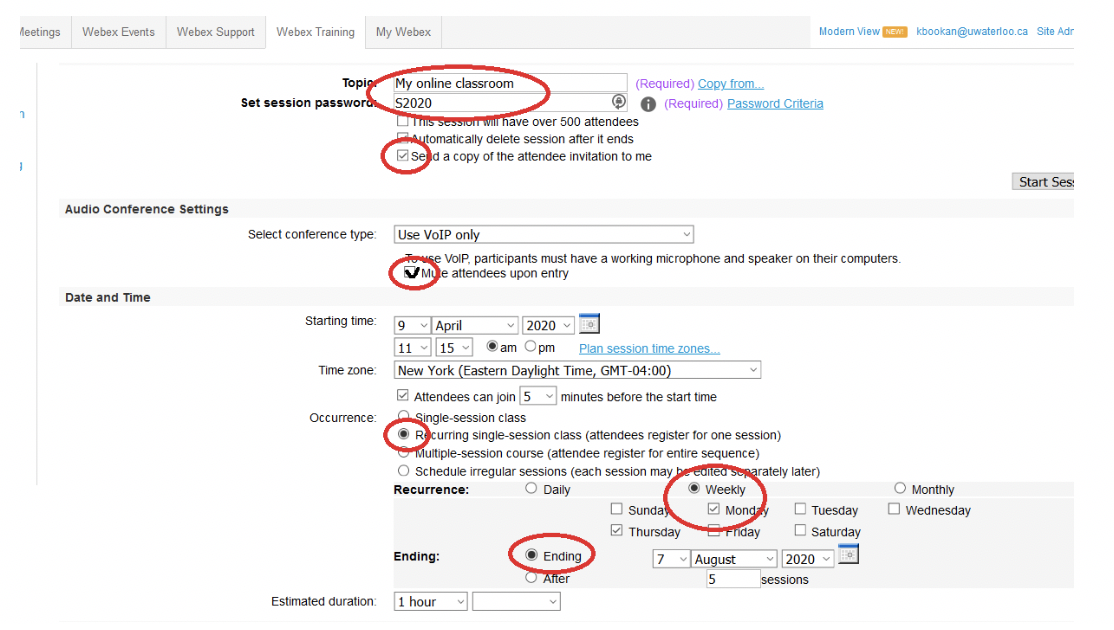
- Make an appropriate title and an easy to remember password for the room.
- Check option for Send a copy of the attendee invitation to me (this allows students to enter as guests if they have problem loggin in)
- We recommend that you select “Mute attendees upon entry” (to avoid background noise and to avoid walking students through how to mute).
- Create schedule of your class under Date and Time.(You need to pick only one day of the week, you can reuse it multiple times)
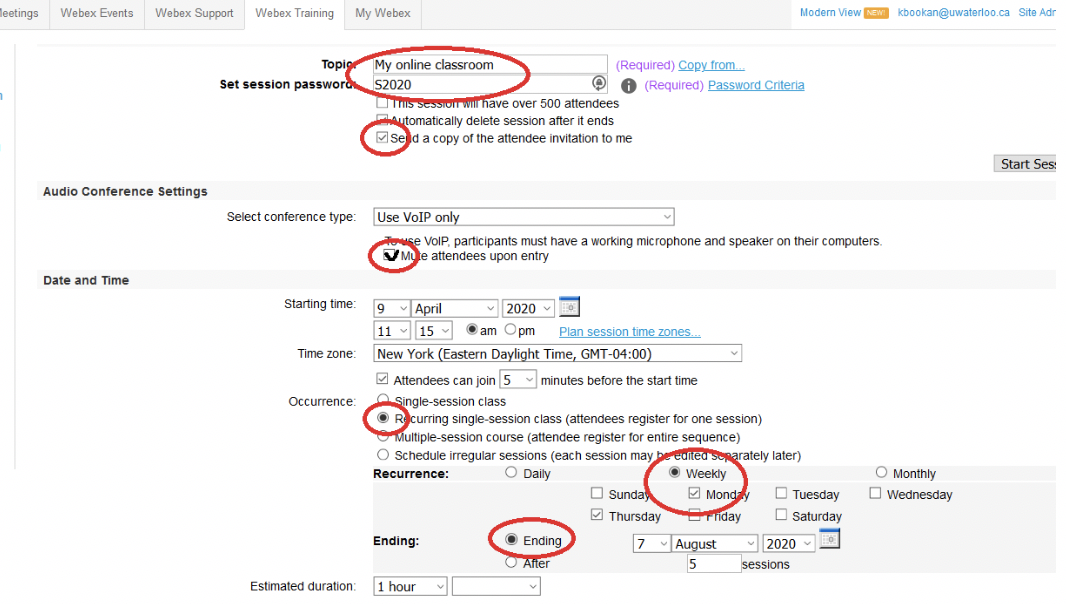
- You may leave the rest of settings at their default.
- Scroll to bottom of page and click Schedule. You will receive two confirmation emails in your University email box.
- Go to your University email box, you should have received two confirmation emails. Save both of them for future reference. Got to Section 4 below.
Section 3. Edit your existing classrooms
- Login to uwaterloo.webex.com with your UW credential (same as used for logging into LEARN, watiam@uwateloo.ca)
- On the landing page you should see your existing rooms. Click on the title of the room you want to edit.

- On the resulting page is summary information about the room; click on Edit button to edit details about the room.
- We recommend changing the default password to something easy to remember. You will send this password to student later.
- Check option for Send a copy of the attendee invitation to me me (this allows students to enter as guests if they have problem loggin in)
- We recommend that you select “Mute attendees upon entry” (to avoid background noise and to avoid walking students through how to mute).
You also can change the timing of your class here, if needed.
Be careful what you change here as it will have effect on student access.
- You may leave the rest of settings at their default.
- Scroll to bottom of the page and click on Update. You’ll receive two confirmation emails in your University email box. Save these emails for future reference.
- Go to section 4.
Section 4: Sharing your WebEx links
- In the email sent from WebEx with 'Forward to attendees Invitation to training session'
- Copy the link in that email labeled. Go to uwaterloo.webex.com/...
- If you are not using LEARN you can send the above link to your class participants directly in the form of an email. You have completed the process and can exit this document
- If you are using LEARN, you can post the above link in your course page in LEARN as described below.
There are two options to add your WebEx meeting link to your LEARN course:
- Add an announcement to your course including the meeting link and password. This option is beneficial because all students who are subscribed to the announcements in your course will also receive an email containing the link and password and for those who have not subscribed, they will see the link when first entering the course.
- To add an announcement to your LEARN course, enter your course and click on the announcement link on the course homepage. This will take you to the announcement tool where you can craft your message.
- On the announcements page, click on the blue “New Item” button.
- Enter the “Headline” or subject of your announcement. In this case, “WebEx meeting” may be most appropriate.
- Scroll down to the Content section of the announcement and provide any information you would like to share with your students, paste the meeting link and password for the meeting.
- Add the WebEx meeting link to your LEARN course is to Create a File in your course Content.
- Enter your LEARN course and click Content.
- On the Content page, click the Module where you want to add the link.
- Next, click the blue “Upload/Create” button and choose the “Create a File” from the dropdown list of options.
- On the Create a File page, enter a title for your page and scroll down to the Content section of the page.
- In the Content section of the page, provide any information you would like to share with your students, paste the meeting link and the password for the meeting.
- Click “Save and Close”.
Related articles