Use these steps to create Group Video Assignment.
Step-by-step guide
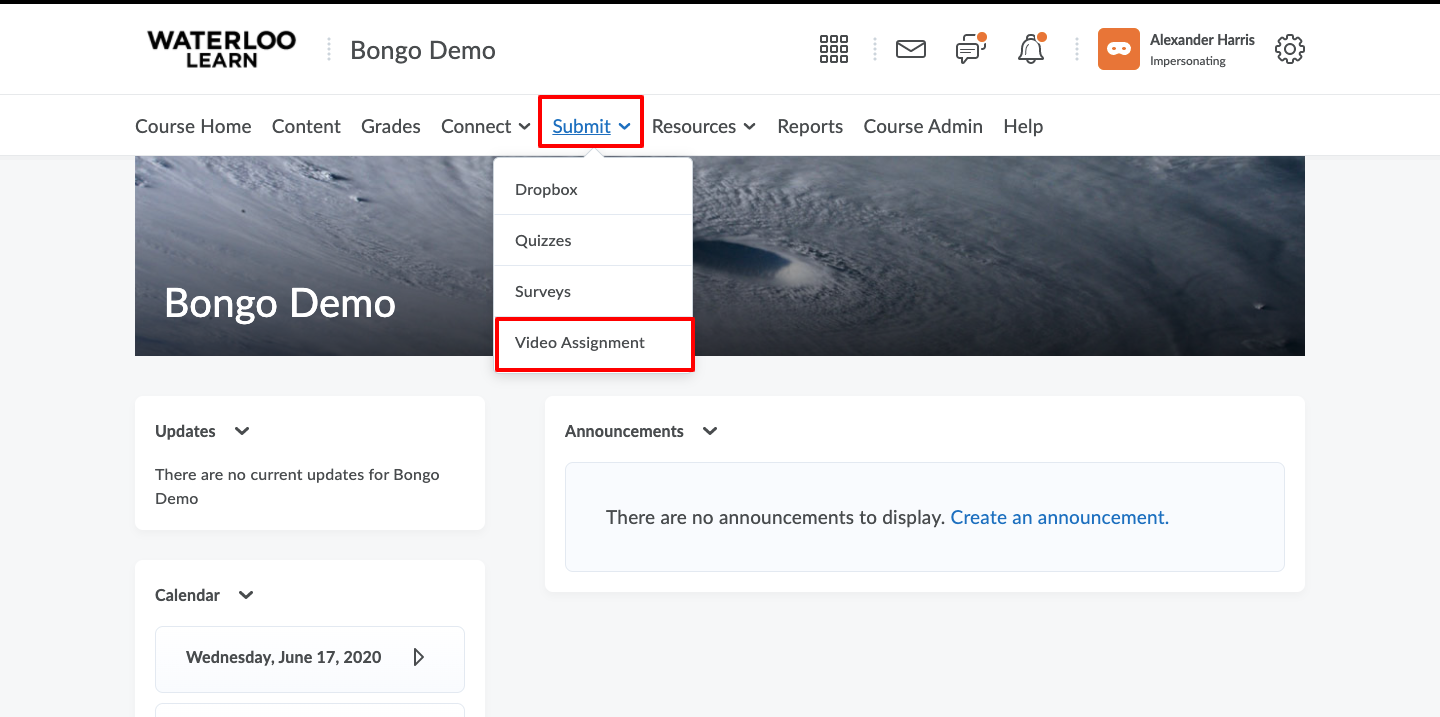
- Click on the Submit tab and choose Video Assignment from the list of options.
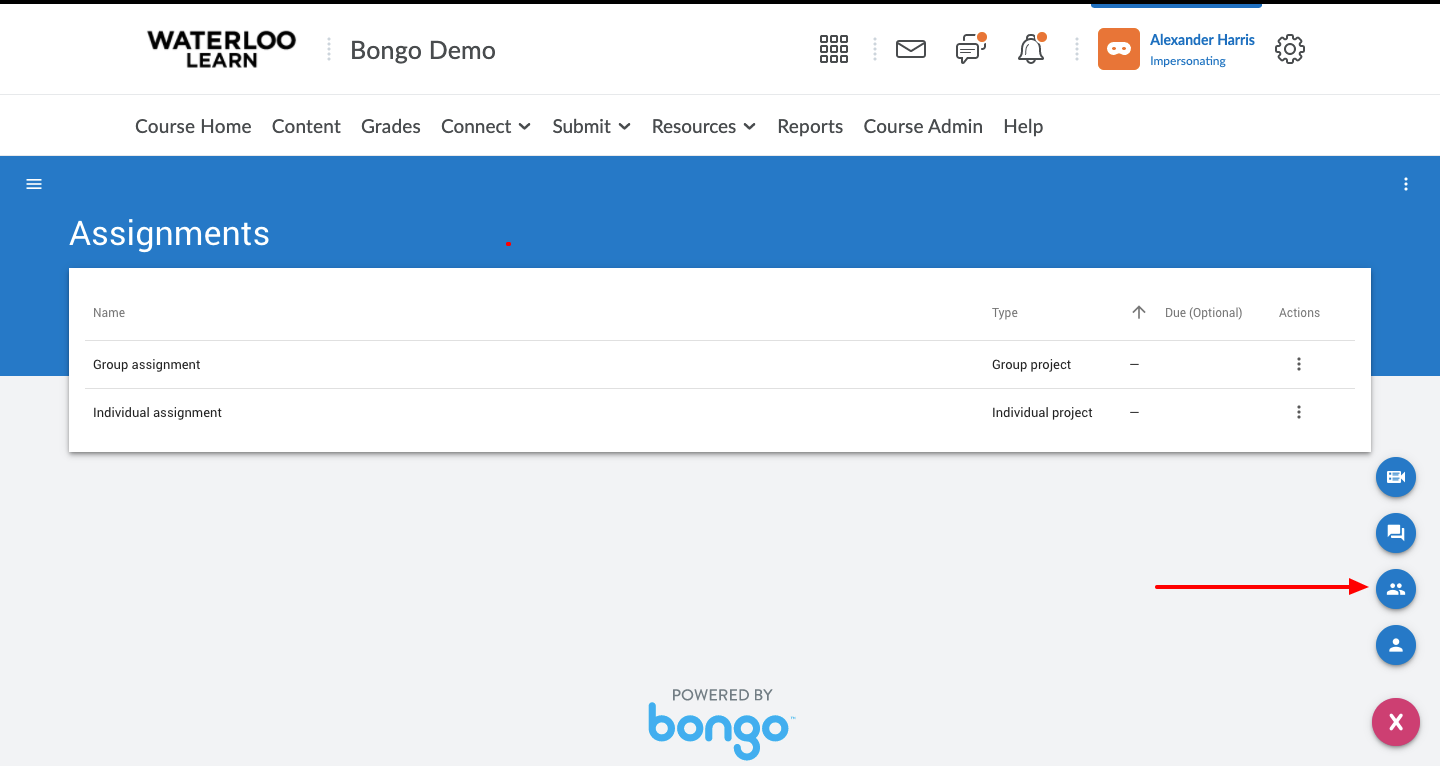
- Click on the large + sign in the bottom right hand corner and choose the group assignment option.
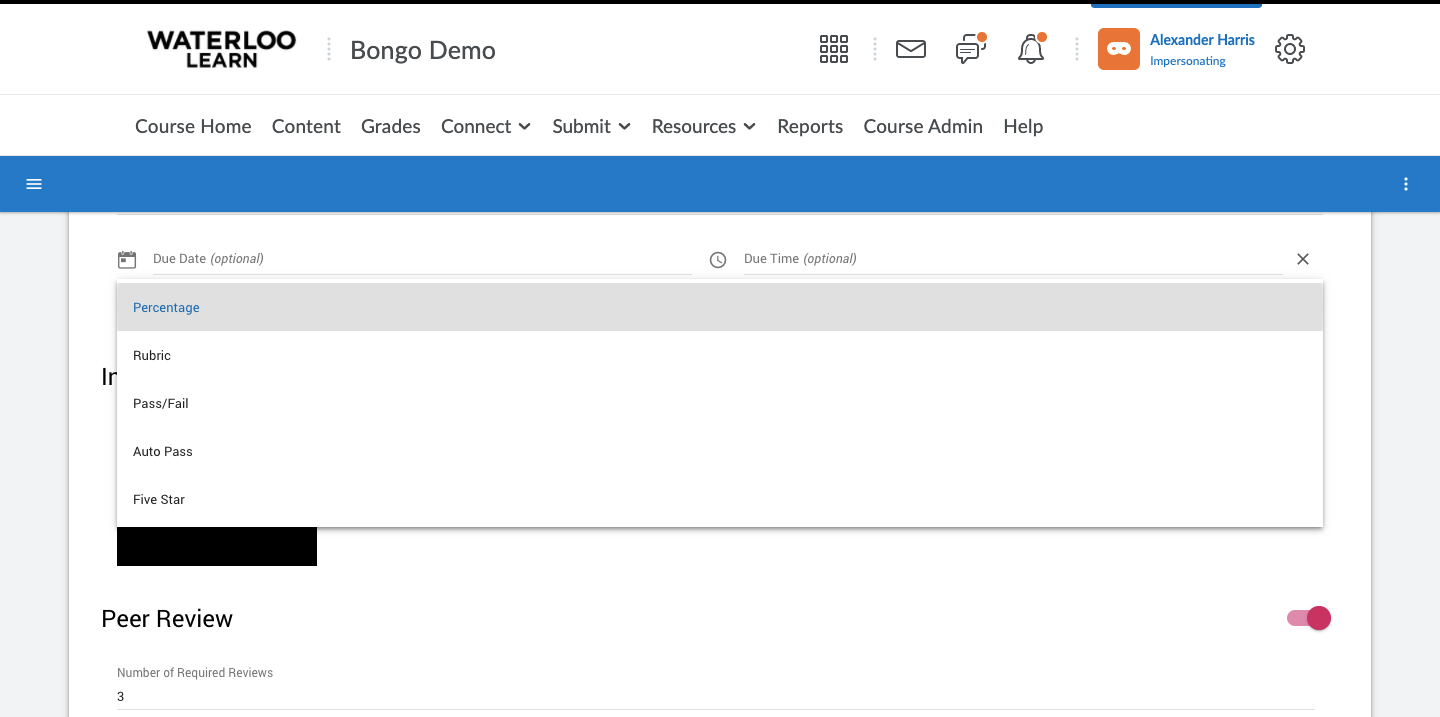
- Enter the assignment name, and a due date and due time if required. Note: The due dates and times are optional, these are soft deadlines.
- Determine your grade type for the assignment. Available options include: Percentage, Pass/Fail, Auto Pass, Five star or Rubric. If a Rubric will be used for peer review or self-assessment, the grade type must also be set to Rubric. Students will use the same grading rubric for peer and self assessment if enabled.
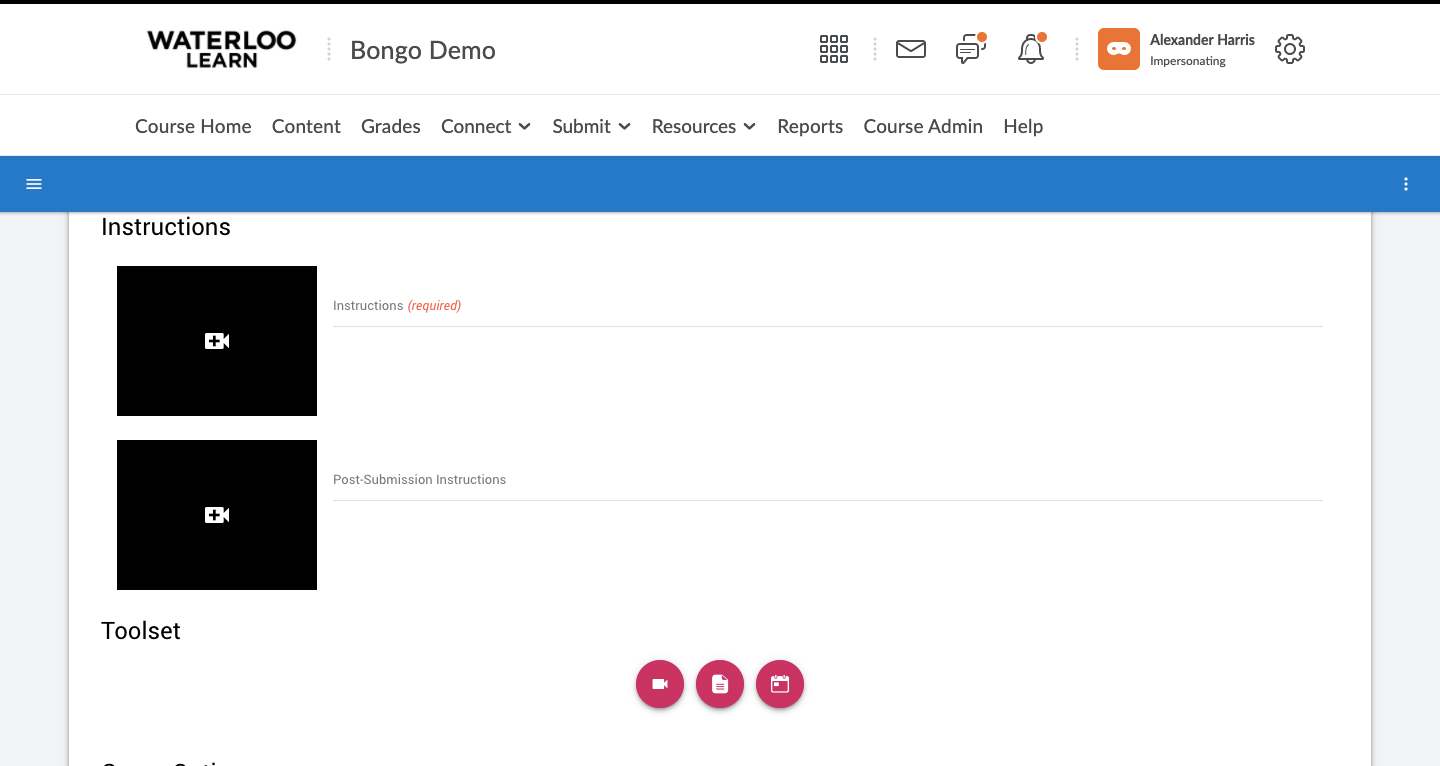
- Add instructions by either recording or including written instructions for students.
- Click on Advanced settings to expand the additional options.
- Add Post-Submission Instructions if applicable.
- Determine the tools enabled for the group assignment. Available options include; video, documents and meetings.
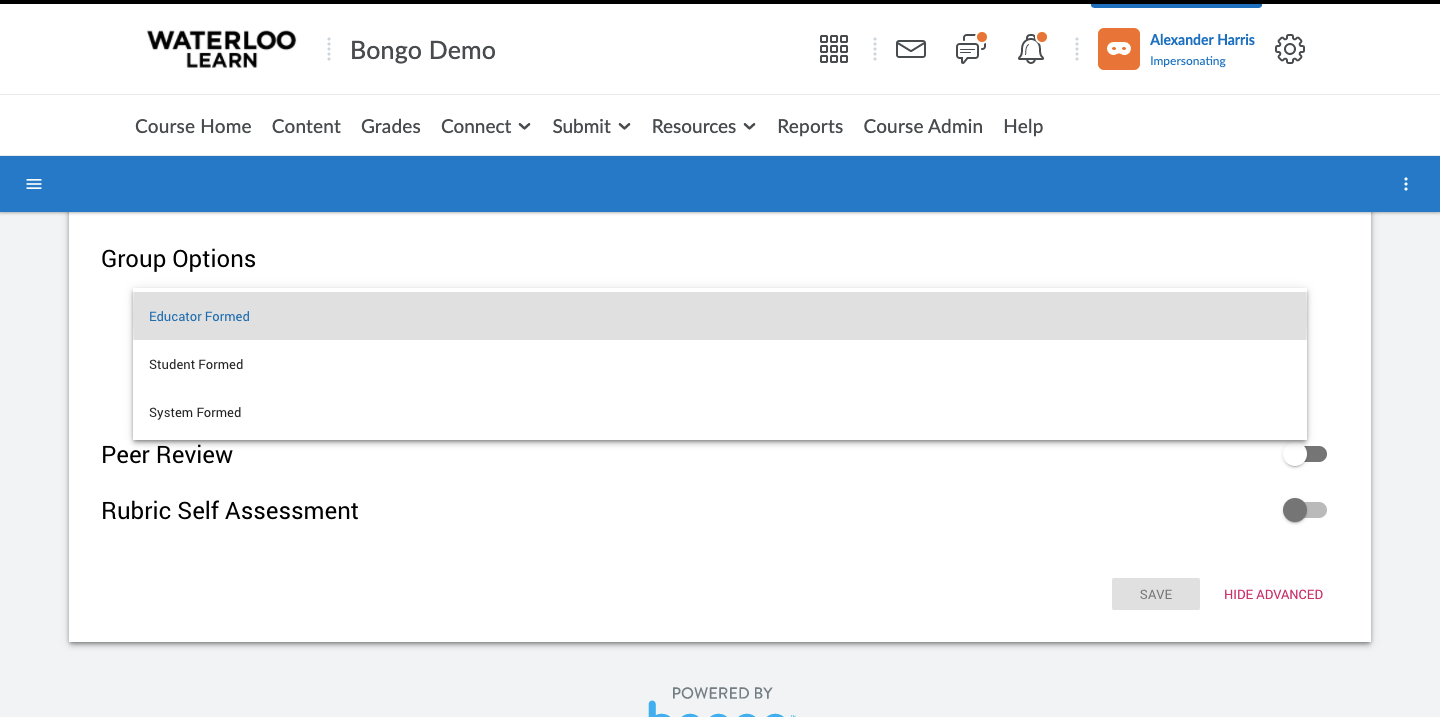
- Set your group options for formation and evaluation. Formation types include; Educator formed, Student formed or System formed.
- Educator formed groups is the default and are created by the Instructor.
- Learner formed allows students to select their own groups
- System formed groups organizes groups based on the available days and times students have in common. A deadline is required for students to enter their availability or the instructor will be required to manually assign the groups.
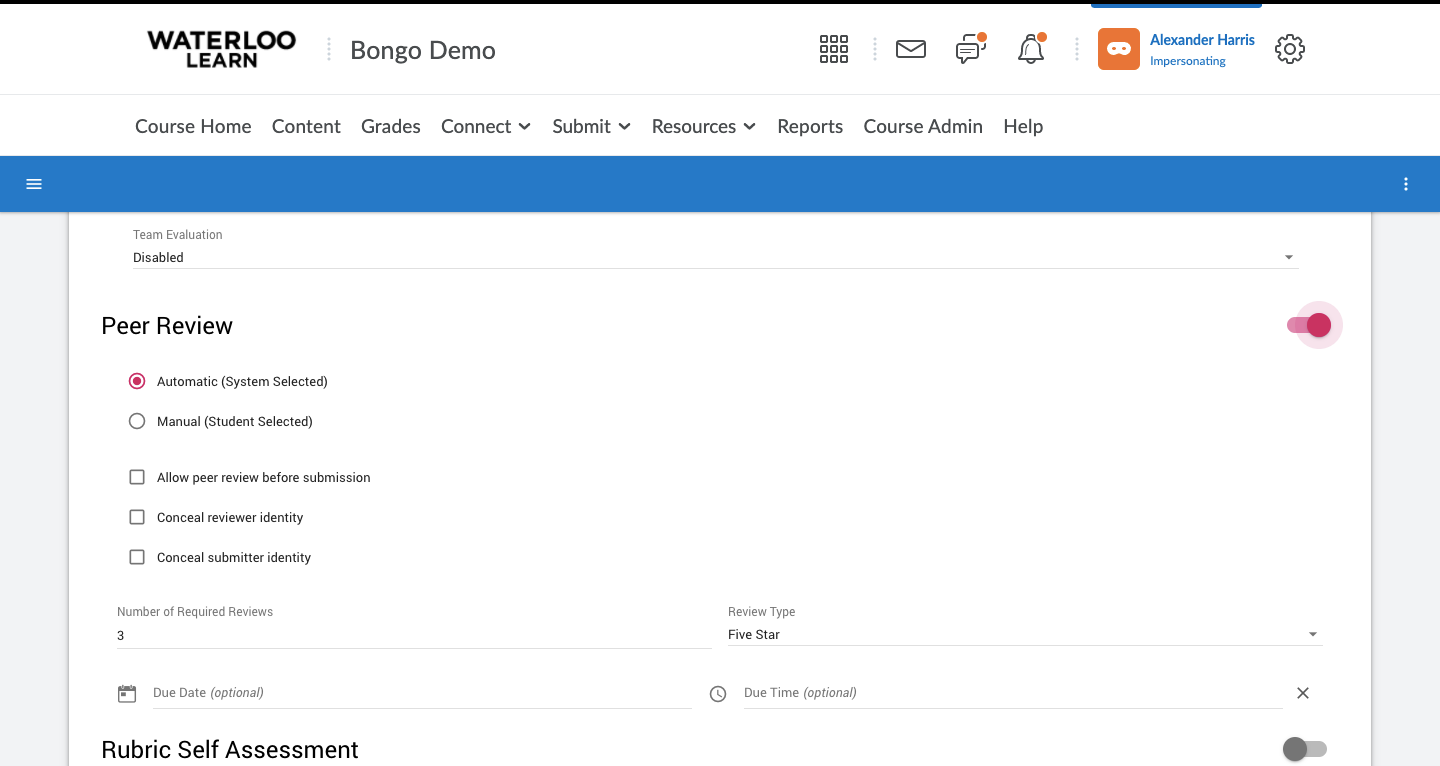
- Enable Peer review and determine your settings, if using.
- Enabling Rubric self assessment will only be an available option if you are using Rubric as your grade type. Students will only be able to asses themselves using the grading rubric selected with the grade type.
- The final step required when using a video assignment (all types) is to add a link to the assignment to the content section of your course or your students will not be able to see or access the assignment.
