...
Select Grades from the course navbar.
It is recommended that the first time you create a gradebook, you select Setup Wizard.


Click on the Start button. As you go through the seven steps of the Grades Setup Wizard, it is recommended to leave the gradebook settings with the default choices.
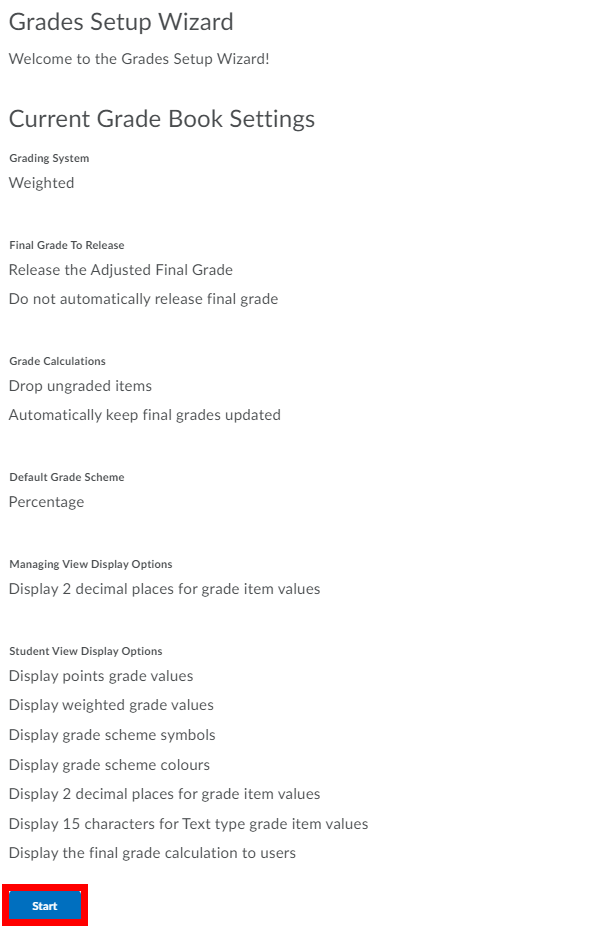

Click through until you hit Finish.
...
Select Grades from the course navbar.
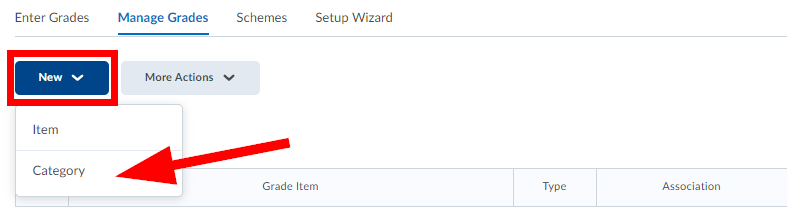
Click the New button and select Category from the drop-down list.

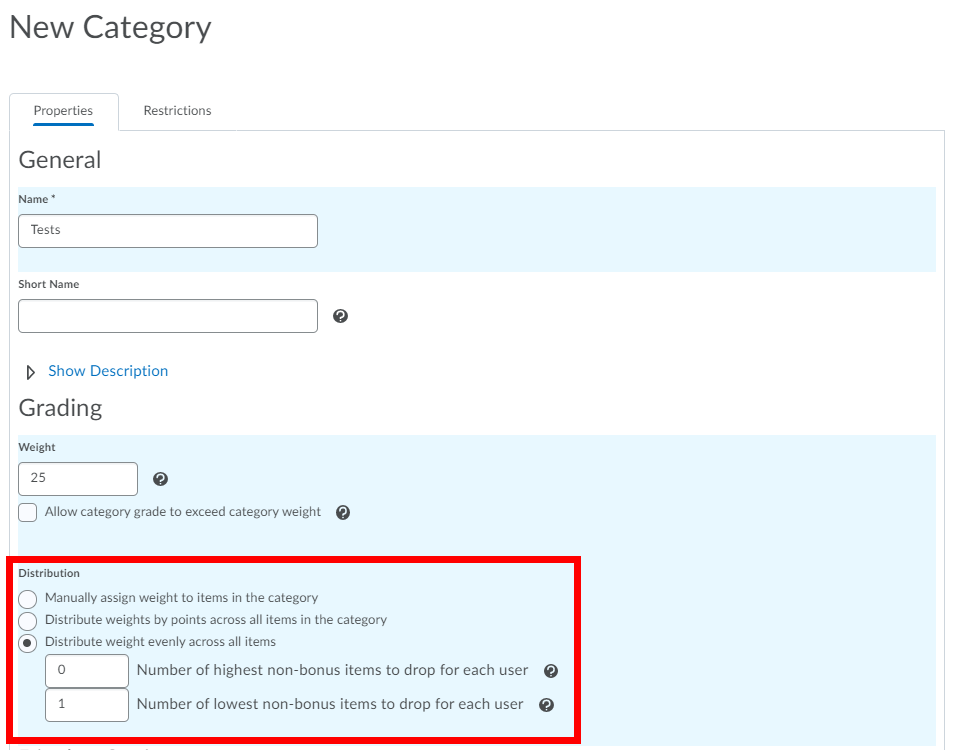
Enter a Name for the category.
Enter a Short Name to display in the grade book (optional).
If you want, type a Description of the category by selecting Show Description (optional).
Select the Allow users to view description check box if you want to make the category description available to users.
If you are using the Weighted system, enter the total Weight that you want the category to contribute towards the final grade.
Select Allow category grade to exceed category weight if you want to allow users' grades for the category to exceed 100%. E.g. 105%.
The Distribution of weight within the category will depend on how grade items will be treated within the category. For example, if you plan to have your students take 5 quizzes, but only count the top 4, your settings might look like the example below. Select one of the three distribution options.

Select Display Options to enable the following features:
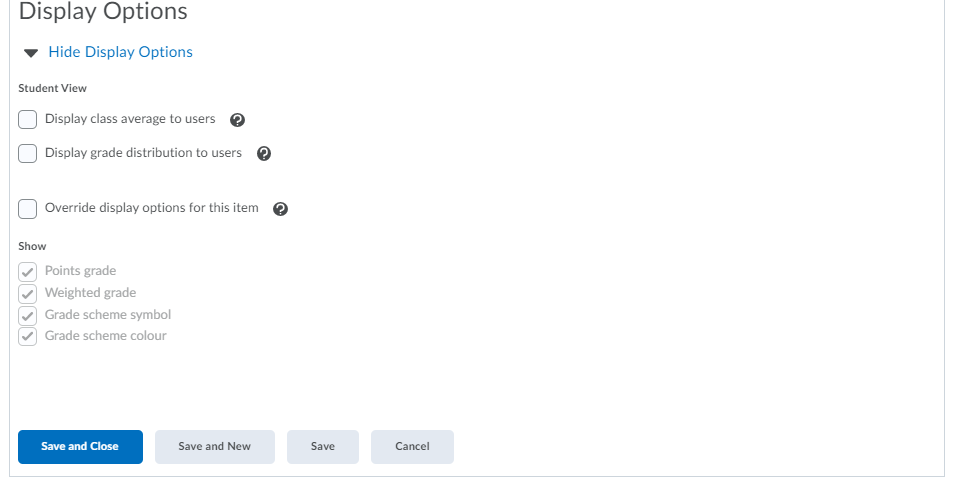

Display class average to users - allows users to see the class average on the item.
Display grade distribution to users - allows users to see a graph showing how grades were distributed between different percentiles.
Override display options for this item - allows for graded users to view grade information for this item differently from other items in the grade book. You can then select what you want to show.
Click Save and Close, Save or Save and New.
...
Select Grades from the course navbar.
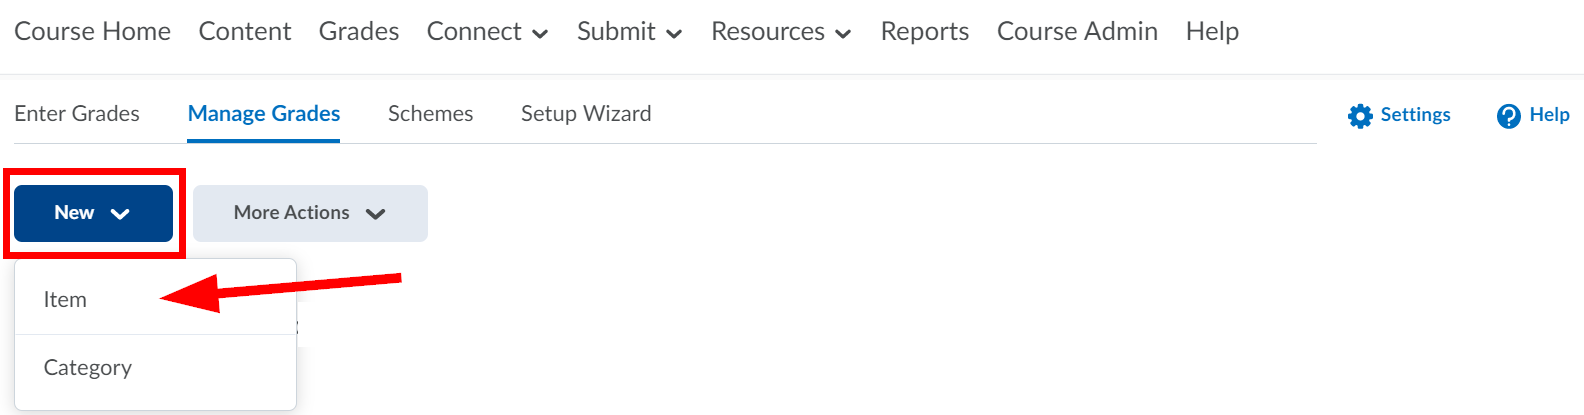
From the Manage Grades area, click the New button and select Item from the drop-down menu.

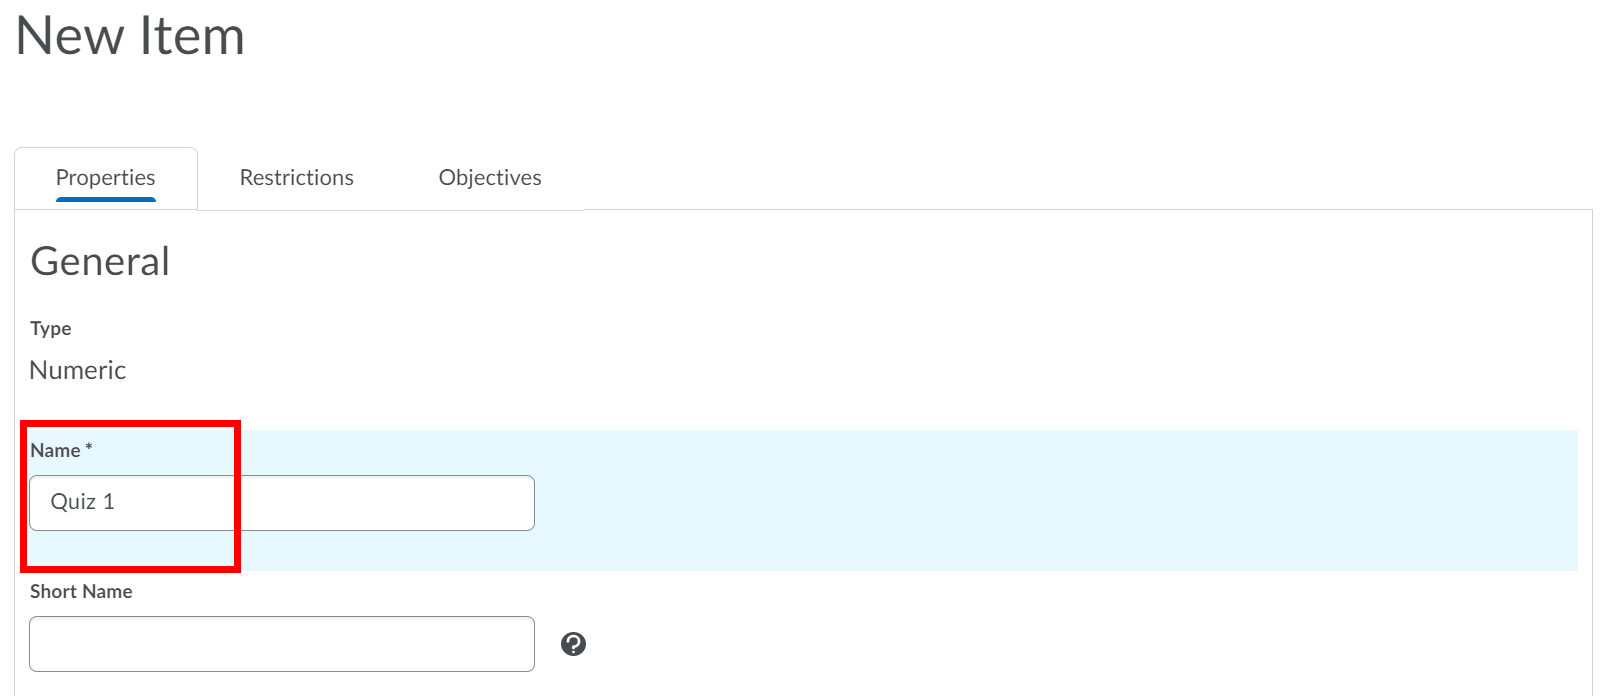
Select Numeric for the Grade Item Type.
Enter a Name for the grade item.

Enter a Short Name to display in the gradebook (optional).
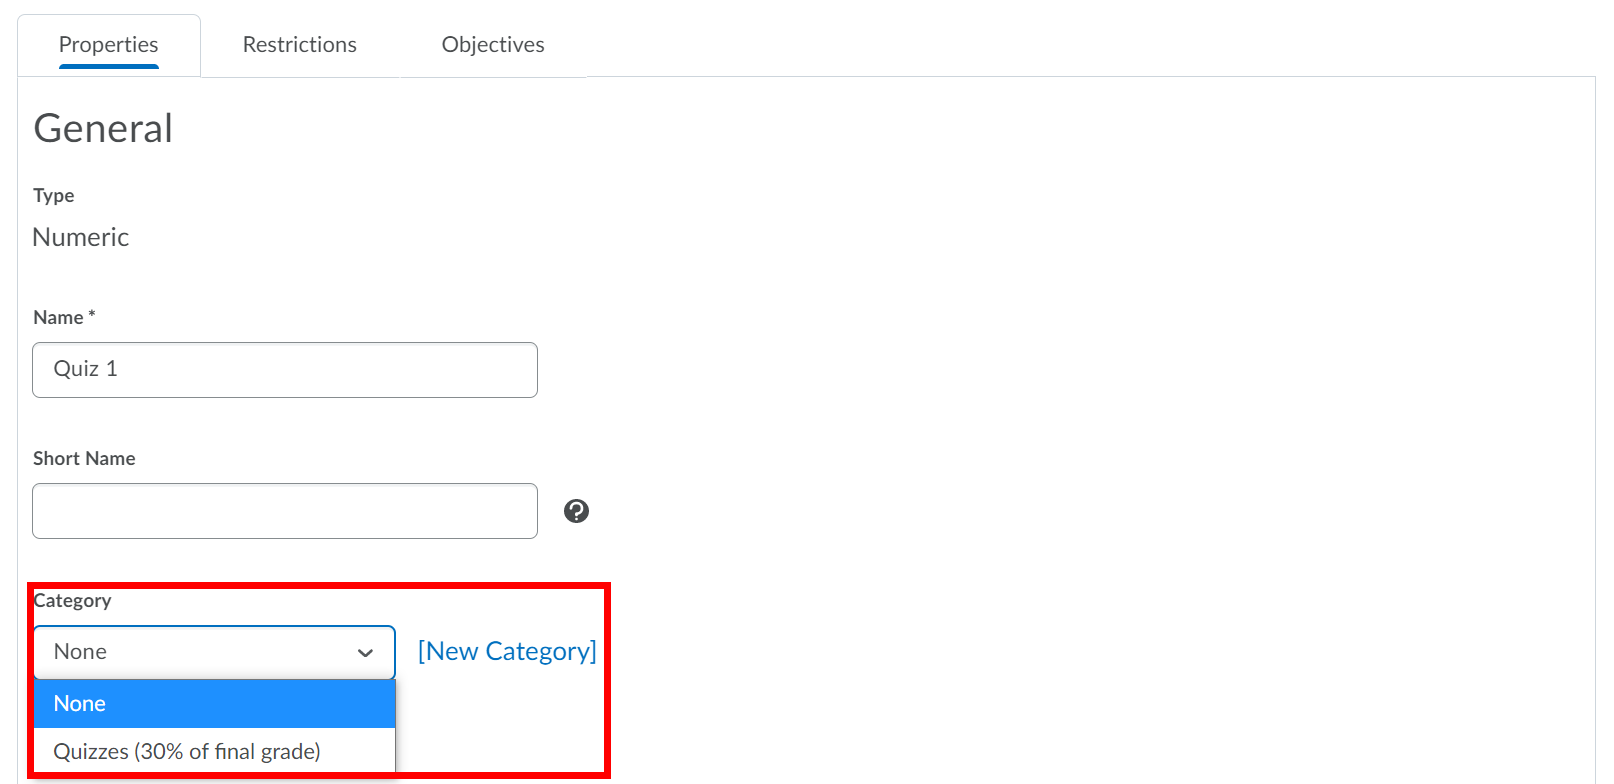
If you want the grade item to be associated with a category, select a category from the Category drop-down list. You can also create a New Category from this page.

Enter a Description of the grade item by selecting Show Description (optional). If you want to make the description available to users, select Allow users to view grade item description.
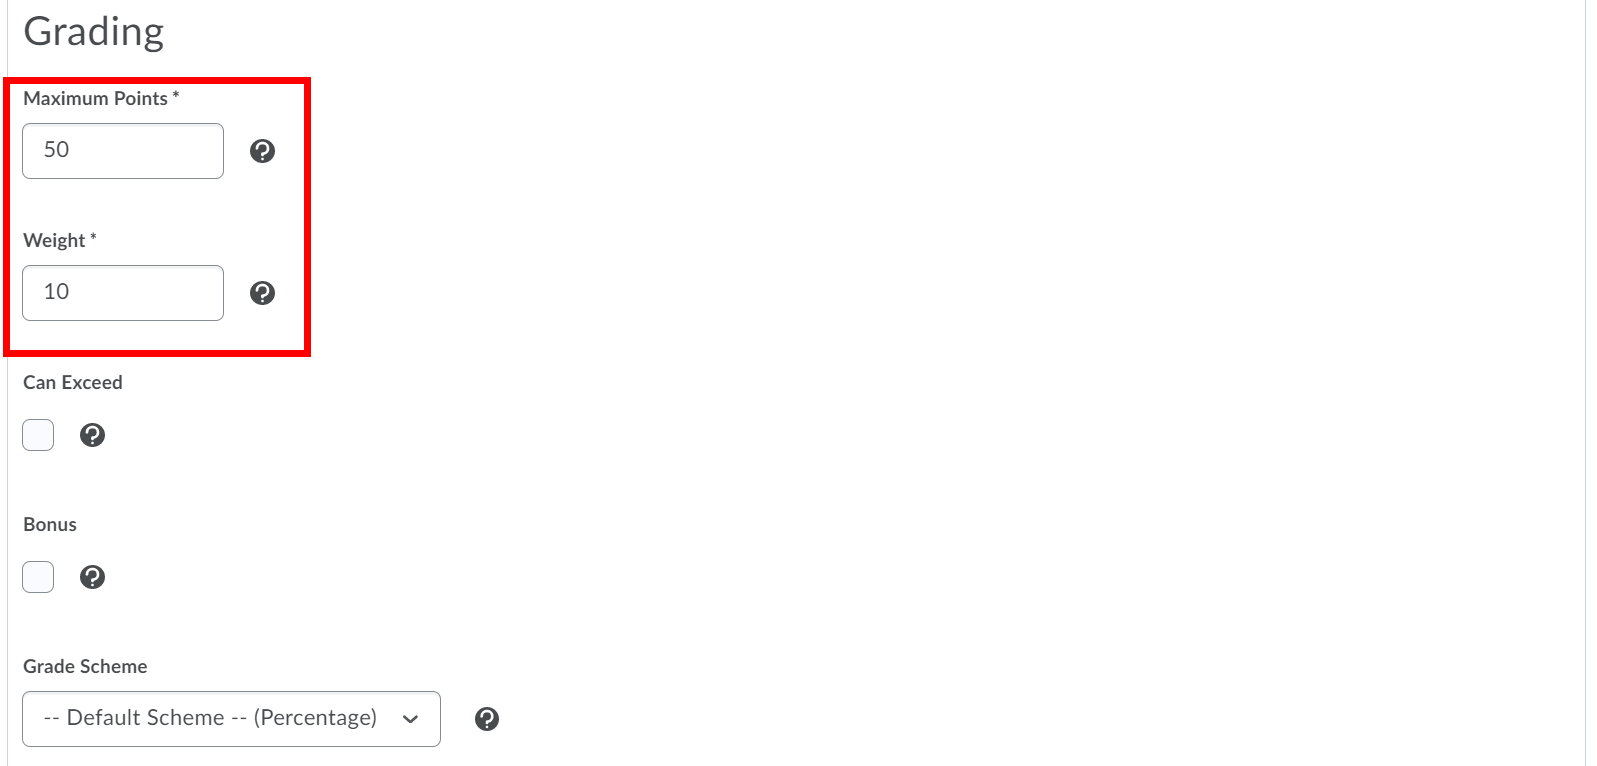
Enter the value you want the item to be graded out of in the Maximum Points field.
If you are using a category and selected, “Manually assign weight to items in the category” when creating the associated Category, enter the Weight you want the grade item to contribute to its category. If the item does not belong to a category, enter the Weight you want it to contribute to the final grade. For grades that are being recorded, but not included in the final grade calculation, you can set the Weight to 0.

If you want users’ grades to be able to exceed the total value of the item, select Can Exceed.
Select Bonus, if you want the item to be counted as a bonus item. Bonus items are not counted towards the maximum points for a category or final grade. Depending on how the extra marks will be used, you must select Can Exceed or Bonus to allow users' grades to exceed the maximum points specified. More on Bonus Grades in a later section of this document.
Select a Grade Scheme to associate with the item, if applicable. Grade Schemes let you represent users' grades with symbols or labels. E.g. A,B,C or 4.0, 3.5, 3.0. The default scheme is percentage.
If you would like to associate a rubric with the item, click Add Rubric to add an existing rubric or, select Create Rubric in New Window to make a new one. See the Rubrics documentation for more detailed information.
Select Display Options to enable the following features:
Display class average to users - allows users to see the class average on the item.
Display grade distribution to users - allows users to see a graph showing how grades were distributed between different percentiles.
Override display options for this item - allows for graded users to view grade information for this item differently from other items in the grade book. You can then select what you want to show.
Under Managing View, select override display options for this item if you want to view grade information for this item differently from other items in your grade book.
Click Save and Close, Save or Save and New.
...
Select Grades from the course navbar.
From the Manage Grades area, select the name of the category or item that you want to edit.
Select the Restrictions tab.
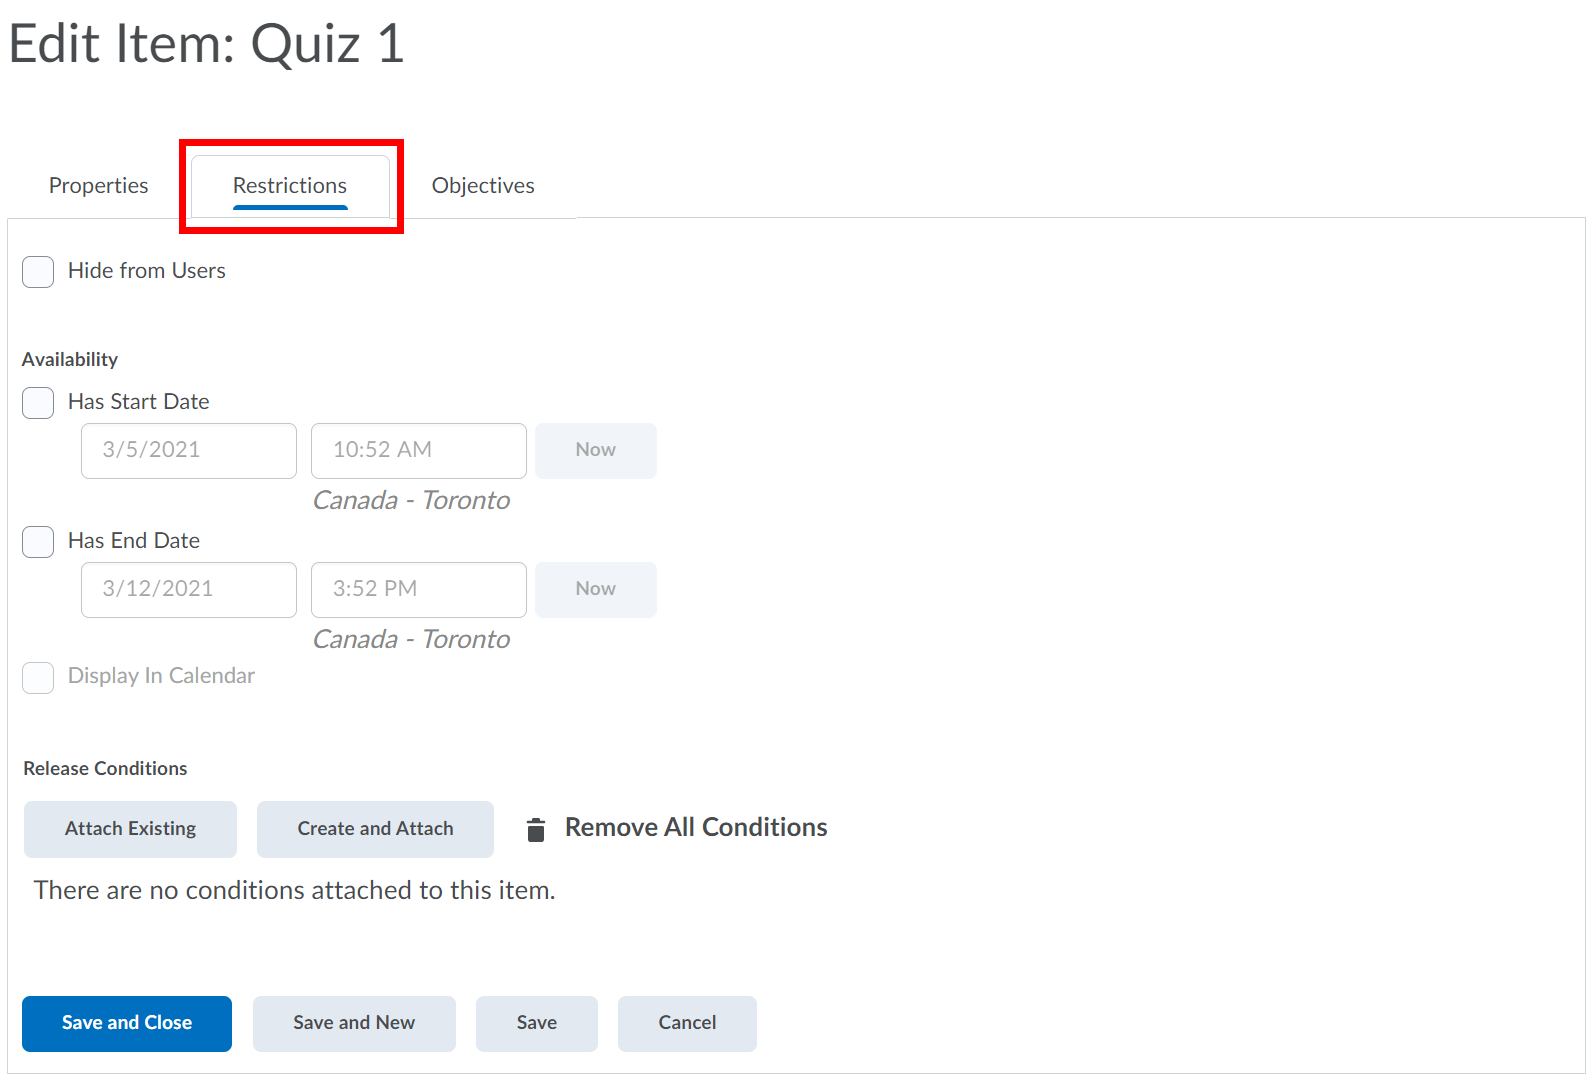

If you want to make the grade item available to selected users during a special time period, enter a Start Date and/or End Date in the Availability section. If you don’t want users to be able to see the grade item select Hide from Users.
Note: if you select "Hide from Users", that overrides the Start/End Date and it will remain hidden until "Hide from Users" is manually unchecked.If you add a start and/or end date you can select to Display in Calendar.
Click Save and Close, Save or Save and New.
...
Select Grades from the course navbar.
From the Manage Grades area, select the name of the category or item that you want to edit.
Select the Restrictions tab.
Under Release Conditions select either Attach Existing or Create and Attach.
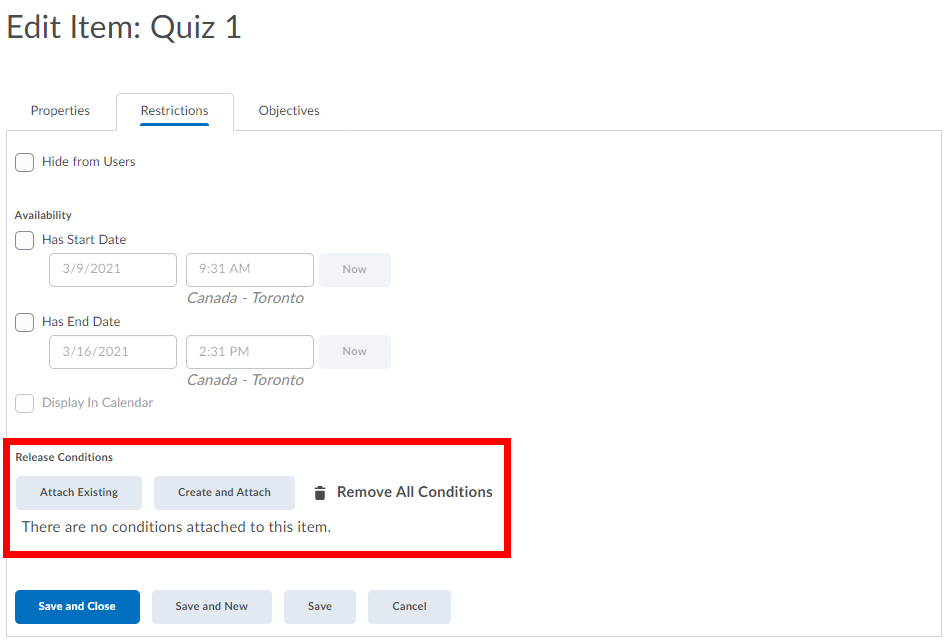

If creating a new one, select your condition type (e.g., Content Topic Visited -- students must read course requirements before marks will be released) and condition details and click Create.
Click Save and Close, Save or Save and New.
...
Select Grades from the course navbar.
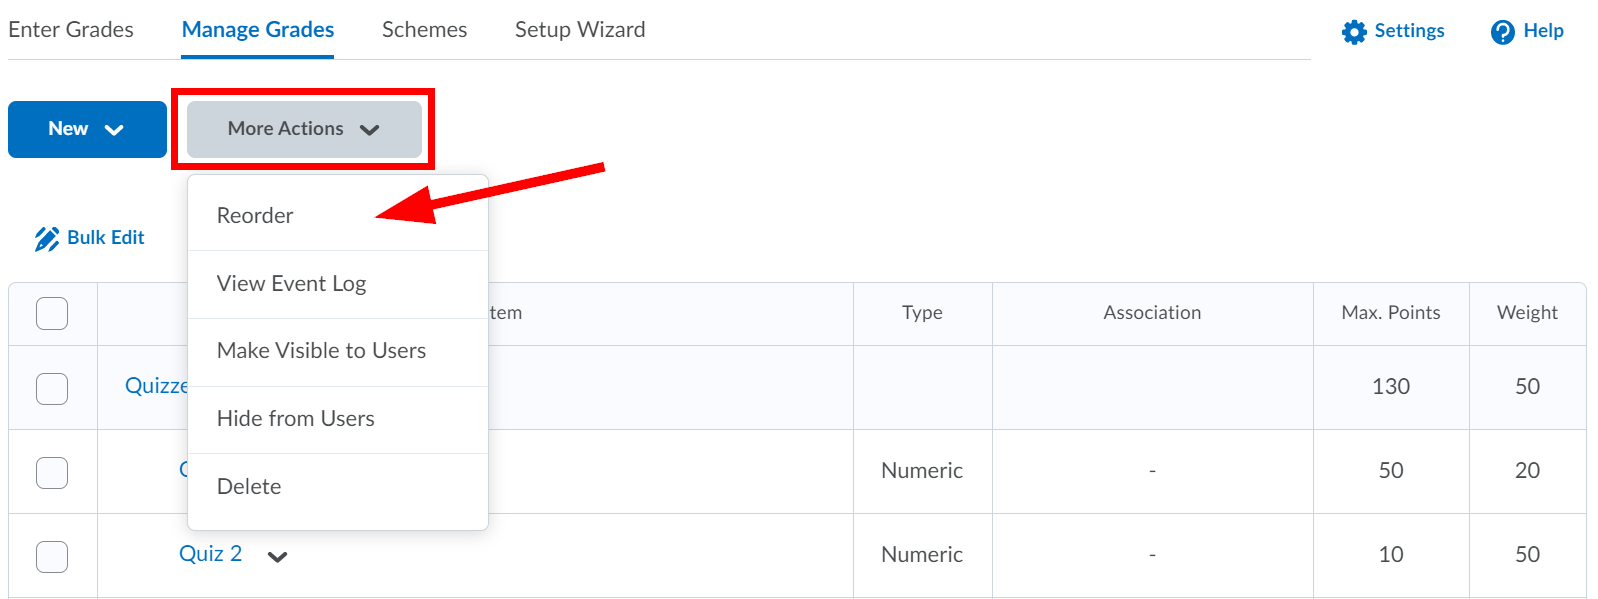
From the Manage Grades area, click the More Actions button and select Reorder from the drop-down menu.

Select a new position for a category or grade item using the Sort Order drop-down menu beside its name. The positions of other categories and grade items adjust accordingly.
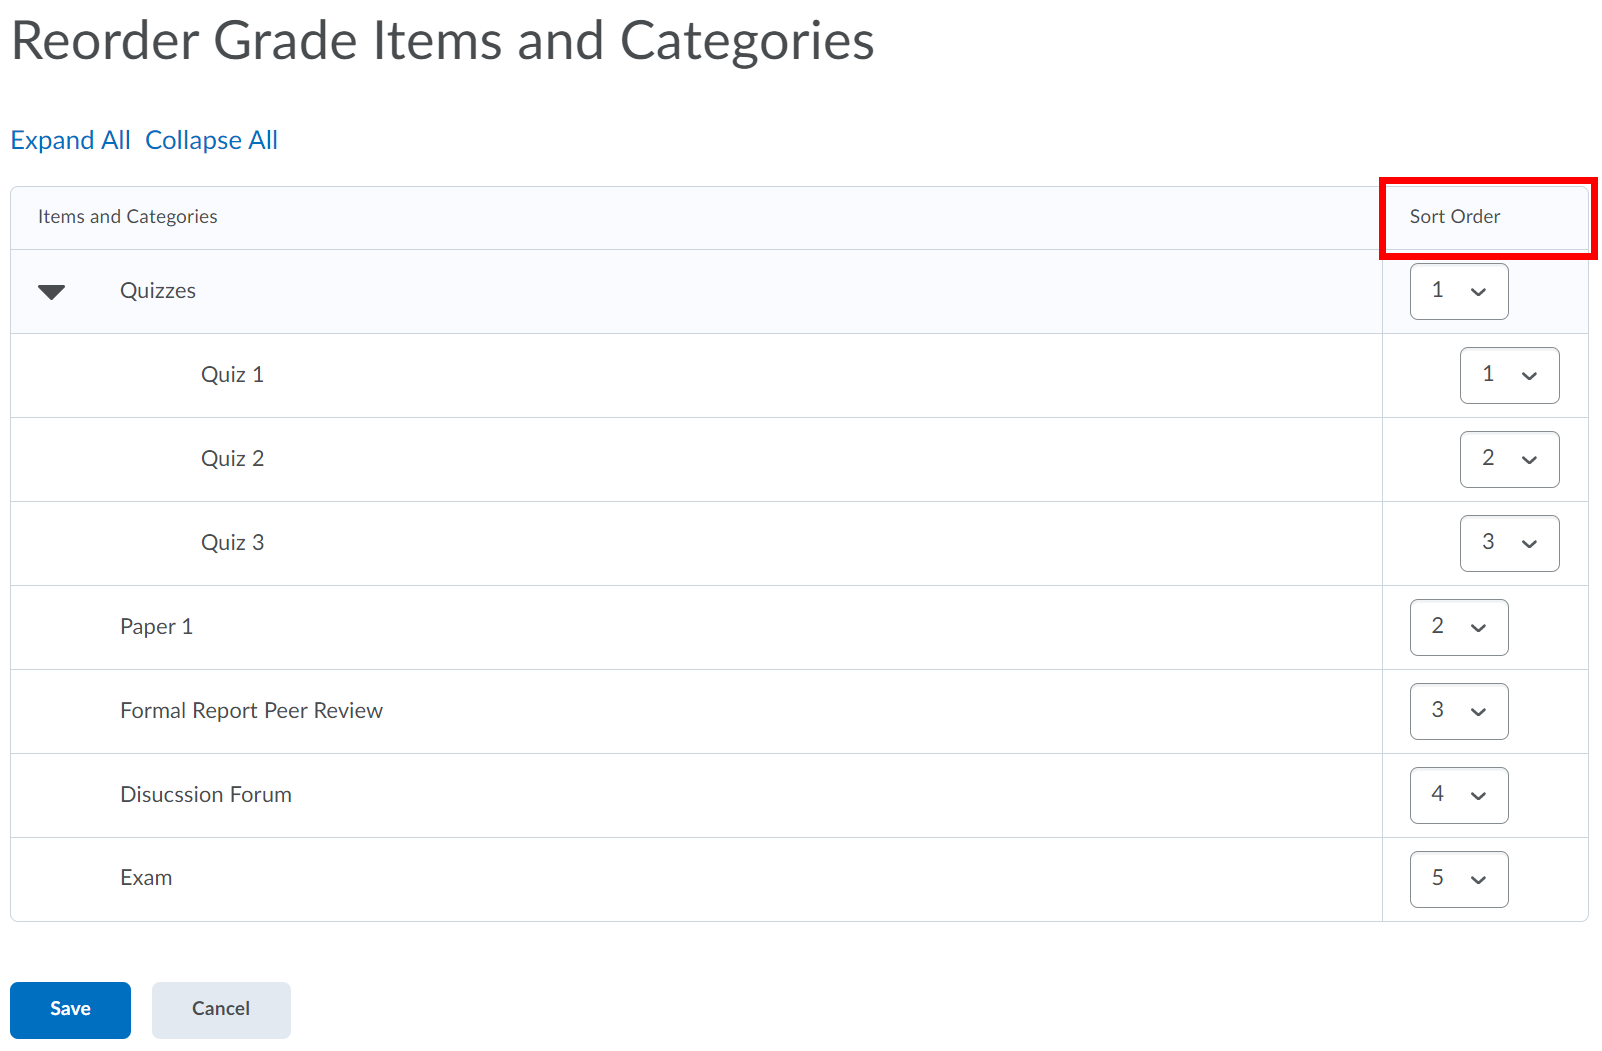

Click the Save button.
...
Select Grades from the course navbar.
From the Manage Grades area, click the More Actions button and select Delete from the drop-down menu.


Select the checkbox beside the category or grade item you want to delete. Selecting a category does not select the grade items that reside in it. If you delete a category the grade items associated with it become independent grade items.
Click the Delete button and in the Confirmation window click Delete again to confirm the deletion.
...
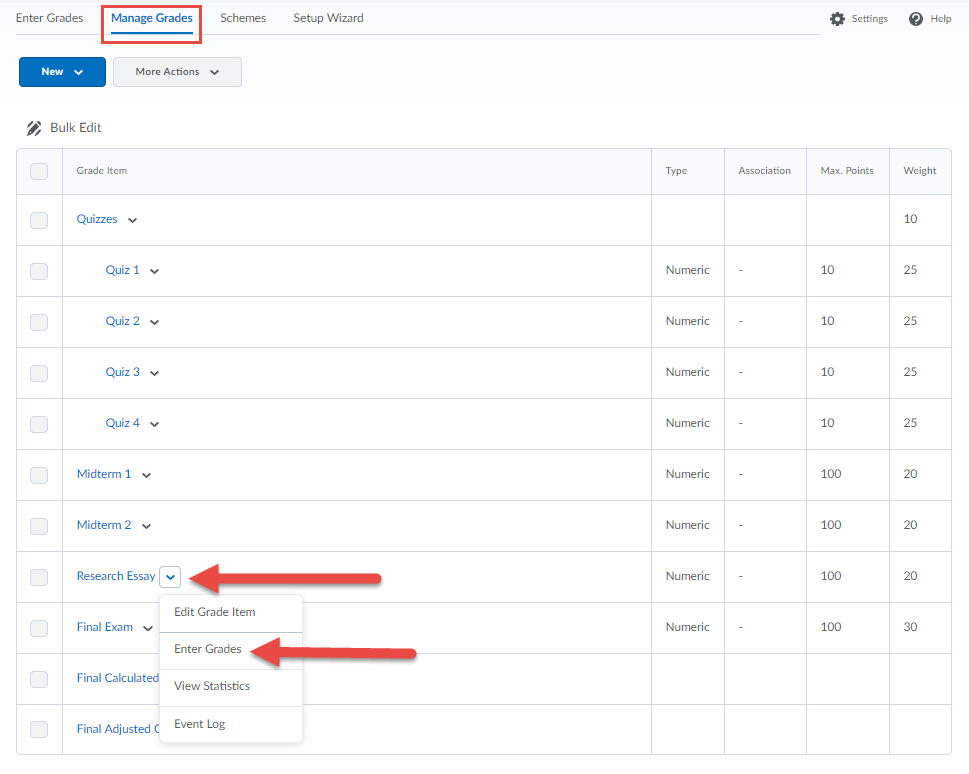
Select Grades from the course navbar.
From the Manage Grades area, click the down arrow beside the grade item you want to enter grades for and select Enter Grades from the drop-down menu.

OR
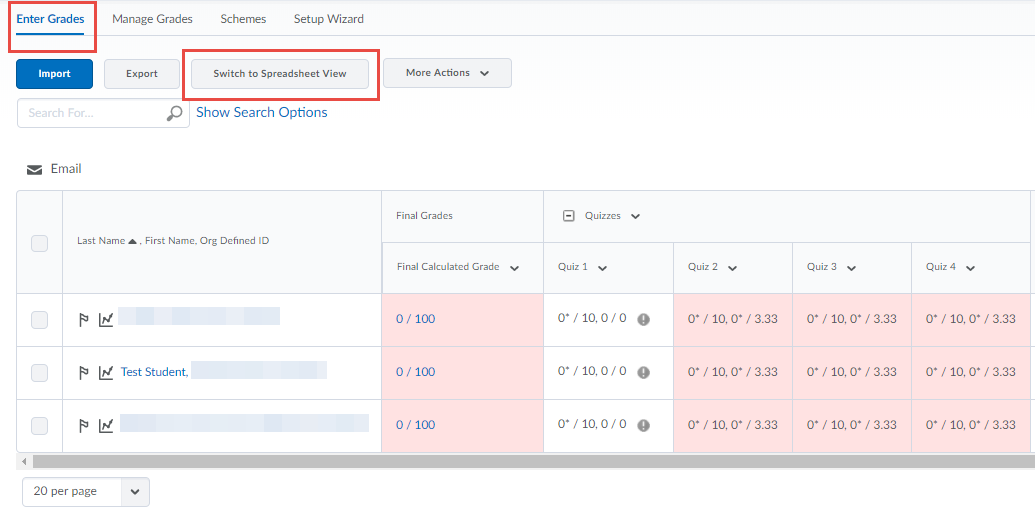
Enter grades using the spreadsheet view of the User List
Select Grades from the course navbar.
Select the Enter Grades tab from the upper left-hand corner.
Click the Switch to Spreadsheet View button.

OR
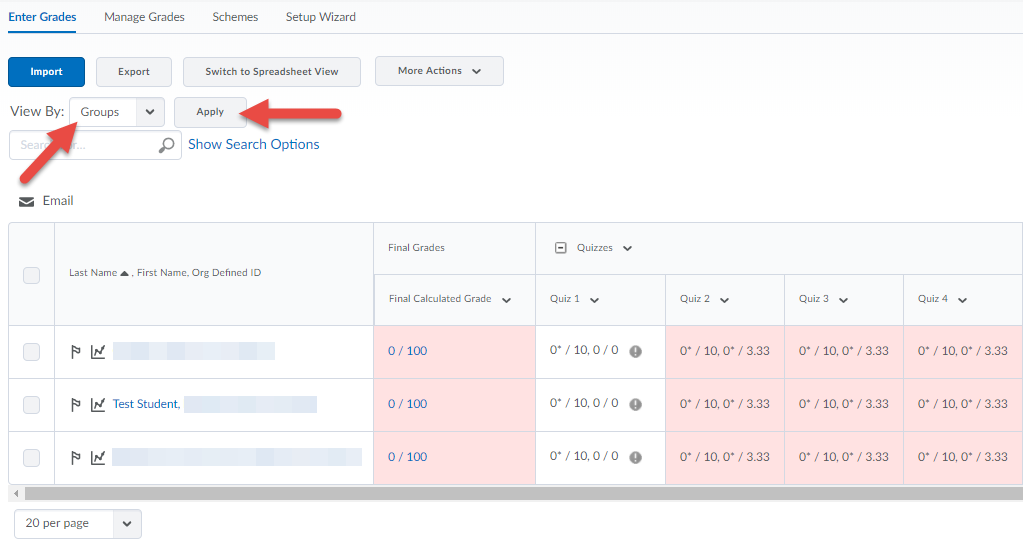
Enter grades by user or group
Select Grades from the course navbar.
Select the Enter Grades tab from the upper left-hand corner.
Use Search For: to locate a specific student or you can increase your view per page from the default 20 to a larger number.
Use the View By filter to restrict your view by section or group. You must select Apply to invoke the filter.

Exempting a Grade Item for a Student
...
Open your file from Step One
Make sure column A contains the usernames and add the title “Username” to cell A1.
Copy the grade item heading from the gradebook export file (from Step Two) and paste it into the first row of column B, cell B1 (which should contain the raw scores).
Add the End-of-Line Indicator to the first row of the third column, cell C1.
Populate each row with a number sign (hash mark). The easiest way to do this is to add a number sign into cell C2 then, hold down the mouse button to select the remaining rows in column C until you arrive at the last student then press Ctrl+D to autofill the cells.
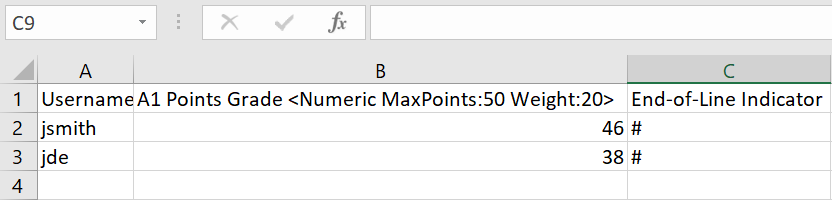

Save the CSV file.
...
Select Grades from the course navbar.
From the Manage Grades area, click the down arrow beside the grade item’s event log you want to view and select View Event Log from the drop-down menu.


Submission icons for reviewing grades
...
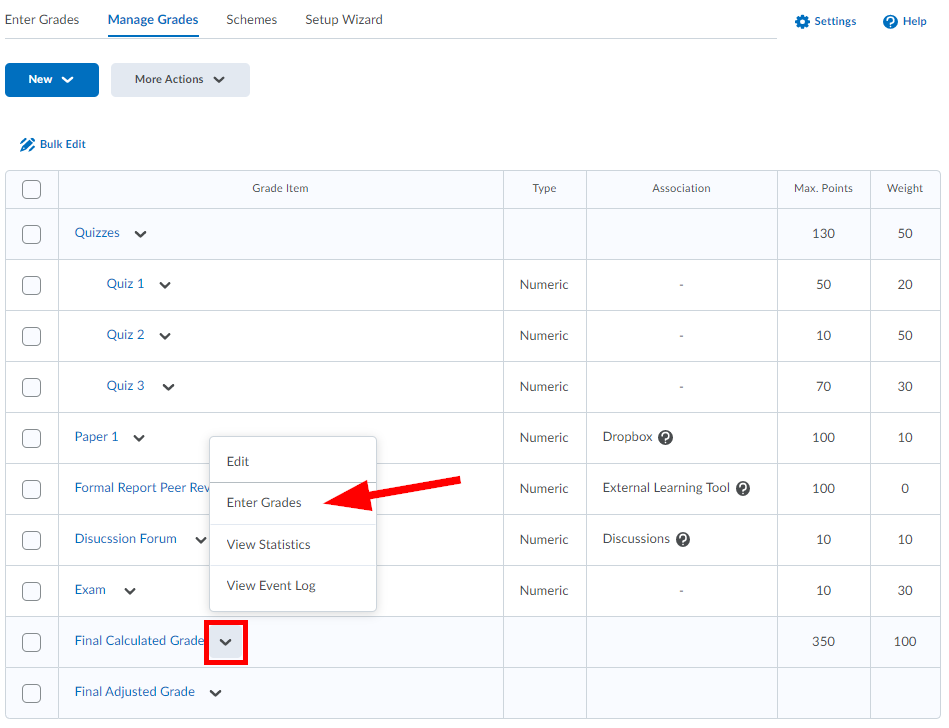
Select Grades from the course navbar.
From the Manage Grades area, select the down arrow beside Final Calculated Grades and select Enter Grades.

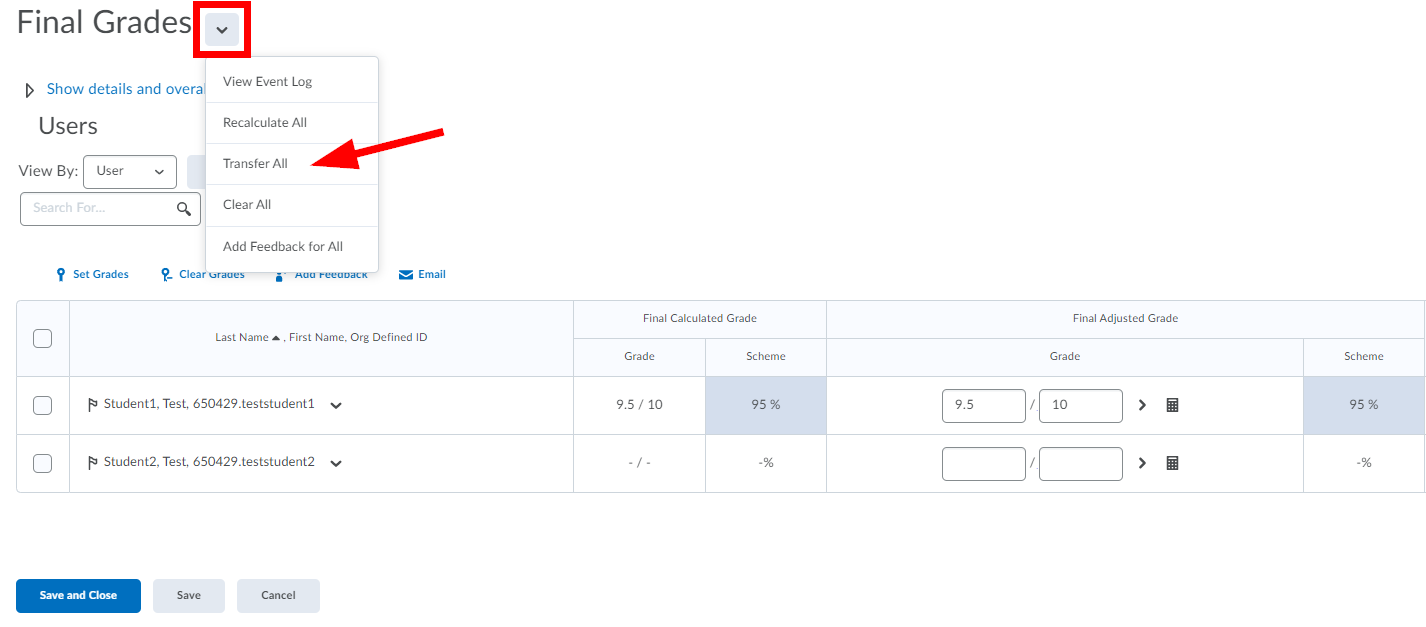
From the Final Grades page, select the down arrow and select Transfer All. This will transfer all final calculated grades to adjusted final grades. Any manually entered adjusted grade will be overwritten by this action.

Step Two:
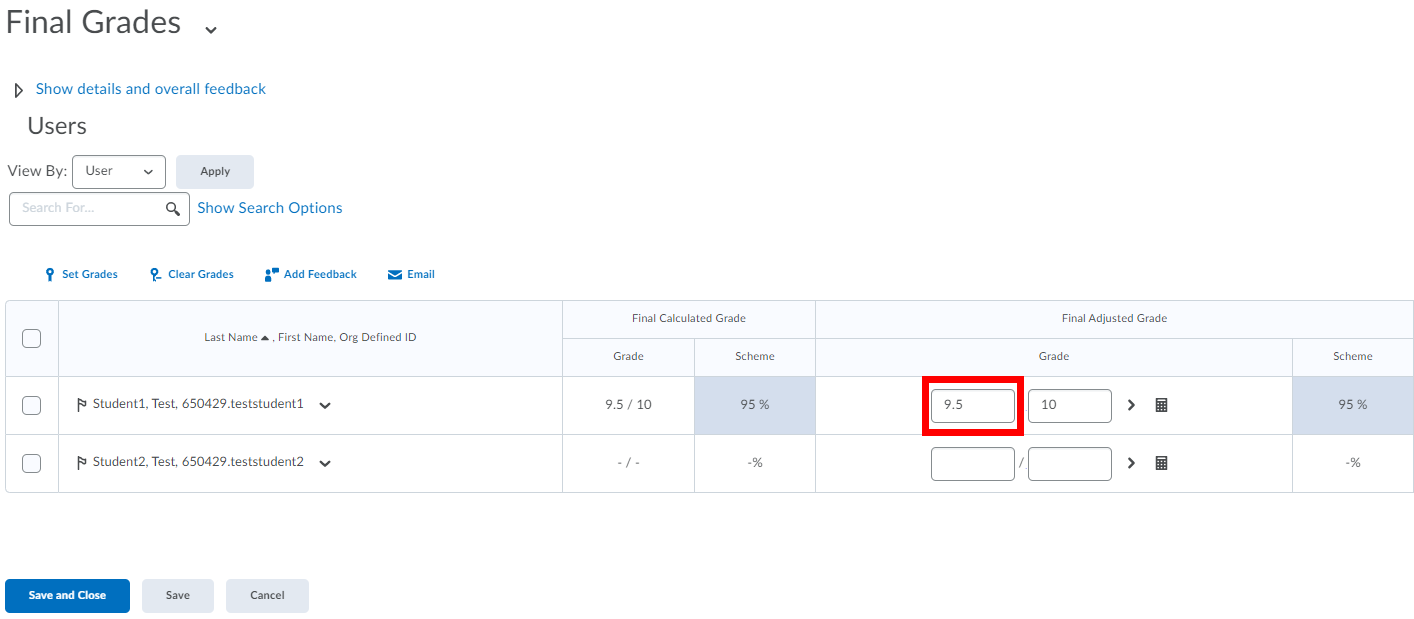
This step is only necessary if there are students whose Final Calculated Grade needs to be adjusted to reflect a different marking scheme or requires alterations.
A grade may be manually adjusted by replacing the existing mark with the new mark (just over striking it).

OR
The software can recalculate the final grade based on a different grade item configuration by selecting the calculator icon across from the affected student.
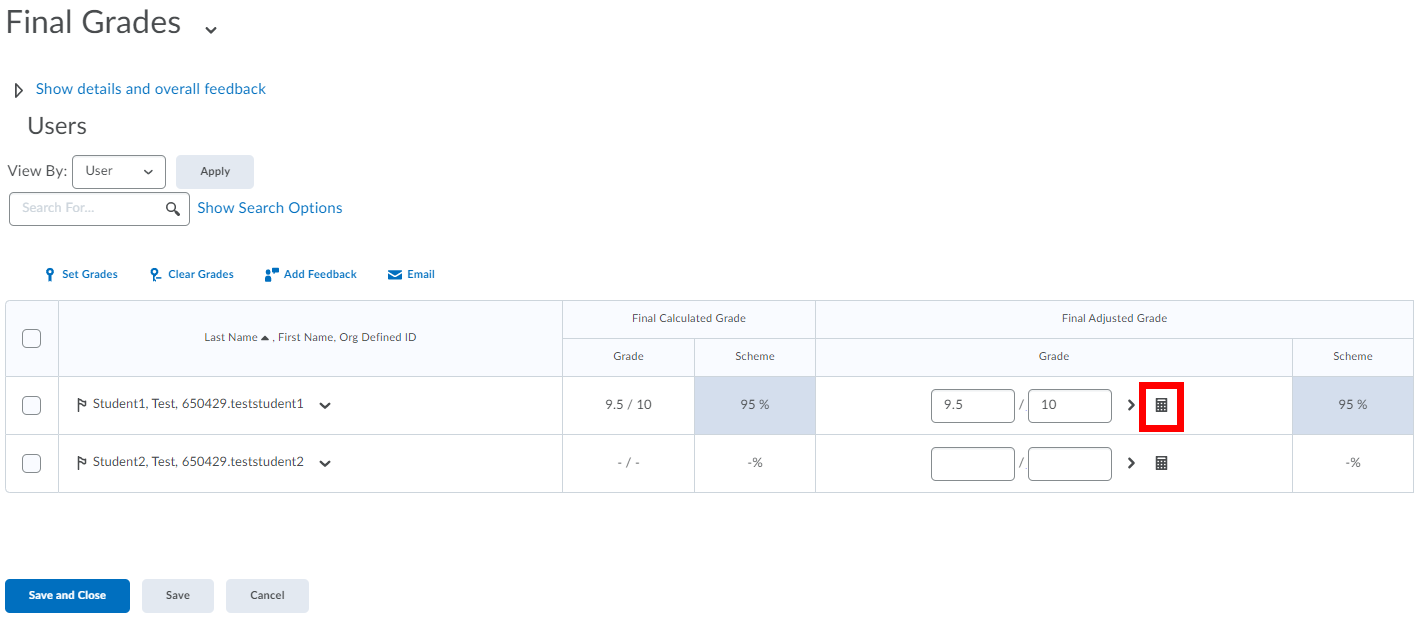

In the example below, the student missed taking the first quiz, so the software will recalculate the grade without including the first quiz. Click on the Calculate button to transfer the newly calculated grade to the gradebook. The gradebook will skew the remaining grade items to produce a new final grade.
...
Select Grades from the course navbar.
Select the Enter Grades tab from the upper left-hand corner.
Click the Export Adjusted Final Grades for Quest button.
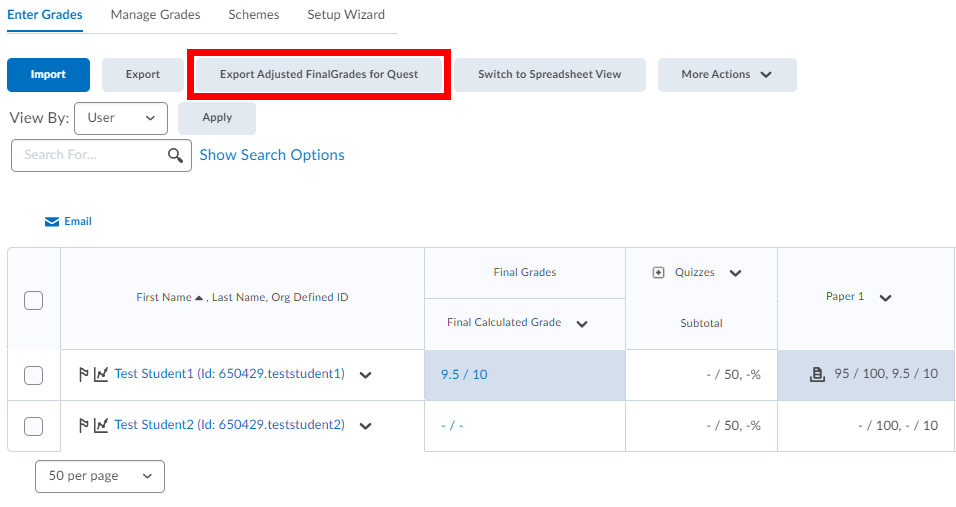

A window will appear with a hyperlink containing the file. Click on the hyperlink. Save this file onto your machine with a new name so that it can be easily identified in the future (e.g., SOC101FinalWinter2020.csv)
...
Select Grades from the course navbar.
Select the Enter Grades tab from the upper left-hand corner.
Click the Export button.
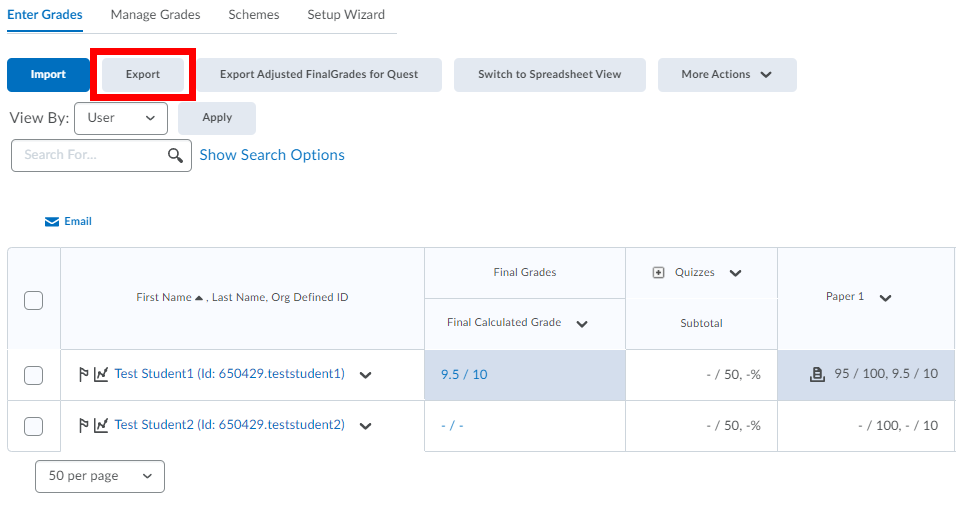

Click the Export to CSV button.
| Info |
|---|
Need help?Contact LEARNhelp at learnhelp@uwaterloo.ca or 519-888-4567 ext. 41744 for assistance. |
| Tip |
|---|
Article FeedbackIf you’d like to share any feedback about this article, contact LEARNhelp at learnhelp@uwaterloo.ca. |