...
See the Types of Groups to determine the options available and what will best suit your needs before creating groups.
Select Connect from the course navbar.
Select Groups.
Select New Category to begin creating groups.
Enter the Category Name (e.g. Research Groups, Presentation Groups) and a Description (optional).
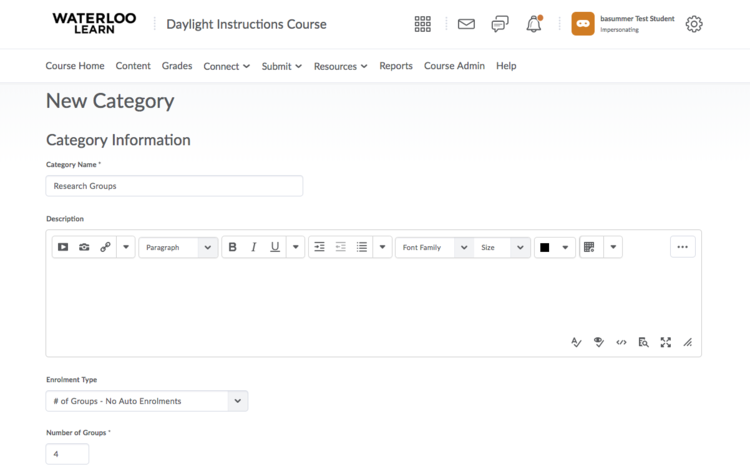
Select the Enrolment Type.
Enter the Number of Groups/Number of Users depending on the type of group you are creating.
The three Self-Enrolment group types have Groups Options for setting a Self Enrolment Start Date and/or Expiry Date. If an expiry date is set, there is an additional option to Allocate unenrolled users after the Self Enrolment Expiry Date.
If your groups will be created based on another, already created group like a lecture or lab section, choose the parent group from the Restrict Enrollments to drop-down menu.
Select the corresponding workspace(s) you would like to create by checking the box beside Set up Discussion areas or Set Up Dropbox folders.
Click Save.
Enrolling users in Groups
...
Modify or add an enrolment
Select Connect from the course navbar.
Select Groups.
Click the down arrow to the right of the Category Name and select Enrol Users.

Select whether you want to Display All Groups or a specific group.
Enter information in the Search For field to look for a specific user.
Enrol users or adjust enrollment by selecting or deselecting the checkboxes in the enrol users grid.
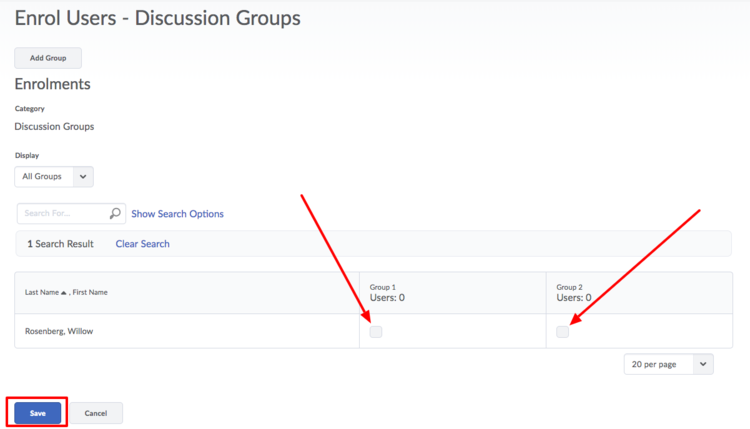
Click Save.
| Info |
|---|
Manually enrolling users allows you to exceed the enrolment limit for a group. |
...
When a user is deleted from a group, all of their files remain in the system, including Discussion messages and Dropbox folders.
Select Connect from the course navbar.
Select Groups.
Click the down arrow to the right of the Category Name and select Enrol Users.
From the Enrol Users page, clear the check box for the group beside the user’s name.
Click Save.
What users see in the Group Tools
...
| Filter by label (Content by label) | ||||||||
|---|---|---|---|---|---|---|---|---|
|
...