Important Note
Before using the Zoom in LEARN you must set up your UW Zoom account. If you have not done this yet please find the setup instructions on the Zoom help page.
In this article:
...
| Table of Contents | ||||||||||||||||||||
|---|---|---|---|---|---|---|---|---|---|---|---|---|---|---|---|---|---|---|---|---|
|
Adding the Zoom Widget to a LEARN Course Homepage
Log into learn.uwaterloo.ca and enter your LEARN course
...
.
Click the Course Admin tab.
Select the Homepages link.
If your Active Homepage is -- Default --, Course Default, or Two-Column Course Homepage, complete these steps to create your own homepage that you can modify.

Click the Down Arrow beside
...
Two-Column Course Homepage and click Copy
...
.
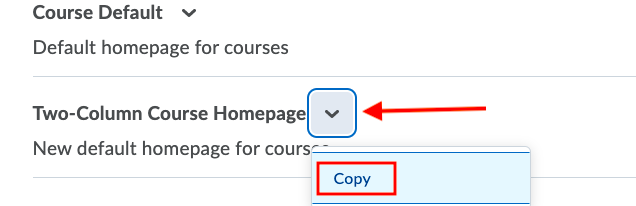
Under Active Homepage, select Two-Column Course Homepage - Copy, and click Apply.
Click the
...
title of your active homepage to edit it.

Scroll until you find the Widgets section of the page
...
. Click Add Widgets in the layout area you wish to place the Zoom widget in.
Scroll to the bottom of the list and select Zoom (LTI v1.3) and click Add.
...

Left click the Zoom widget and drag it
...
where you would like it on the homepage.

Click Save and Close
...
.
Accessing the Zoom Widget on LEARN
Log into learn.uwaterloo.ca
...
and enter your
...
LEARN course.
On the Course Homepage, scroll to find the widget named Zoom
...
(LTI v1.3) and click either on the image or on Click Here.
...

A new tab will open to the Zoom widget Upcoming Meetings tab
...
.
Scheduling a Meeting with the Zoom Integration
Open the Zoom widget from your course homepage
Click the schedule a meeting button on the top right

Select your desired settings for the meeting:
Topic: Title the meeting
Description (Optional): Provide a short description of the meeting topic
Date & Time: Select the date and time of the meeting and the duration
Recurrence: Choose if the meeting is recurring and indicate when it reoccurs
Registration- Select if registration will be required

Security- Enable security options
Waiting room: Host must manually admit participants into meeting
Only authenticated users can join: Participants must log into their UW Zoom account to join the meeting
Video: Choose if hosts and participants will start with their video on or off
Audio: Select your audio settings
Meeting Options: Enable meeting options
Join before host: Allow participants to join before host starts meeting
Mute participants on entry: Participants join the meeting muted
Use Personal Meeting ID: Use your PMI for the meeting instead of a randomly generated meeting ID
Record automatically: Recording will begin as soon as meeting is started
Alternative Hosts: Enter the email of a user who will have permission to start the meeting on the hosts behalf
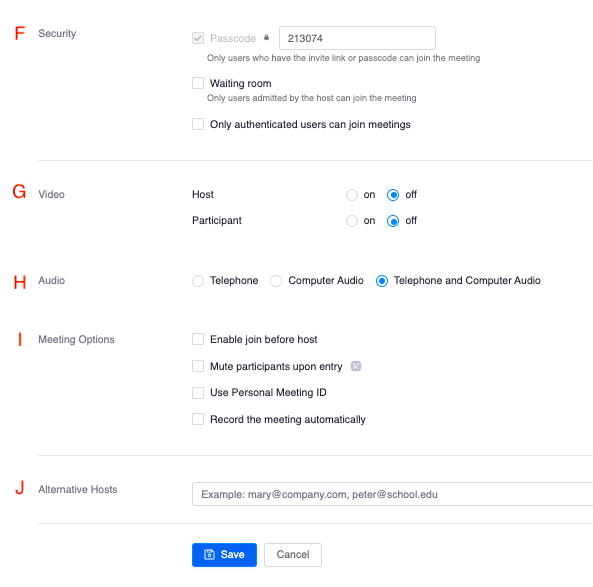
Click Save at the bottom of the page

The meeting will appear in the Upcoming Meetings tab in the Zoom widget on LEARN for all users enrolled in the course
Note: The meeting will appear in the hosts Zoom web portal. However, the meeting will NOT appear in student’s Zoom web portal. The meeting is only accessible to students within LEARN.Anchor
Co-teaching in the Zoom Widget
Click Schedule a meeting at the top of the widget window
Scroll to the bottom of the scheduling page to find the Alternative Host section
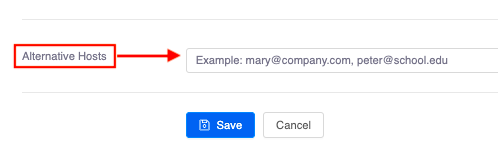
Type in the email of the user you want to assign alternative host
This user will receive a special link to start the meeting with and will be able to start the meeting on your behalf from the Upcoming Meetings tab in their Zoom Widget
...
Starting a Zoom Meeting in LEARN
Go to the Upcoming Meetings tab in the Zoom Widget
Locate the meeting you want to start from the list of scheduled meetings
...

Click the Start button on the left-hand side of the meeting
The Zoom meeting will launch in your desktop application
Note: If you have been assigned the Alternative Host role, you will be given the option to Join. If the host has not started the meeting, an alternate host clicking Join will start the meeting. Anchor
Adding a Scheduled Zoom Meeting to LEARN
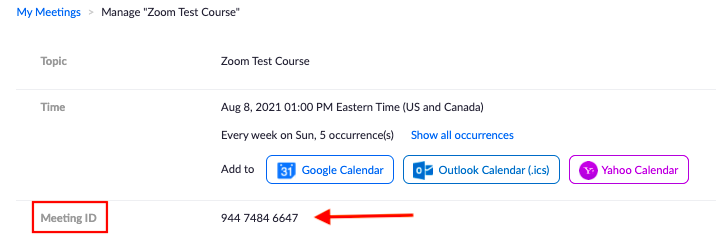
Log into uwaterloo.zoom.us and go to the Meetings tab
Copy the meeting ID of the meeting you want to add to a LEARN course
Go to http://learn.uwaterloo.ca and open the Zoom widget
Click the three dots beside Schedule a Meeting at the top right of the landing page
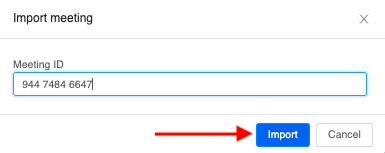
Click Import a Meeting

Paste the Meeting ID that you copied in step 2 and click Import
This meeting will now appear in your Upcoming Meetings tab in the LEARN course
Note: Meetings can only be associated with one course at a time.
Remove a meeting from LEARN without deleting the meeting
...
Open the Zoom widget on LEARN
Copy the Meeting ID of the meeting you want to remove from the course
...
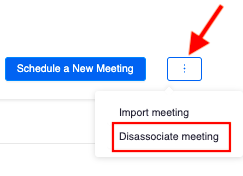
Click the three dots beside the Schedule a Meeting button.

Click Dissociate a meeting
...
Paste the Meeting ID you copied in Step 2 and click Dissociate
This meeting or meeting series will be removed from the LEARN course but remain in your Zoom web portal
Optional
Once dissociated, you can import this meeting into another LEARN course
...
Accessing Recordings in the Widget
Start the meeting you want to record
Click the Record button in the control panel and select Record in cloud
To access the recording after the meeting go to the Cloud Recordings tab in the widget

The recording will appear in all course members recordings tab
Note: The recording will automatically post to the LEARN Recordings tab for all course members no matter where the meeting was started (widget, desktop application or web portal).
...
Anchor
Limitations to the Zoom Widget on LEARN
Instructors cannot manually create Polls for Zoom meetings in LEARN. To work around this, instructors can access the meeting in their Zoom web portal and create the poll for the meeting there.
Instructors cannot Preassign Breakout Rooms for Zoom meetings in LEARN. To work around this, instructors can access the meeting in the Zoom in the web portal and preassign the breakout rooms for the meeting there
Instructors cannot edit single occurrences in meeting series’ in LEARN. To work around this, instructors can access the meeting in the Zoom web portal and click the occurrence they want to edit. Users will be prompted to “Edit this Occurrence” or “Edit entire Series,” they will click “Edit this occurrence” and make the desired changes.
...
| Filter by label (Content by label) | ||||||||
|---|---|---|---|---|---|---|---|---|
|
| Info |
|---|
Need help? |
| Tip |
|---|
Article feedbackIf you’d like to share any feedback about this article, please let us know. |