The WebEx Events
WebEx Events is intended for webinars and similar online events with very large audience.
To schedule a WebEx Event:
- Login at uwaterloo.webex.com with your UW credential (watiam@uwaterloo.ca)
- Click on WebEx Events in the bottom left corner of page (may be abbreviated as WE)
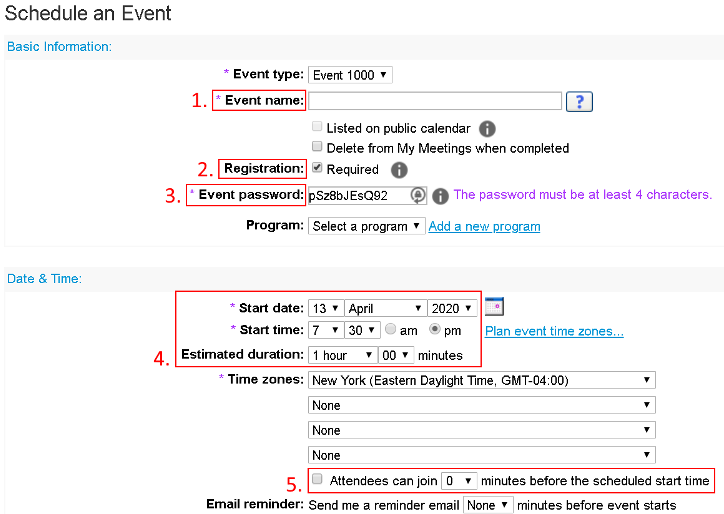
- Clicking on Schedule an Event from the menu on the left takes you to the following page:
- Enter the name of your event
- Select this if you want attendees to register for the event
- Recommended to make password something easy to remember
- Choose date, time, and estimated duration (Note: you can start and stop the event at any time, this is a guideline for calendars)
- Recommended to allow attendees to join 5-10 minutes before start time
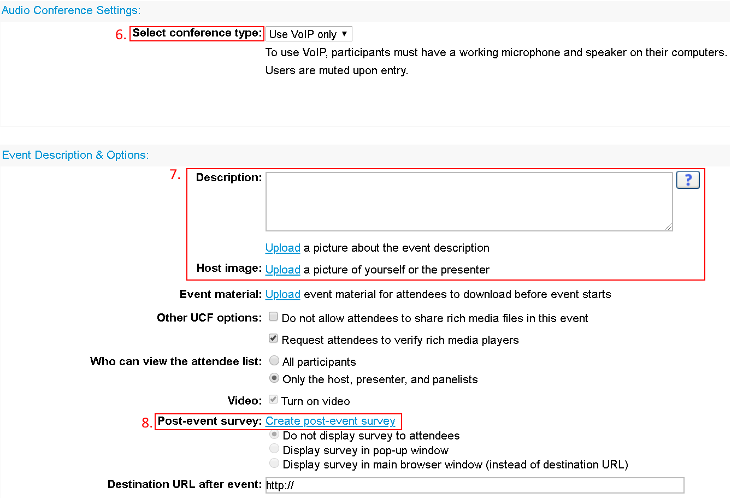
- Make sure “Select conference type” is set to Use VoIP only
- Optionally create a description and/or upload photos for the event
- Optionally create a survey for the attendees after the event (see Registration for question customization – uses the same format/method)
Registration
Scrolling lower on the schedule brings you to the “Attendees & Registration” section. You can Create Invitation List if you have a .csv file containing the names and emails of those you wish to invite as attendees. (other invitation methods later on)
If you enabled registration, you can customize the form by clicking where it says “Click here to customize your registration form” to bring up this page: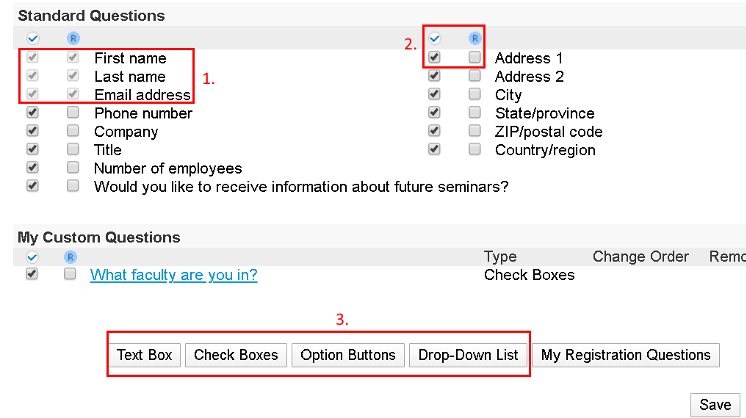
- The minimum required registration questions are first name, last name, email
- 1st checkbox = question included on form 2nd checkbox = answer required to register
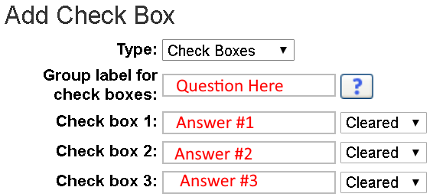
- Click to create a custom question, each option determines the type of question, clicking opens the following window where you enter the questions (and answers if required)
After completing the form, leave the remaining registration options as is.
Presenters & Panelists
Next you can click on Create Invitation list for panelists.
From here, you can type the names and emails of those you wish to present and click “Add to invitation list”.
These people will be able to join the event with a panelist role (Note: you can grant people panelist roles during the event so this invitation is optional).
Scheduling
When you’ve finish setting things up, click Schedule This Event in the bottom right corner.
You can then send out automated invitation emails to panelists/attendees.
Event Information Page
After scheduling the event, you are redirected to the event page. (You can also access this page by clicking on the event in the “Meetings” page from uwaterloo.webex.com)
- This is the link you will send to attendees. Clicking this link will take them to the registration page and/or the join event page. Anyone with this link will be able to attend the event.
- This link is for people who are joining as panelists. (Note: they must have been added to the Invitation List for Panelists in order for this link to work)
- Clicking Start Now will open WebEx Events and let you start the event
WebEx Events Interface
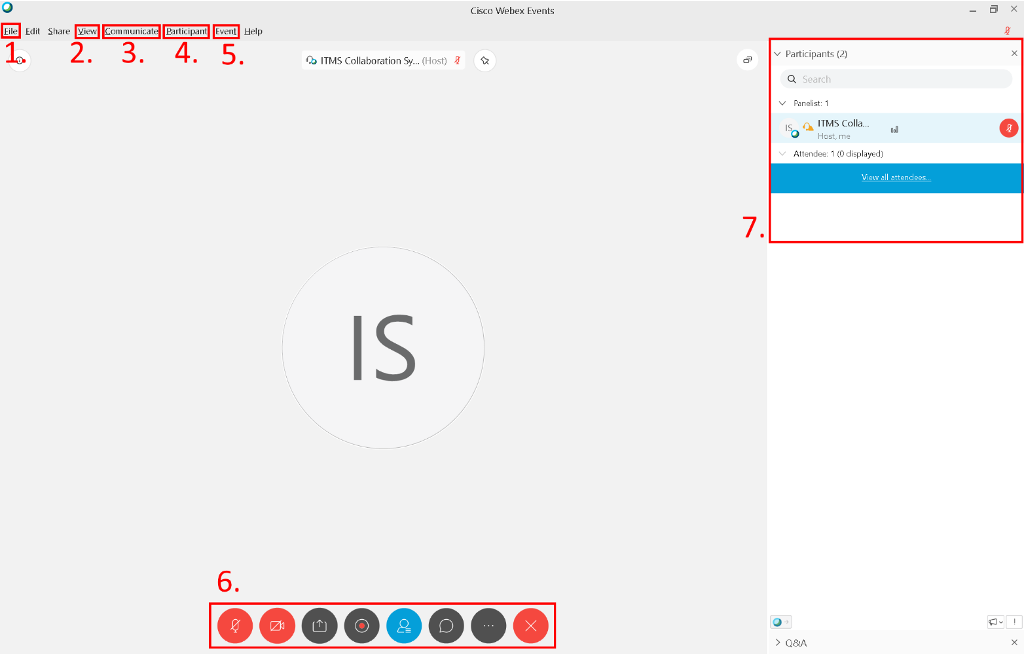
WebEx Events (the following image) is where you’ll be conducting the event. The main components are: The navigation bar along the top (1-5), the content viewing area (middle of the screen), the event controls (6), and the panels (7)
Use Save and Open for polls, chats, Q&As to save them as text files on your computer
Hover over Panels and click Manage Panels to bring up the menu on the right.
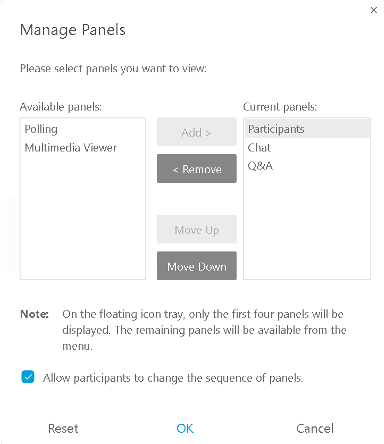
Here you can choose which panels are active for you and your attendees.
The “available panels” are panels that can be activated and the “current panels” are active by default
Make sure you uncheck “Allow participants to change the sequence of panels”
Start Practice Session so panelists can talk and share content without the attendees being able to see or hear anything
Event Controls (from left to right
Mic – Mute or unmute microphone
Webcam – Enable or disable webcam
Share – lets you share content (good for presentations with dynamic content)
Recorder – Allows you to record the event (make sure “Record in cloud” is selected
Participants – Hides or displays the participants panel,
Chat – hides or displays the chat panel
Three-dot icon – Shows additional panels along the top and some other options (pictured right)
End/Leave – As a host this lets you end the event, forcing everyone to exit and closing your application. Attendees can use this to simply leave the event.
This is where any displayed panels will appear. By default only the participants panel will be displayed fully with the Q&A panel is closed at the bottom. Other panels (Chat, Polls, etc) will have to be opened from Event Controls.
Participants – This shows a list of everyone currently attending the session. It is separated by Panelists, people who can use webcams, mics, and share content, and Attendees, people who can watch, listen, and ask Q&A questions but cant speak or share content.
Only one panelist can share content at a time, they are designated by the icon.
You can right click on someone to Change their role, Mute, or Private chat .
You can click “View all attendees…” to view everyone attending the session
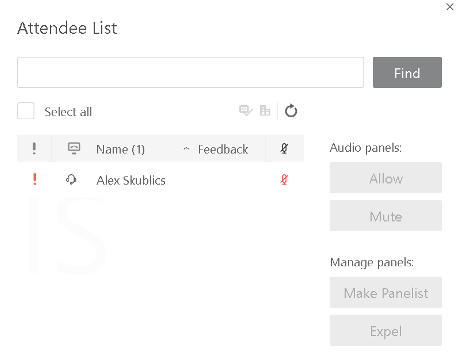
From here you can change their audio rights, give them the Panelist role, or expel them completely from the event
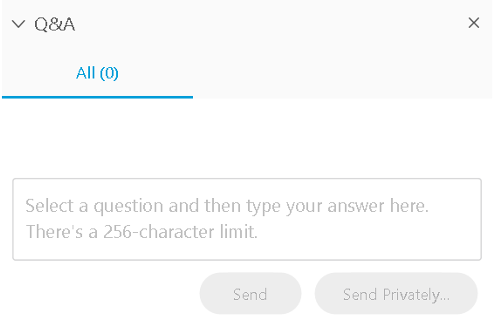
Q&A – This panel is for attendees to ask questions to the panelists. It allows for an organized communication of questions and answerings. Attendees simply type in and send a questions and panelists click on a question to type an answer. Pictured below is the Q&A panel from the attendee perspective (LEFT) and the panelist perspective (RIGHT)
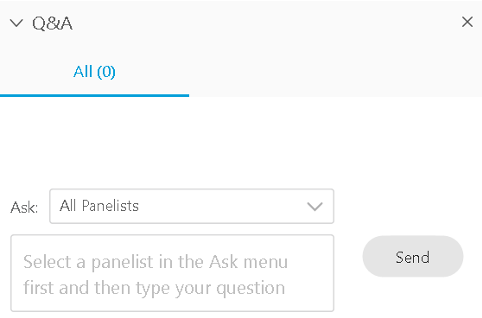
 .
. is designed to provide webinar functionality where presenter’s audio/video and slide presentation are broadcasted. Events can host up to 3000 participants.
Participants can ask questions via chat and hand raising.
The key features of WebEx Events include:
- Instructor’s audio/video
- Slide Presentation/Whiteboard
- Distributed multimedia link
- Chat public or private
- Mute/unmuted audience microphones/cameras
- Panelists for moderation
- Registration in advance
- Post event surveys
- Role assignments
- Recordings
Related articles
| Filter by label (Content by label) | ||||||||||||||||||
|---|---|---|---|---|---|---|---|---|---|---|---|---|---|---|---|---|---|---|
|
| Page Properties | ||
|---|---|---|
| ||
|
| Info | ||||
|---|---|---|---|---|
| ||||
Contact the IST Service Desk at helpdesk@uwaterloo.ca or 519-888-4567 ext. 44357. |