| Info |
|---|
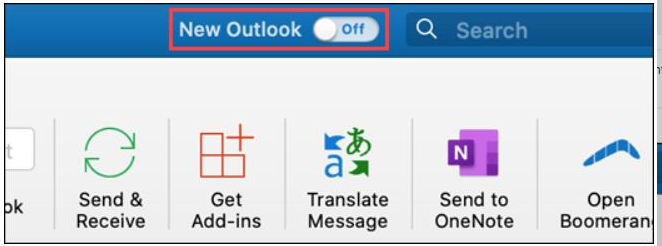
Outlook for Mac users are not able to use the "new" Outlook if they have a shared account in Outlook. For more information, please see this article.
Contact IST Service Desk or your computer support rep if you need help to meet the above requirements. |
...
Instructions for Connect (on-prem) Shared Mailboxes
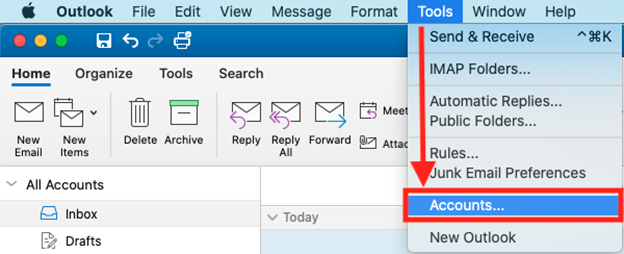
Open Outlook for Mac.
Click Tools on the menu bar, and then click Accounts… from the drop-down list.
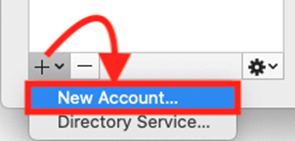
Click on the plus sign button near the lower-left corner, and then click New Account… from the pop-up menu.
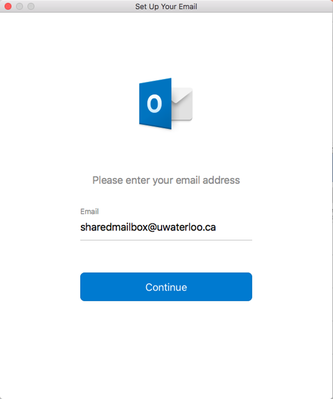
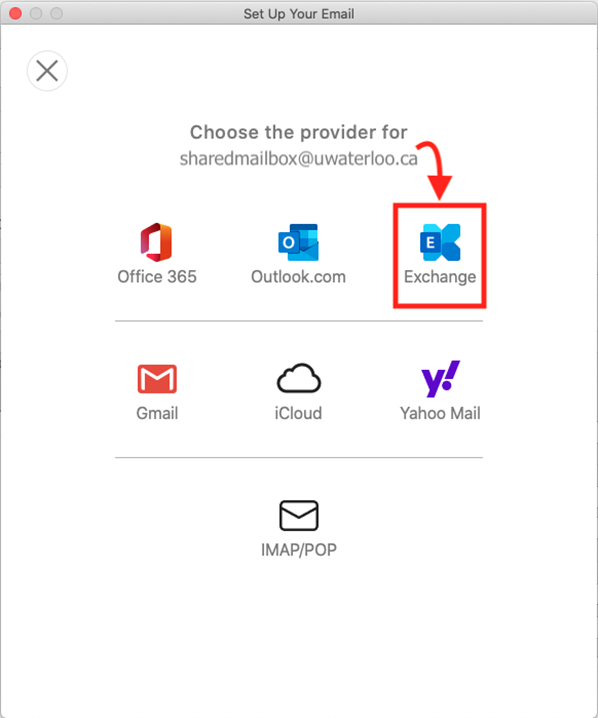
Type in the 8-character username of the shared mailbox (i.e. sharenam@uwaterloo.ca) and then click the Continue button.
Click on Exchange (top row at right) at the “Choose the provider for…” prompt.
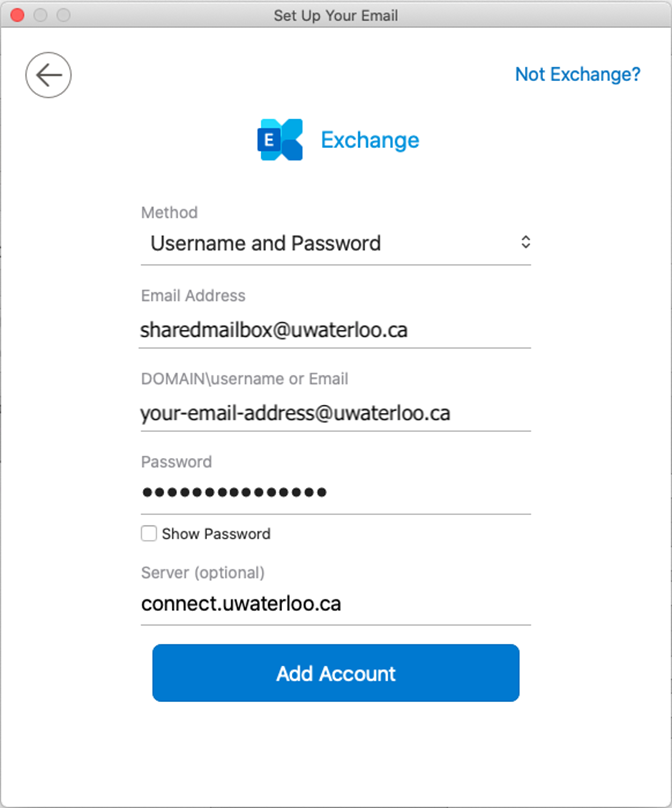
Enter the following in the “Set Up Your Email” window (Username is your 8-character username, i.e. j25rober) and then Click the Add Account button
Leave “Method: Username and Password” as it appears
Leave “Email Address” as it appears.
DOMAIN\username or mail: enter your username@uwaterloo.ca (e.g. j25rober@uwaterloo.ca). Note the DOMAIN prefix isn't required.
Password: your UWaterloo password
Server (optional): connect.uwaterloo.ca
You will see a message prompt that your shared mailbox has been added. Click the “Done” button near the bottom of the window to return to the Accounts window.
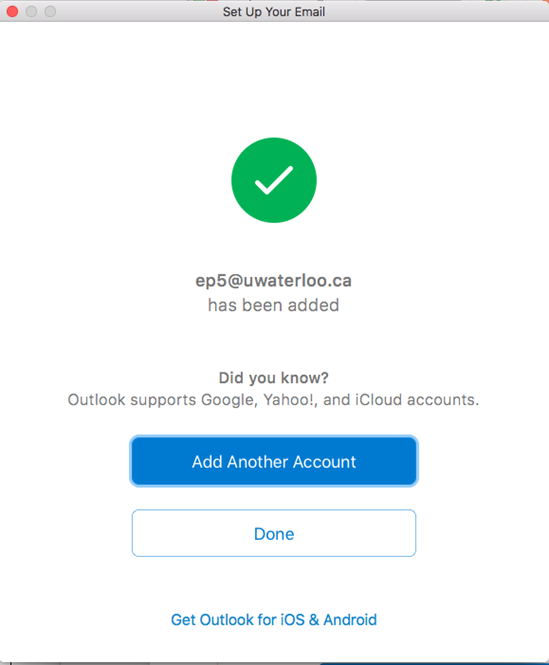
Close the Accounts Window.
The next time you click on the “New Email” button, you will be able to choose which account you want to use to send a message by clicking the “From:” drop-down list.
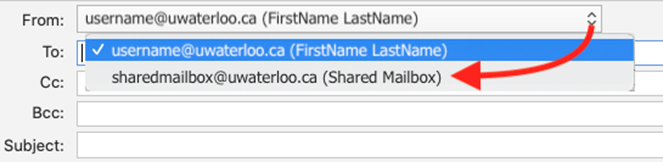
Try sending a test message from the shared mailbox to ensure the account is working properly.
| Info |
|---|
NoteIf you see the Outlook was redirected to the server autodiscover... dialog box:
|
...
| Filter by label (Content by label) | ||||||||||||||||||
|---|---|---|---|---|---|---|---|---|---|---|---|---|---|---|---|---|---|---|
|
| Info |
|---|
Need help?Contact the IST Service Desk online or 519-888-4567 ext. 44357. |
| Tip |
|---|
Article feedbackIf you’d like to share any feedback about this article, please let us know. |