...
Part 1: Adding and Sharing Content in OneDrive
Go to your UWaterloo
...
microsoft365.com account and select your OneDrive.
Under My files, select +New and Folder. Name your folder CourseCode###-shared, or similar (i.e., ECON101-shared).
Hover over the new folder, click on the three vertical dots, and select Manage Access.
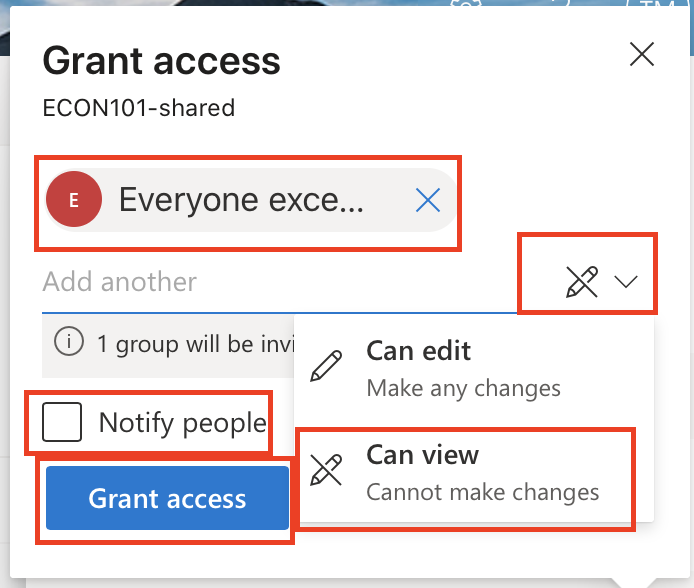
Click on + beside Direct Access, type “Everyone except external users”.
Change to Can view.
Uncheck Notify People.
Select Grant Access.
Now, files you add to this folder can be shared with your students and other members of the university.
Part 2: Add Your PowerPoint
Select Upload and upload
...
the PPSX/PPTX files you would like to share with students.
Select the three vertical dots beside your new file, select Open and Open in browser.
In PowerPoint, select File, Share, and then Embed. Select the dimensions (usually the largest).
Copy the embed code at the bottom of the window.
Part 3: Adding File to LEARN Content
Open your LEARN course. Here, we will create a page for your presentation and use the Embed Code copied from Part 2.
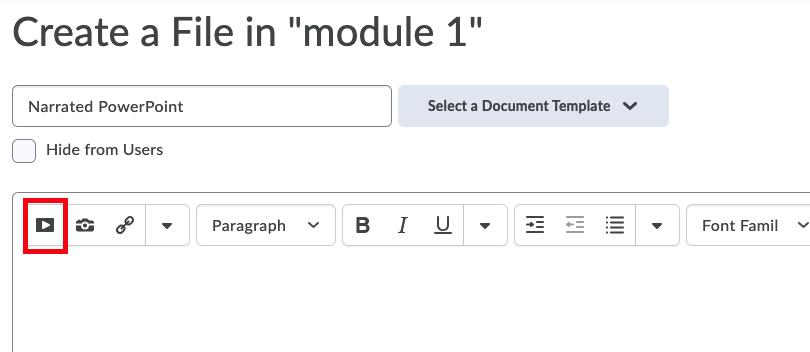
Go to Content, select the module, click Upload/Create and select Create a File.
Enter a Title for your presentation.
Select “Insert Stuff” (the play icon) in the editor menu bar.
Select Enter Embed Code.
Paste the embed code you copied in Part 2 and select Next. You will now see your presentation.
Click Save and Close.
Your students can now watch your presentation in your LEARN course. You can repeat this process for any further presentations.
...