| Info |
|---|
To add a shared mailbox it is necessary to have all of the following:
Contact IST Service Desk if your account does not meet the above requirements. |
...
| Info |
|---|
NOTE: If you are using new Outlook please follow this steps: https://uwaterloo.atlassian.net/wiki/spaces/ISTKB/pages/43898929265/Adding+M365+Shared+Mailbox+in+New+Outlook+that+is+shared+with+you#Adding-a-shared-mailbox-to-new-Outlook |
Adding a shared mailbox to Outlook
...
(Classic)
Open Outlook (Classic).
Click on the File tab in the ribbon.
Click on the + Add Account button.
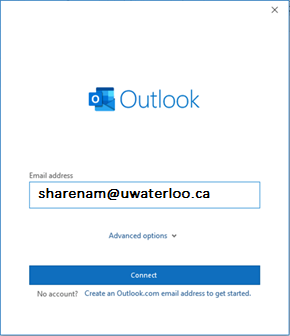
Type the 8-character username of the shared mailbox @uwaterloo.ca (i.e. sharenam@uwaterloo.ca), then click Connect button.
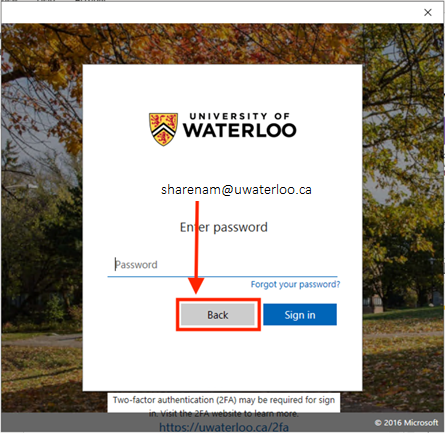
Click the Back button at the window prompting you to type the password for the shared mailbox email address. Do not enter a password here as you will use your own credentials for authentication (as described in #6) .
Edit the username to match your own 8-character username@uwaterloo.ca* (i.e. myuserna@uwaterloo.ca), then click the Next button.
*Be sure to use your own username@uwaterloo.ca and not a friendly email address.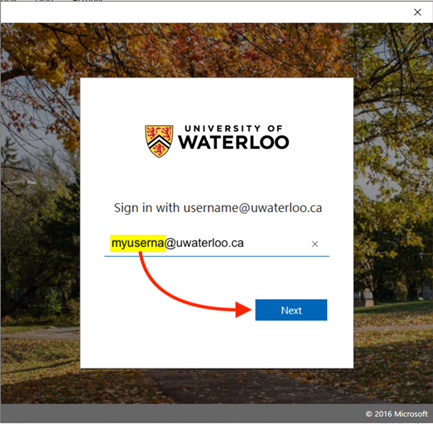
Enter your password and then click the Sign in button.
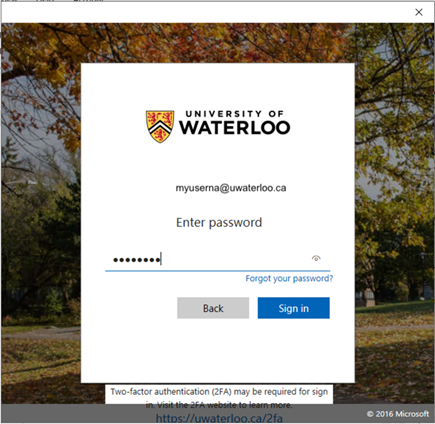
Complete the DUO 2-Factor Authentication.

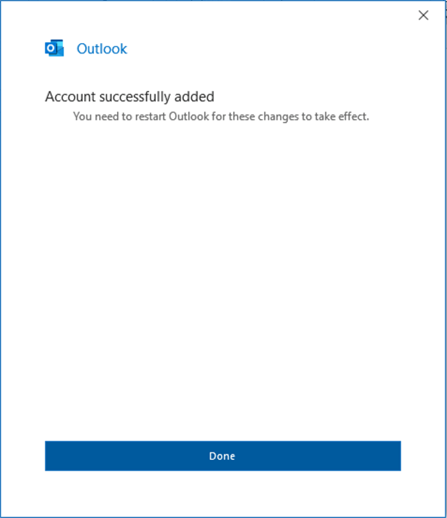
Click the Done button.
...
Close the Accounts Settings window and then close the Outlook desktop app. Wait about 5-10 seconds and then open the application.
To access the Shared Mailbox folders; scroll down the folder navigation list (the left column of the Outlook window) to locate the account that was added. Click on the arrow at the left of the account name to expand the folder list.
Adding a shared mailbox to Classic Outlook using Windows 11
| Info |
|---|
NOTE: If you are using new Outlook please follow this steps: https://uwaterloo.atlassian.net/wiki/spaces/ISTKB/pages/43898929265/Adding+M365+Shared+Mailbox+in+New+Outlook+that+is+shared+with+you#Adding-a-shared-mailbox-to-new-Outlook |
NOTE: Windows 11 currently defaults to use Outlook (New), if you want to use Outlook classic follow below steps and add shared mailbox:
Type “ Outlook ” into the search field on the Taskbar and then select “ Outlook (Classic) > Open ” from the search results.
...
Once Outlook (Classic) is open on a Windows 11 machine the setup of a shared account follows EXACTLY the same steps as described for Windows 10.
Pin Outlook (Classic) to your Taskbar and set it as the default email application.
Click File at top, then Account Settings, and Account Settings again.
...
Select your own UW email. Click Change button above it.
...
Click More Settings, then Advanced tab.
...
Beside the "Open these additional mailboxes", click Add button.
...
Type in the email address, ex. sharedemail@uwaterloo.ca
...
Click OK, Apply, and OK again (Outlook might freeze a bit while it loads).
...
.
To send email:
In the compose message window, click From menu and pick Other Email Address.
...