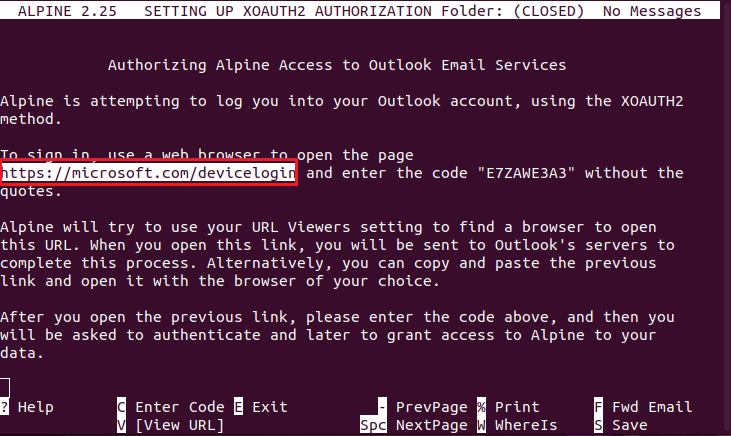
These are instructions on how to set up your Linux system to be able to download, unpackage, compile, and set up your Alpine program for use with your UWaterloo email address using OAUTH2 authentication.
noteThe instructions are for personal UWaterloo accounts or UWaterloo generic accounts that authenticate with the generic account password, ie. not for shared mailboxes.
The instructions are for personal UWaterloo accounts or UWaterloo generic accounts that authenticate with the generic account password, ie. not for shared mailboxes.
You will need to make sure that you are using a version of Alpine (2.24 or higher) that supports OAUTH2 authentication. You can verify this by running the command “alpine -supported”. |
The instructions have been tested on Ubuntu 5.13.0.35-generic x86_64.
First Step: Install Build Essentials / Install Any System Updates
The first step is to be sure that your Linux environment is up to date and that you have the proper files to be able to properly configure your Alpine program.
Input these commands:
“sudo apt-get install build-essential checkinstall zlib1g-dev -y”
"sudo apt update"
"sudo apt upgrade"
noteThese commands can be combined using “sudo apt update && sudo apt upgrade -y”
These commands can be combined using “sudo apt update && sudo apt upgrade -y”
Compile and install the ALPINE client
Now you can compile and install the Alpine client.
Run 'sudo apt install alpine”. This command will install the software so that you can open it for the first time and create your mail directory.
Open ALPINE for the first time.
Type “alpine” into your terminal command line
This will create a mail folder for you

After opening Alpine, you will need to update your ".pinerc" configuration file. An example configuration can be found here: https://www.math.uwaterloo.ca/~ccalzone/Docs/imap-on-pine-mutt.html

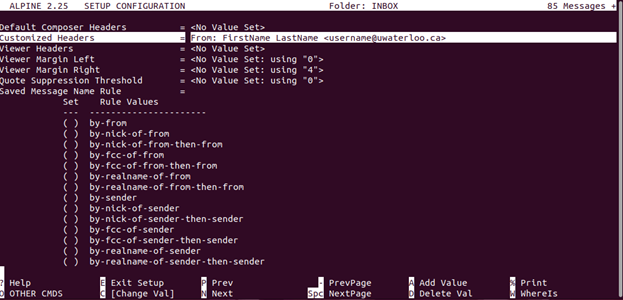
If you run into an error after initialization, you can solve this by adding a customized header to your ALPINE Config:
On the ALPINE landing page, after authentication, go to ( S )etup, then ( C )onfig
Use the ( W )hereIs command to search for "Customized Headers"
Add the header, exactly as the screenshot shows below.
Save and restart ALPINE

Related articles
Related articles appear here based on the labels you select. Click to edit the macro and add or change labels.

Article feedbackIf you’d like to share any feedback about this article, please let us know. |


