...
Setup
Download and install the Android/iOS app on a smartphone.
Plug the power cord into the OWL pro.
In the app, select your OWL pro from the “Nearby Owls” tab
Ensure that Bluetooth is enabled on your device.
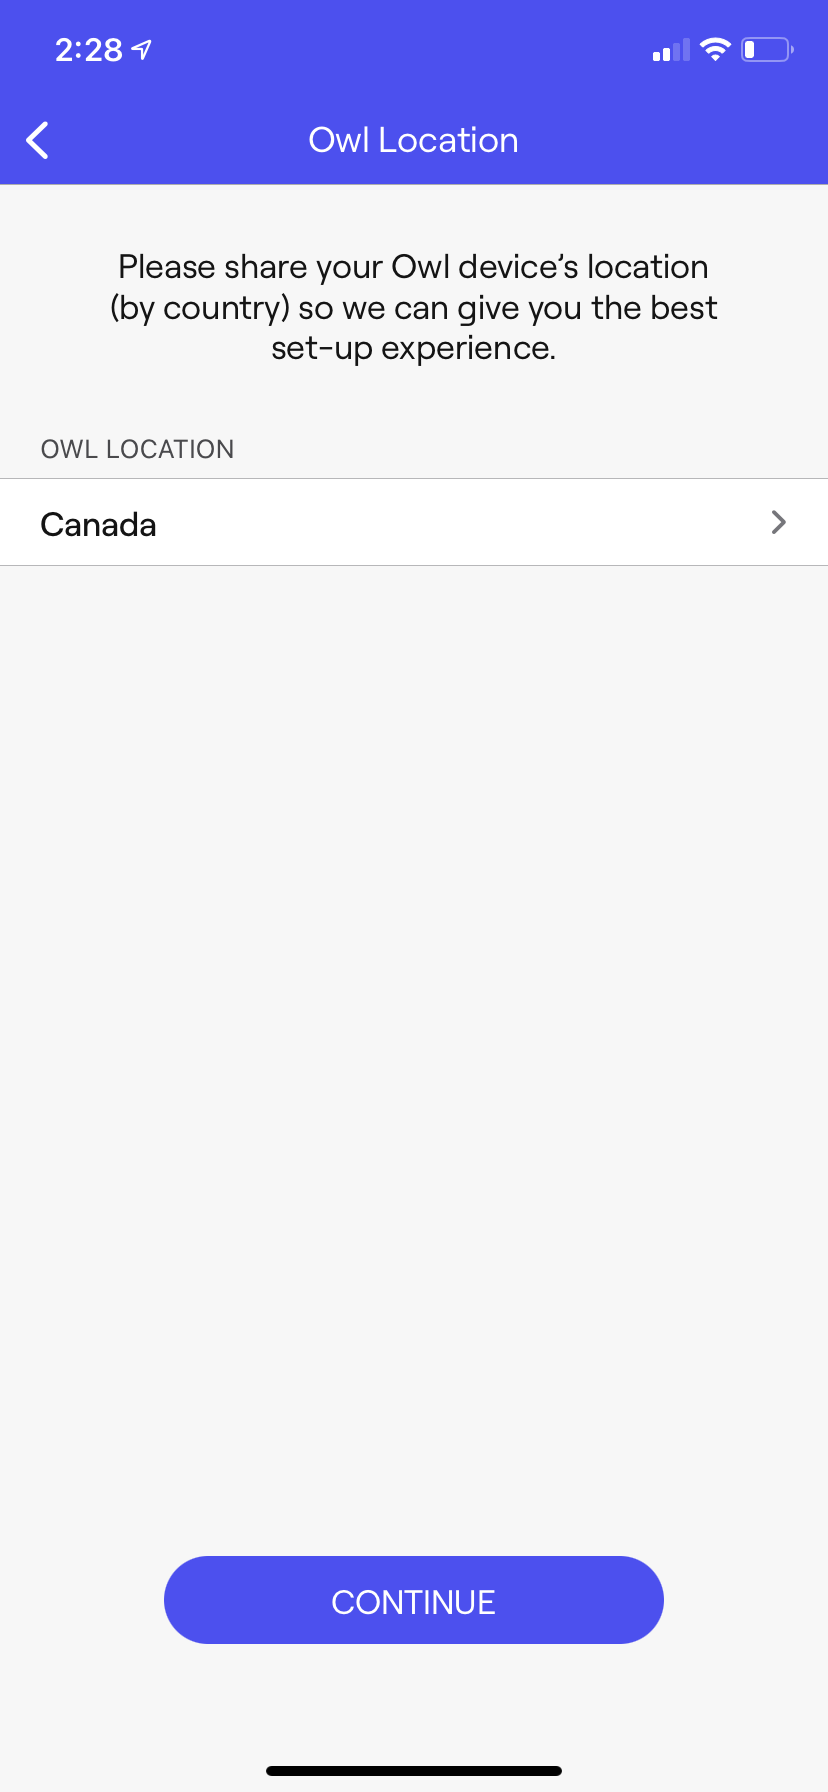
In the “Owl Location” menu, select Canada and click “Continue”.
...
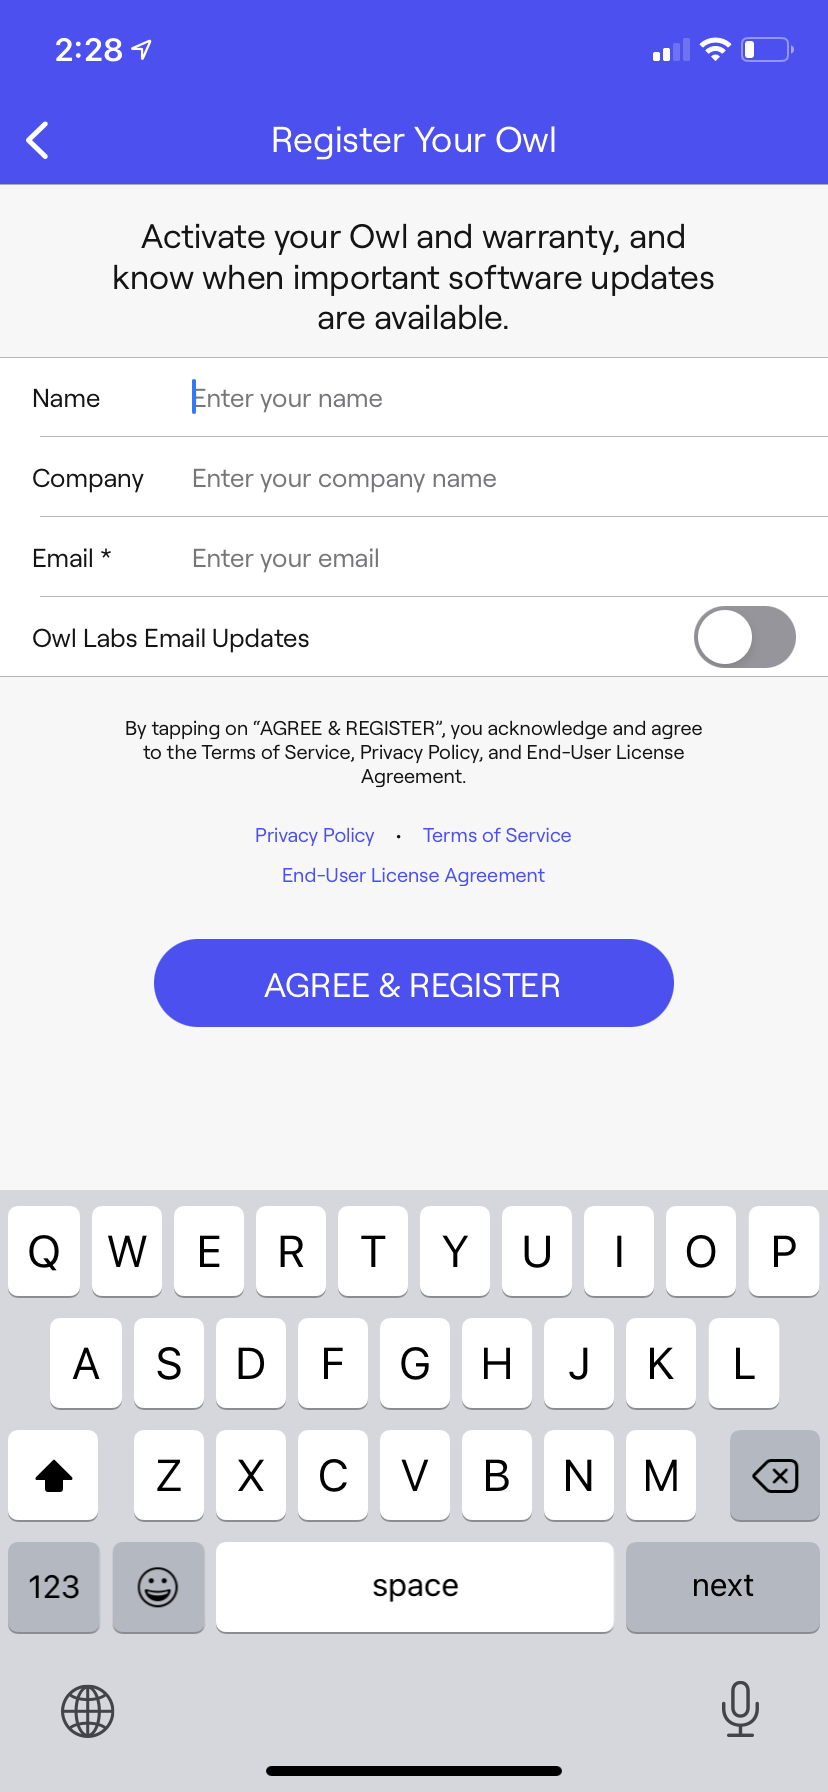
In the “Register Your Owl” menu, enter aco-soft@uwaterloo.ca for the email. Leave the other fields blank and ensure “Owl Labs Email Updates” is unchecked. Then, click “Agree & Register”.
...
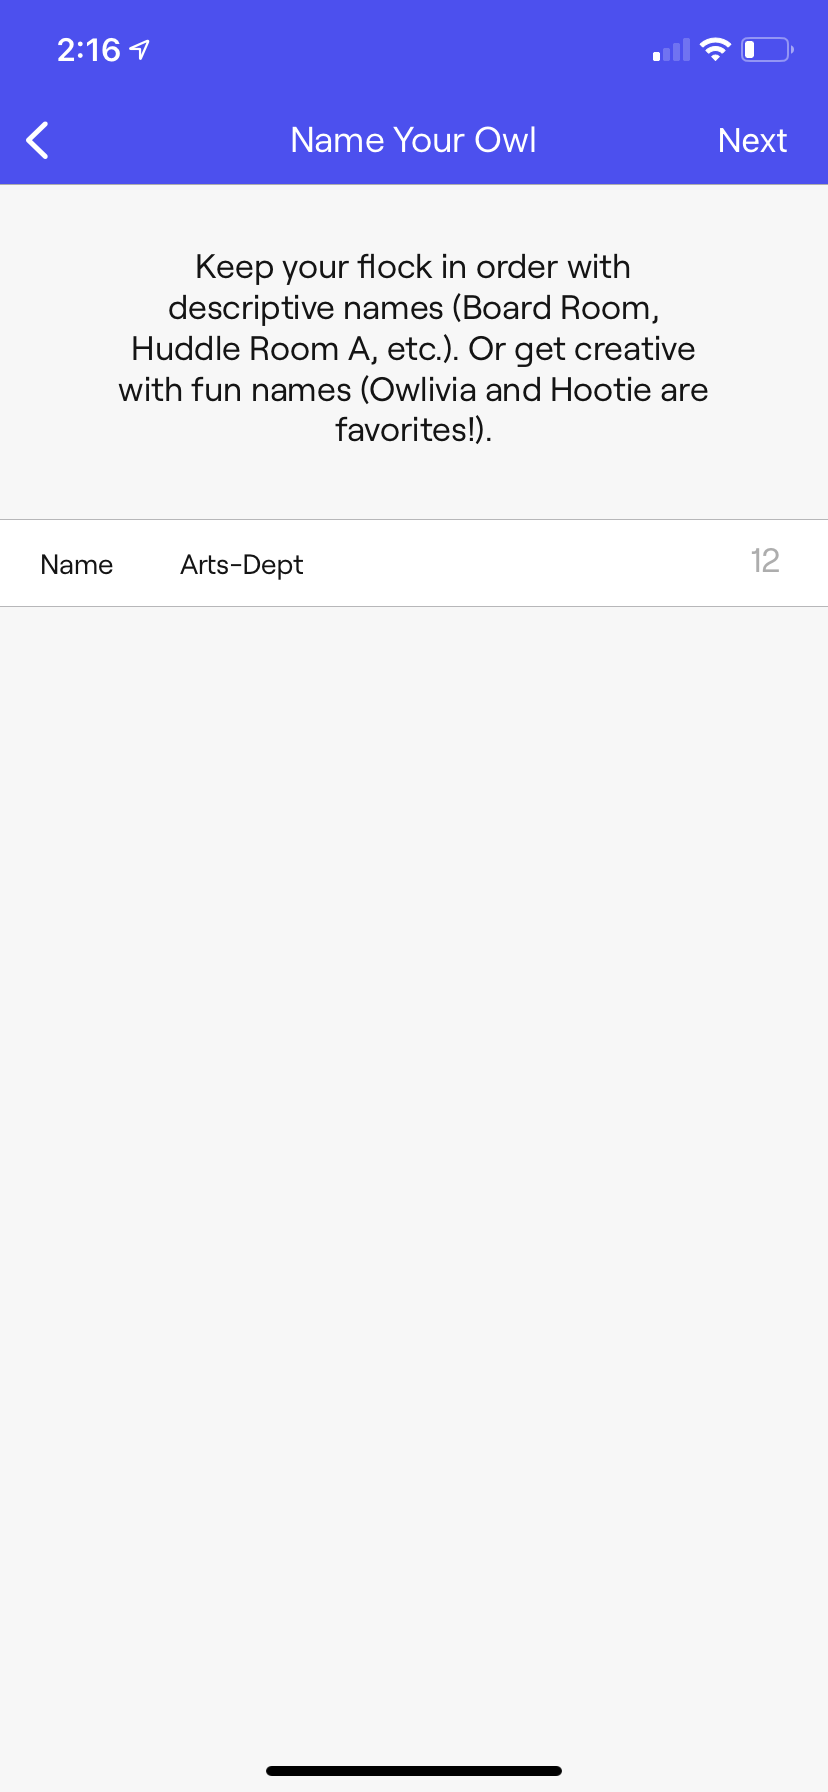
In the “Name Your Owl” menu, enter Arts-Dept, then click “Next”.
...
In the “Connect Owl to Wi-Fi” menu, click “Connect”, then select the network UniversityofWaterloo.
...
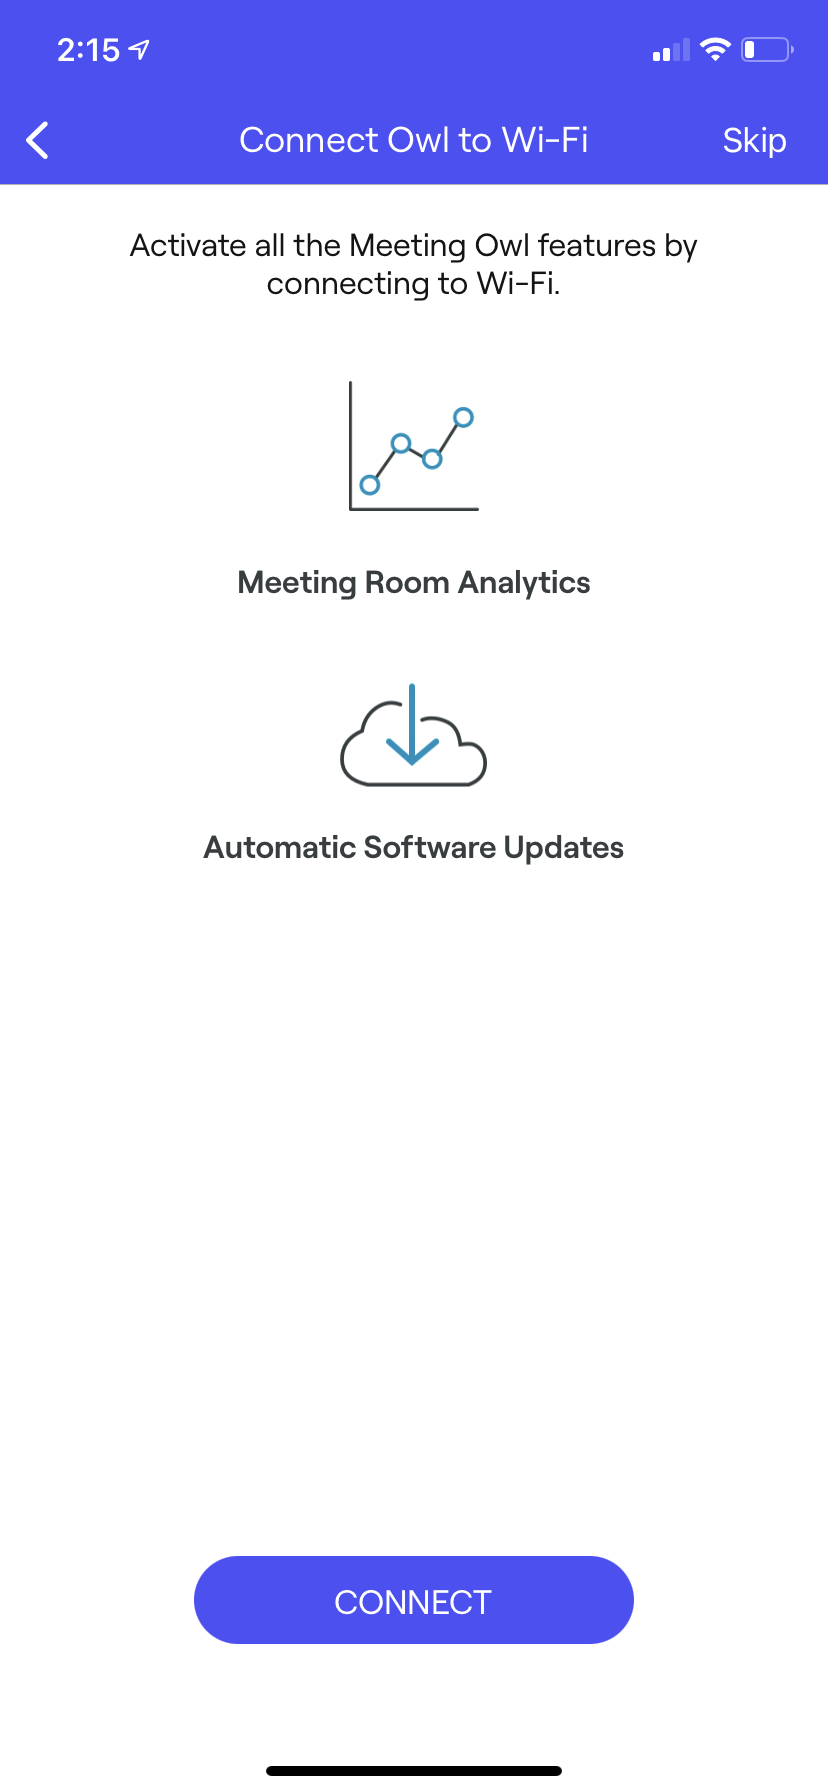
The OWL pro will not be able to connect to this network without first being whitelisted. To set this up, submit a Jira Ticket with the OWL pro’s MAC address requesting it to be whitelisted on the UniversityofWaterloo network.
Go to IST’s JIRA portal, select “Network Services”, and then “Wireless Network (for IT administrators)” to submit your OWL pro’s MAC address and request whitelisting on the UniversityofWaterloo network.
Alternatively, you can click “Skip” in the top right corner and configure Wi-Fi connection later in the “About” menu
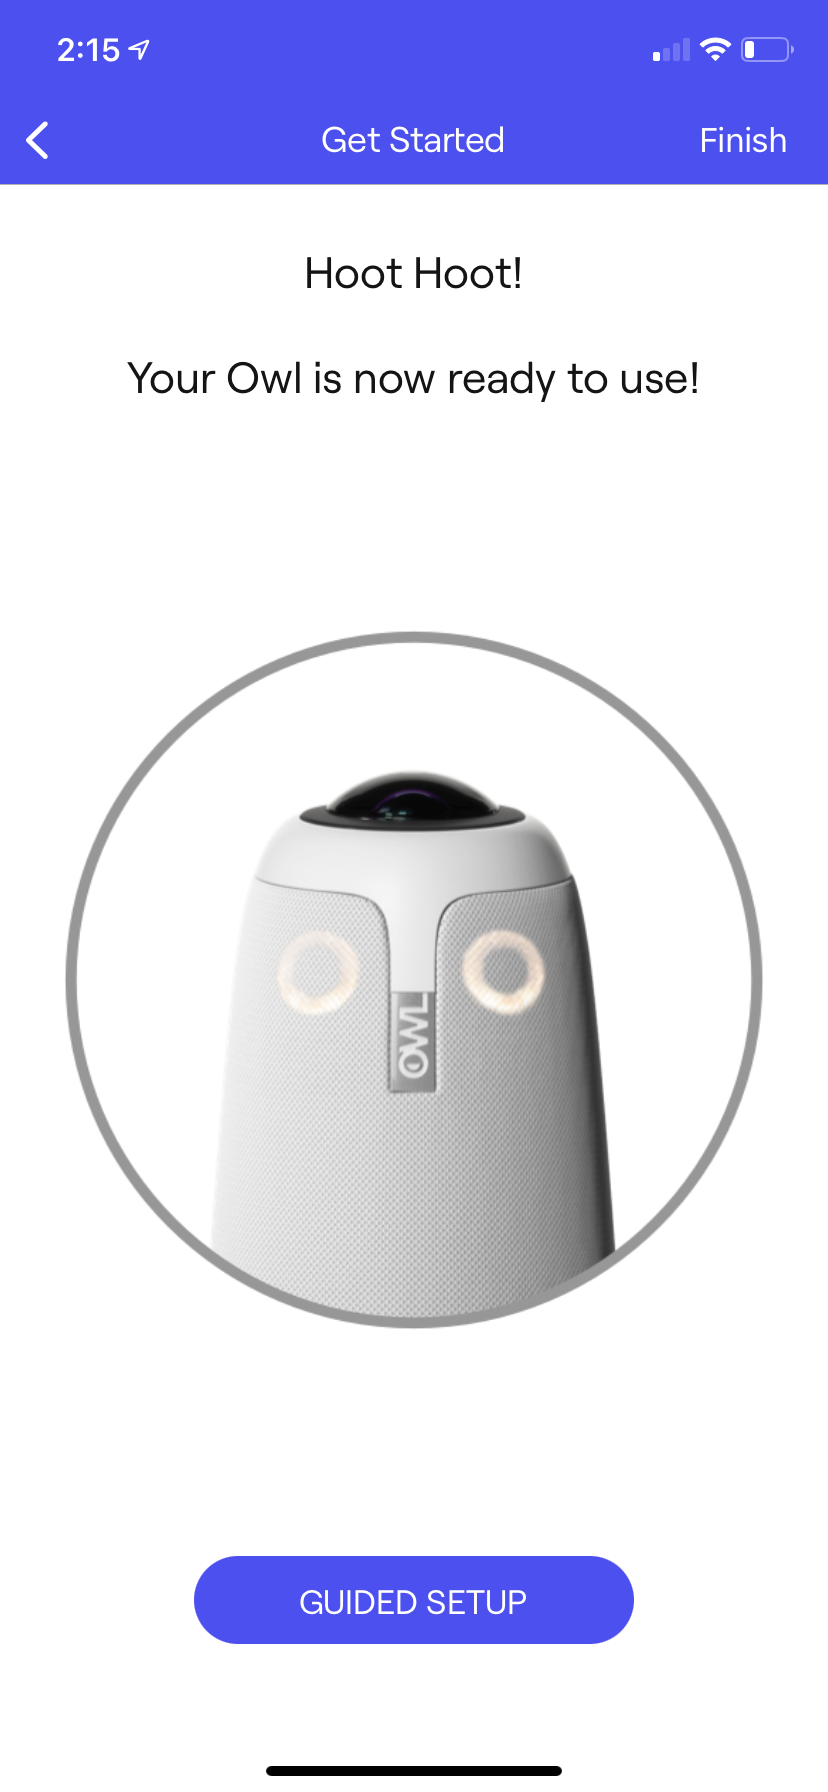
In the “Get Started” menu, click “Finish” in the top-right corner.
...
You should now be on the home menu for your OWL pro. You can navigate to this menu in the future by selecting your OWL pro from the “Nearby Owls” tab upon opening the app.
In your OWL pro’s home menu, select “About” at the bottom of the page.
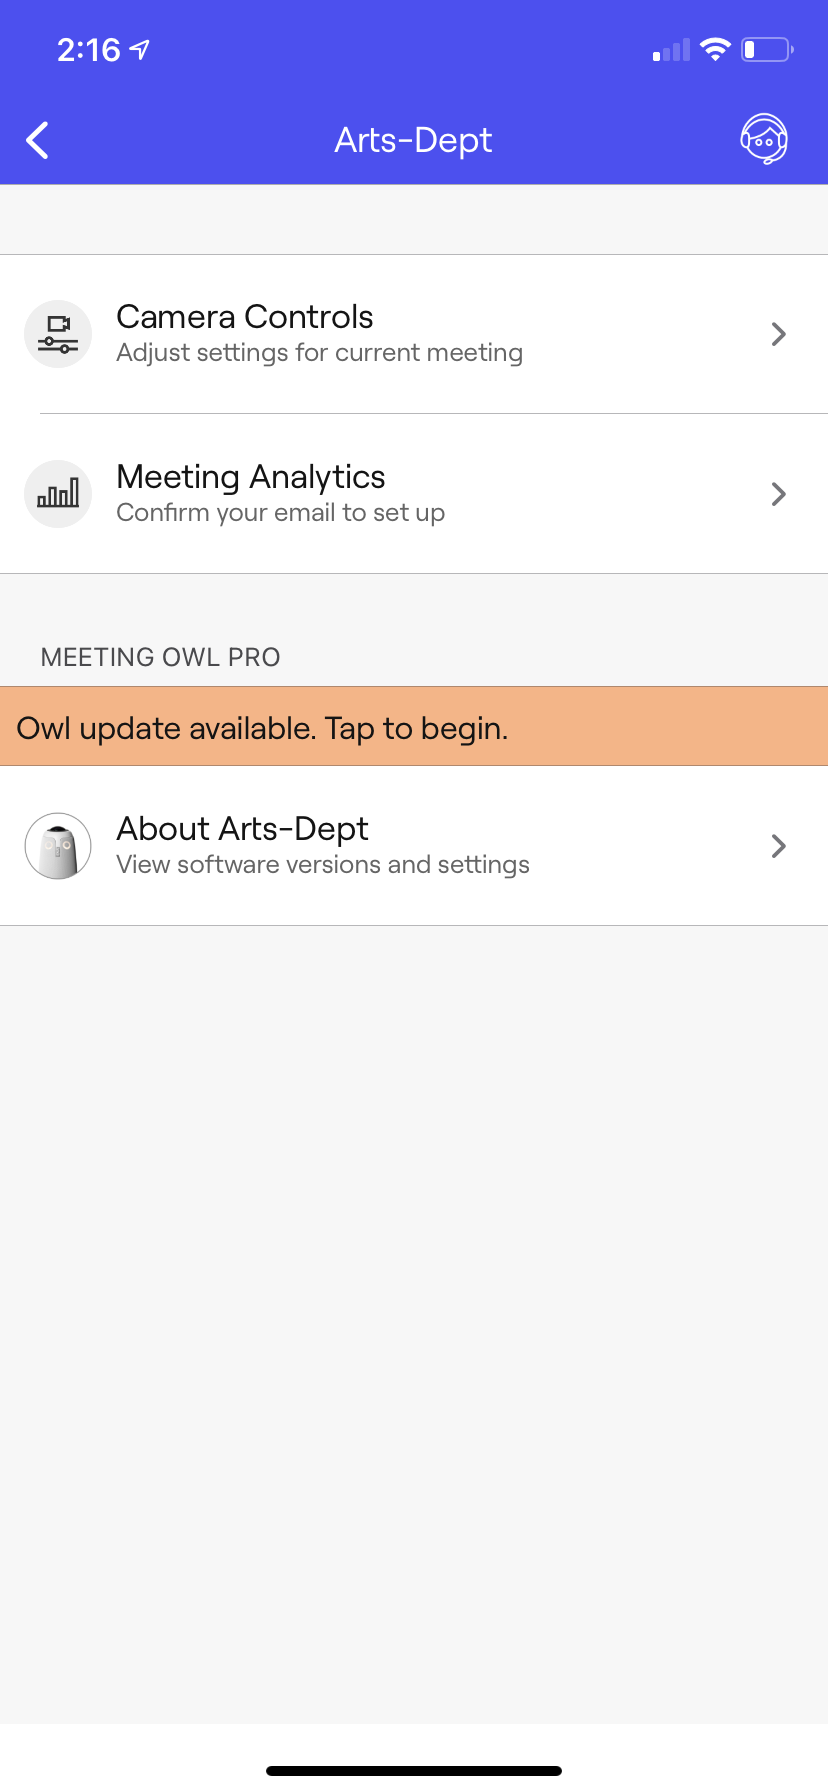
Scroll down and select “Set Owl Passcode”. Use your OWL pro’s ACO# as the passcode.
Update CALMS with your OWL pro’s ACO# and serial number.
Configuring Owl Settings
The passcode should be the ACO#.
Bluetooth must be enabled on the phone.
Open the meeting Owl Pro app and select your owl from the “Nearby Owls” list.
Click the “About <Owl Pro Name>” to view the settings and its software version.
You can connect the Owl to Wi-Fi here if needed for updates (uw-wifi-setup-no-encryption).
Camera and audio settings can also be configured here.
Setting the Owl passcode and Resetting the Owl to its factory conditions can also be done here.
How to setup OWL device for use
...
in Microsoft Teams & Zoom
First determine the best location for the OWL, since the OWL captures video in a 360-degree view placing the OWL centrally is often best.
...
Connect the OWL to power and to your desired device using the USB-C port on your computer/laptop.
Launch your video conference platform.
In Teams:
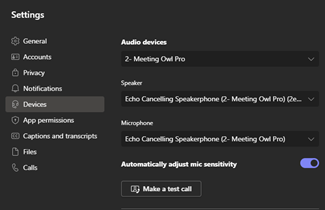
At the top left of the screen select the ellipses beside your icon, and then choose Settings.
Within the new window select Devices from the menu and chose the OWL for video, microphone, and speaker
...
Plugin the USB micro-B connector into the bottom of the Owl and into the computer.
...
Plugin the AC power adapter into the bottom of the Owl.
...
Set your audio (speakers and microphone) and webcam devices to the Meeting Owl Pro equivalents in your video conferencing software of choice.
...
.
In Zoom:
At the top right of the screen select the setting icon.
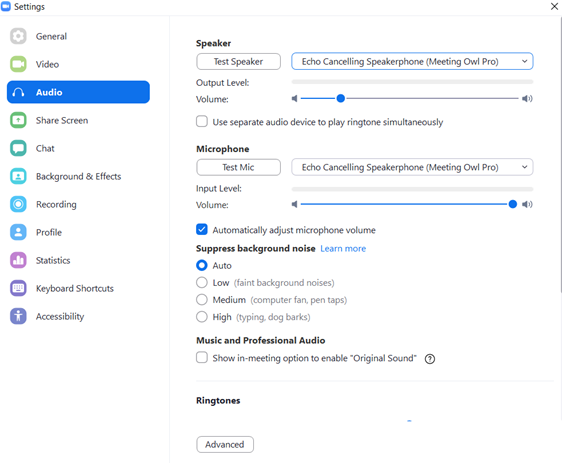
Under Video confirm that the OWL is selected under the Camera option
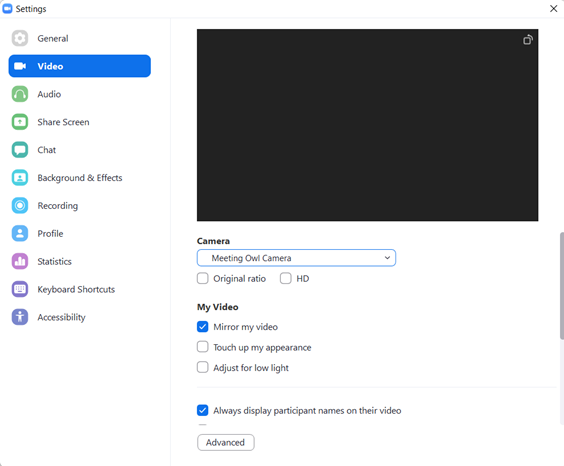
Under Audio confirm that the OWL has been chosen for both the Speaker and the Microphone.
Be sure to connect your computer to an external display if desired via HDMI.
Once ready start your meeting like normal, it should only take a moment for the OWL to initialize once the meeting is started.
| Info |
|---|
To use the USB extender, connect the male end of the Owl’s USB connector to the female end of the USB extender. Then, connect the male end of the USB extender into your computer. |
...
| Note |
|---|
This is not recommended as it can cause issues with audio. |
Plug power and the USB into the Primary Owl Pro (the one connected to the computer) and only plug in power to the Secondary Owl Pro.
Wait until both Owl Pro’s make the hoot noise and have their eyes face each other from around 1~3 meters away.
Open the Meeting Owl App and select the Primary Owl (the Owl should be blinking to indicate this).
Select “Owl Connect” under meeting controls in the app and select the Secondary Owl.
Press “Pair” and wait until the pairing process is complete.
In a meeting, you can confirm the Owls are properly paired and visible to one another when the singular Owl logo on the top right of your video is replaced by two bolded Owls.
...
Flip the camera vertically (for ceiling mounting)
Select the Owl within the Meeting Owl app.
Select “About your Owl”.
Under “Admin - Default Camera Settings” toggle the “Vertically Flip Owl Camera View” setting and click “Yes” to confirm.
Updating the Owl Pro
How to update your Owl’s software
...