Students living and studying in China may experience slow connections, increased latency, and inconsistent access while using UWaterloo learning technologies from China. UWaterloo has engaged a cloud enterprise network service from Alibaba, a company operated within China, to improve network flows in and out of China. You should see improvements when using the solution for learning technologies (e.g. LEARN, Crowdmark, Bongo), though the degree of improvement can vary depending upon your home province and your residential internet speed.
About this service
UWaterloo provides this service using the Alibaba Cloud Enterprise Network.
Alibaba Cloud, also known as Aliyun, is a Chinese cloud computing company, and subject to laws in China or surveillance by authorities in China
Alibaba Cloud's terms of service is available here
Use of this service is optional. You are under no obligation to use this service.
Alibaba Cloud doesn't hold, or have access to, any UWaterloo records, including your 8-character username (e.g. j25rober), password, student ID number, name, and UWaterloo email address
The University of Waterloo cannot ensure or warrant the security of Alibaba Cloud's product and services
The service is meant to be used only for learning technologies in your courses (such as LEARN, Crowdmark, PebblePad, Bongo), and only those applications are enabled through this solution. It does not lift restrictions on resources that are not generally available to you.
| Info |
|---|
|
...
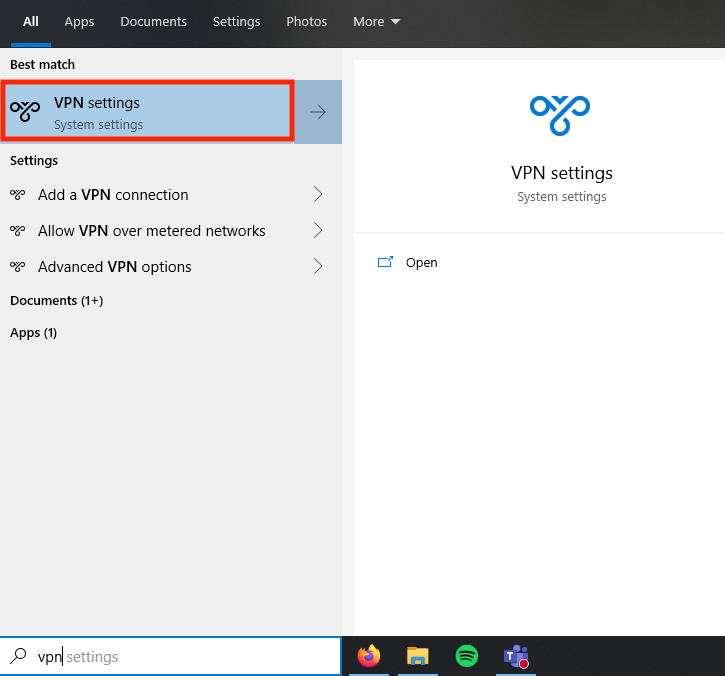
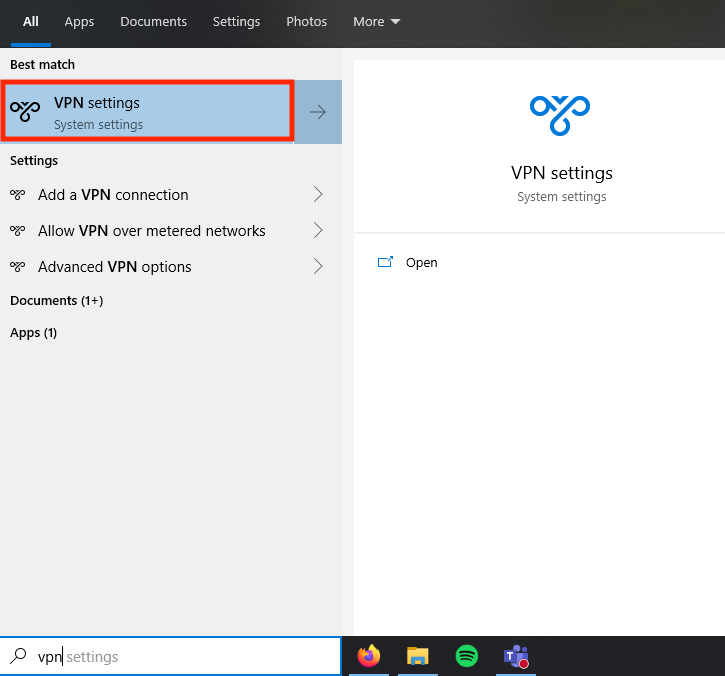
Go to Start menu > search for VPN and click on VPN settings.
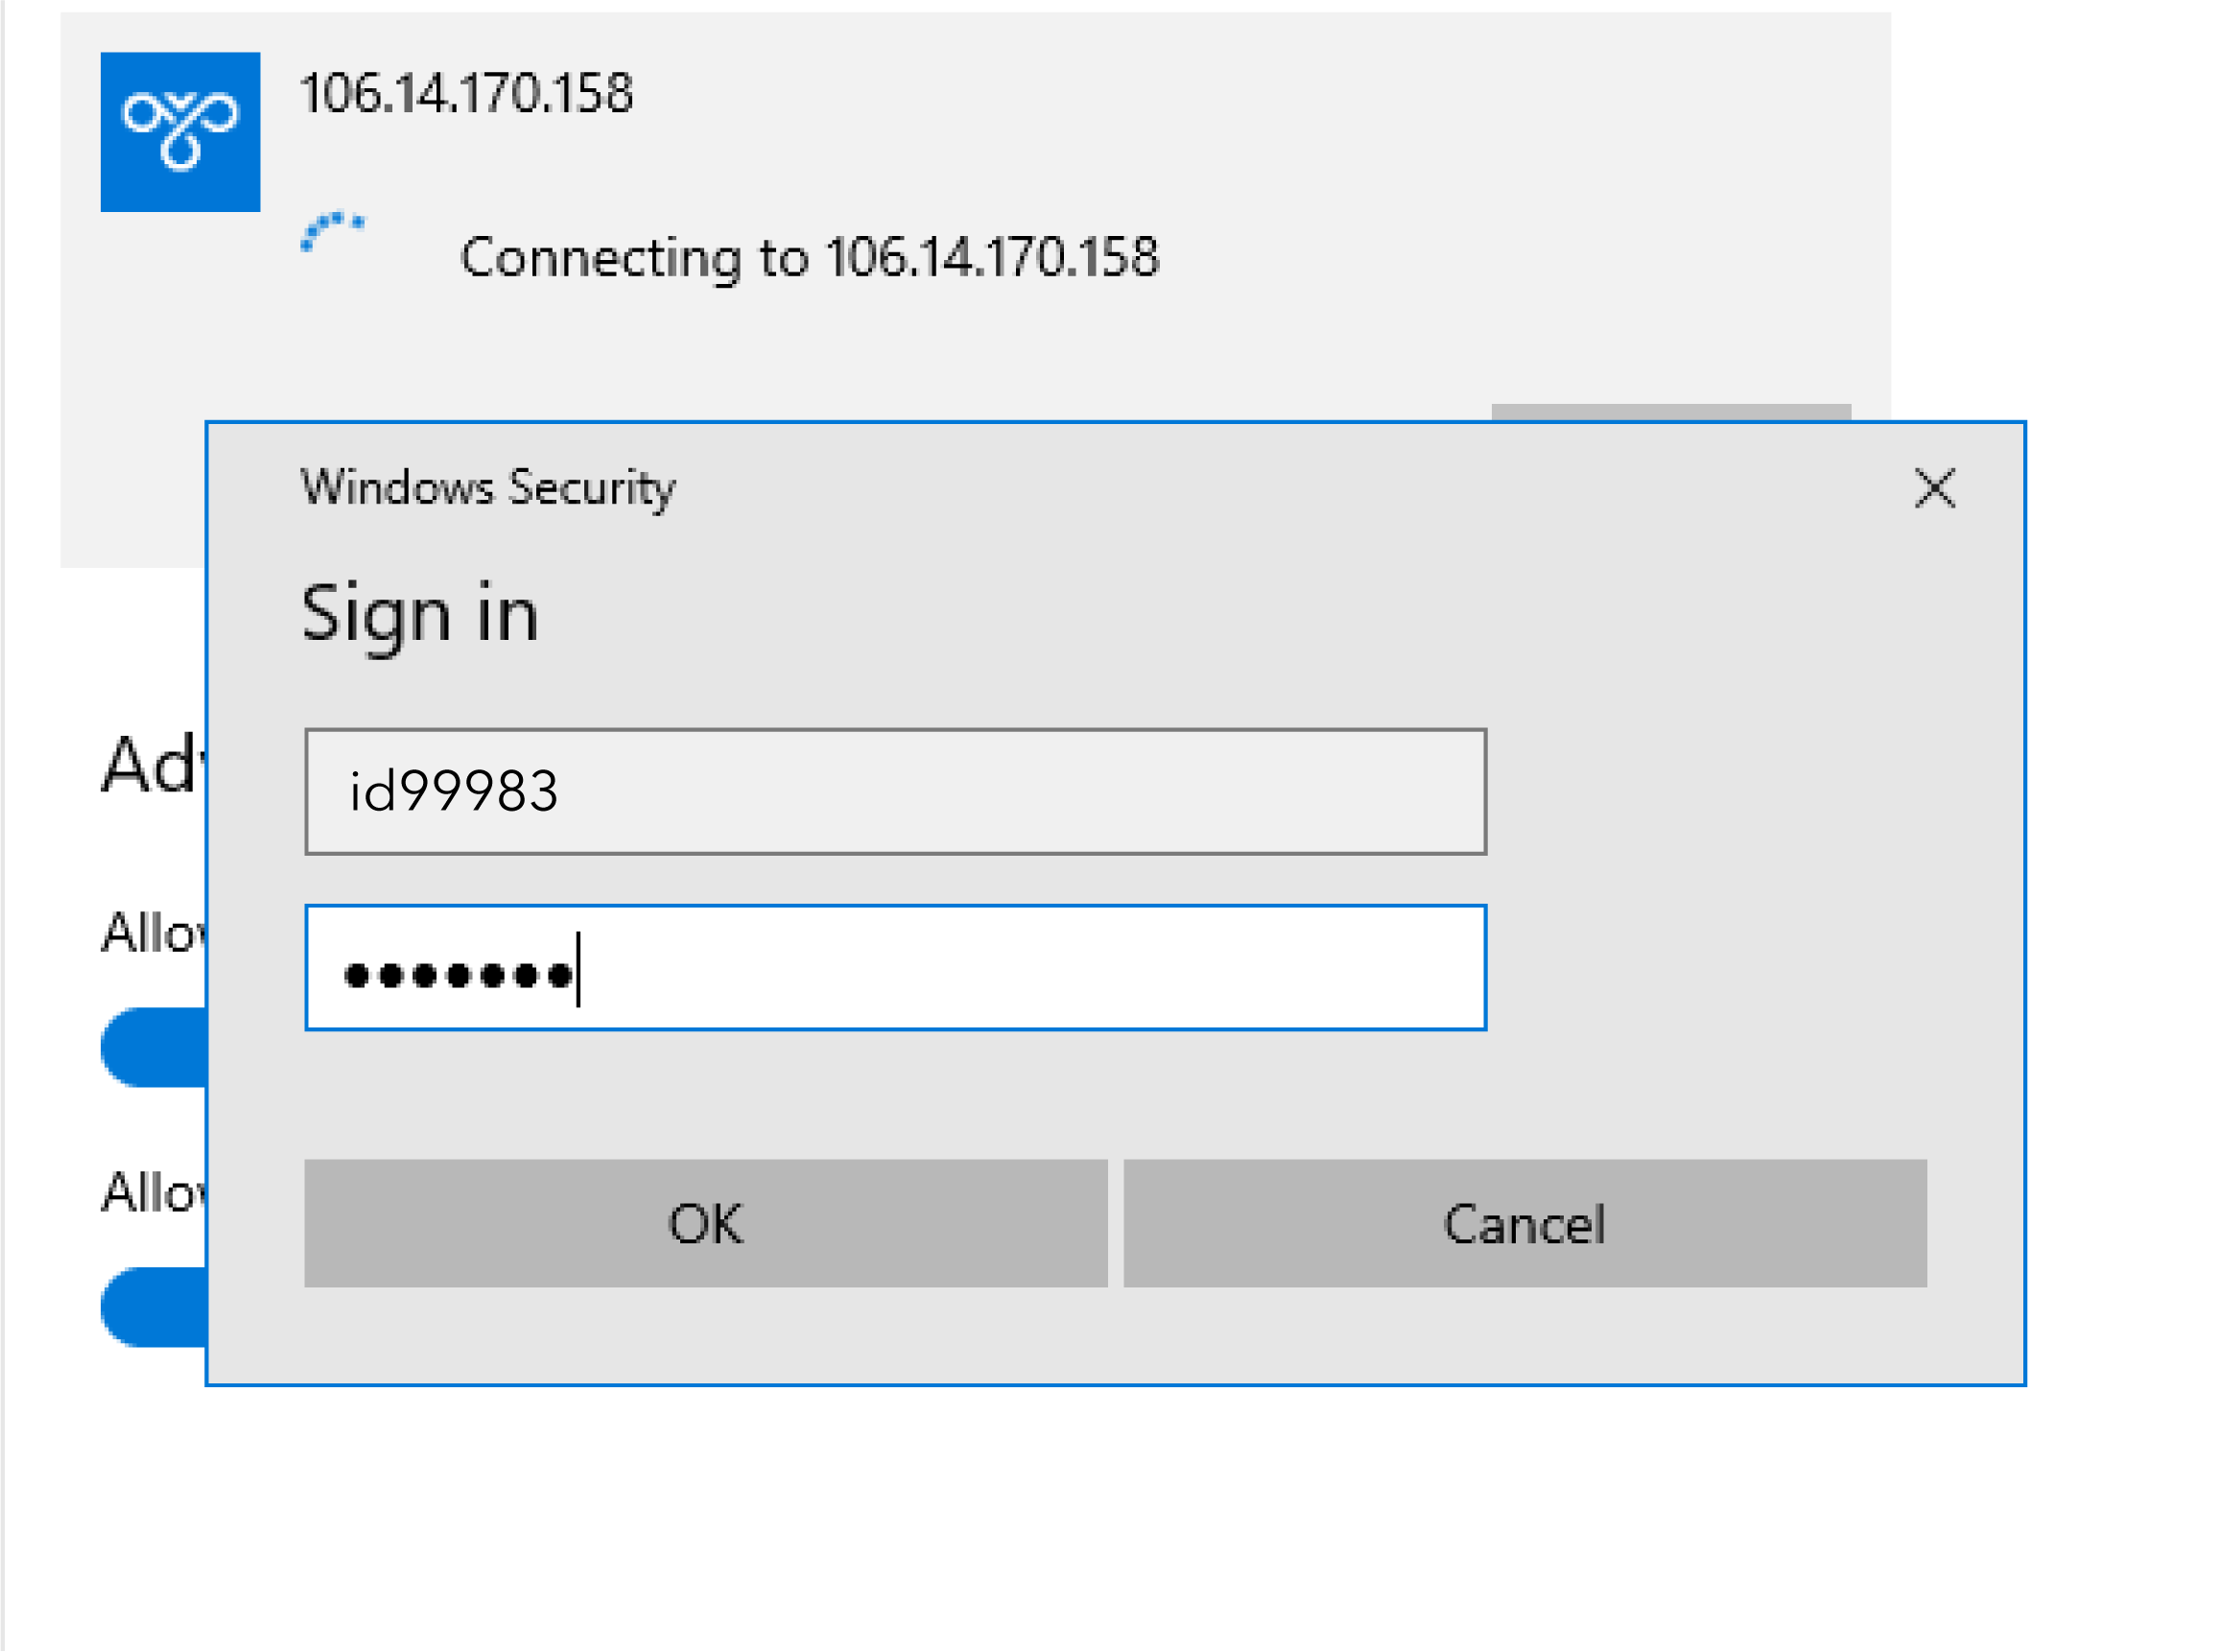
Select the 106.14.170.158 network and click Connect.
Enter the special VPN username and password provided. You will now be connected to the VPN. Do not enter your normal 8-character username (e.g. j25rober) and password.
...
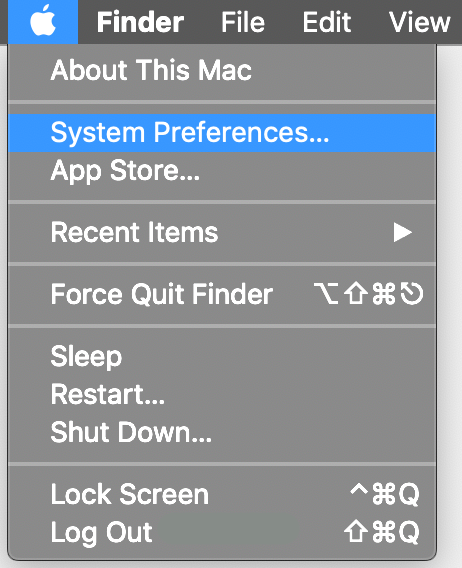
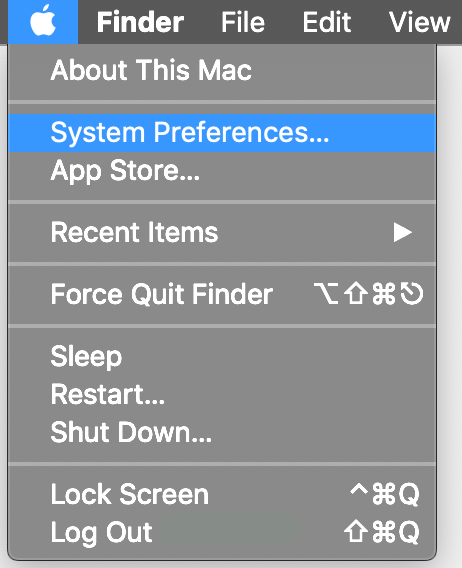
To the Apple menu > System Preferences.
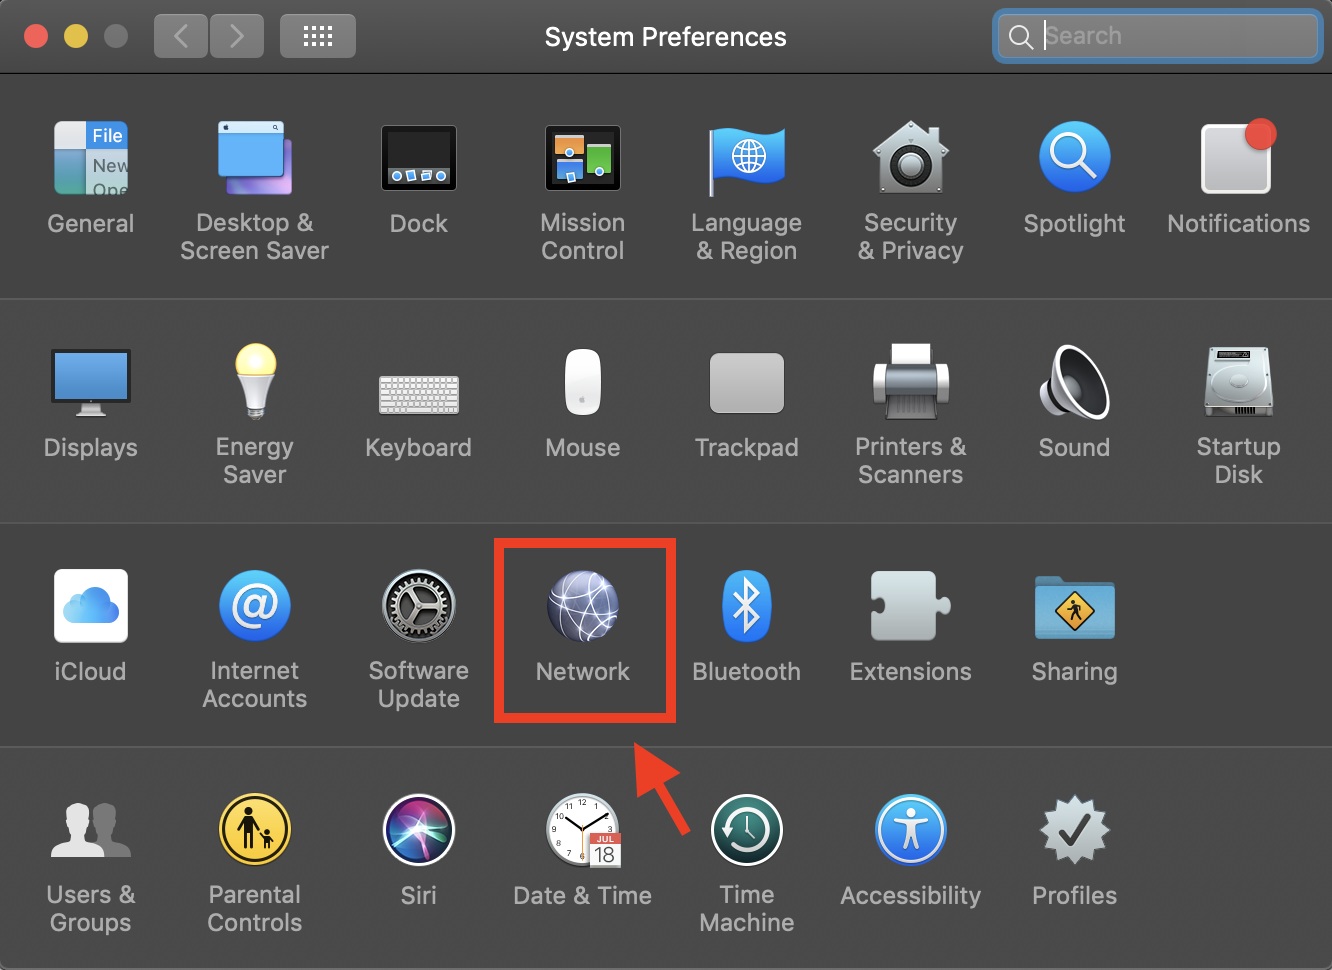
Click and open Network.
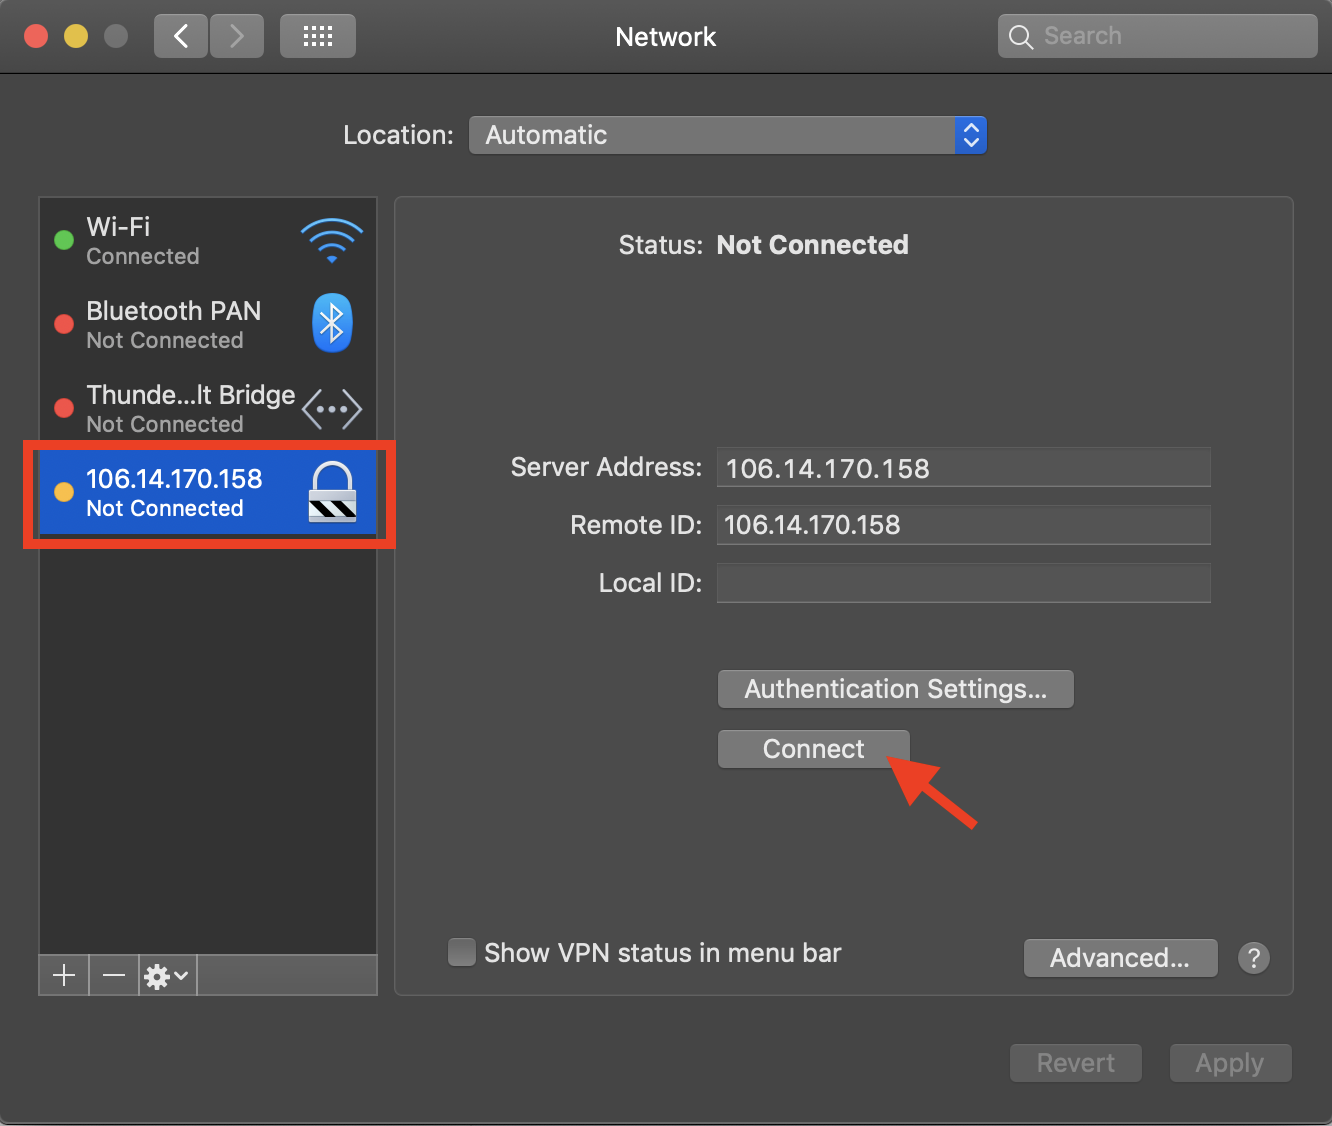
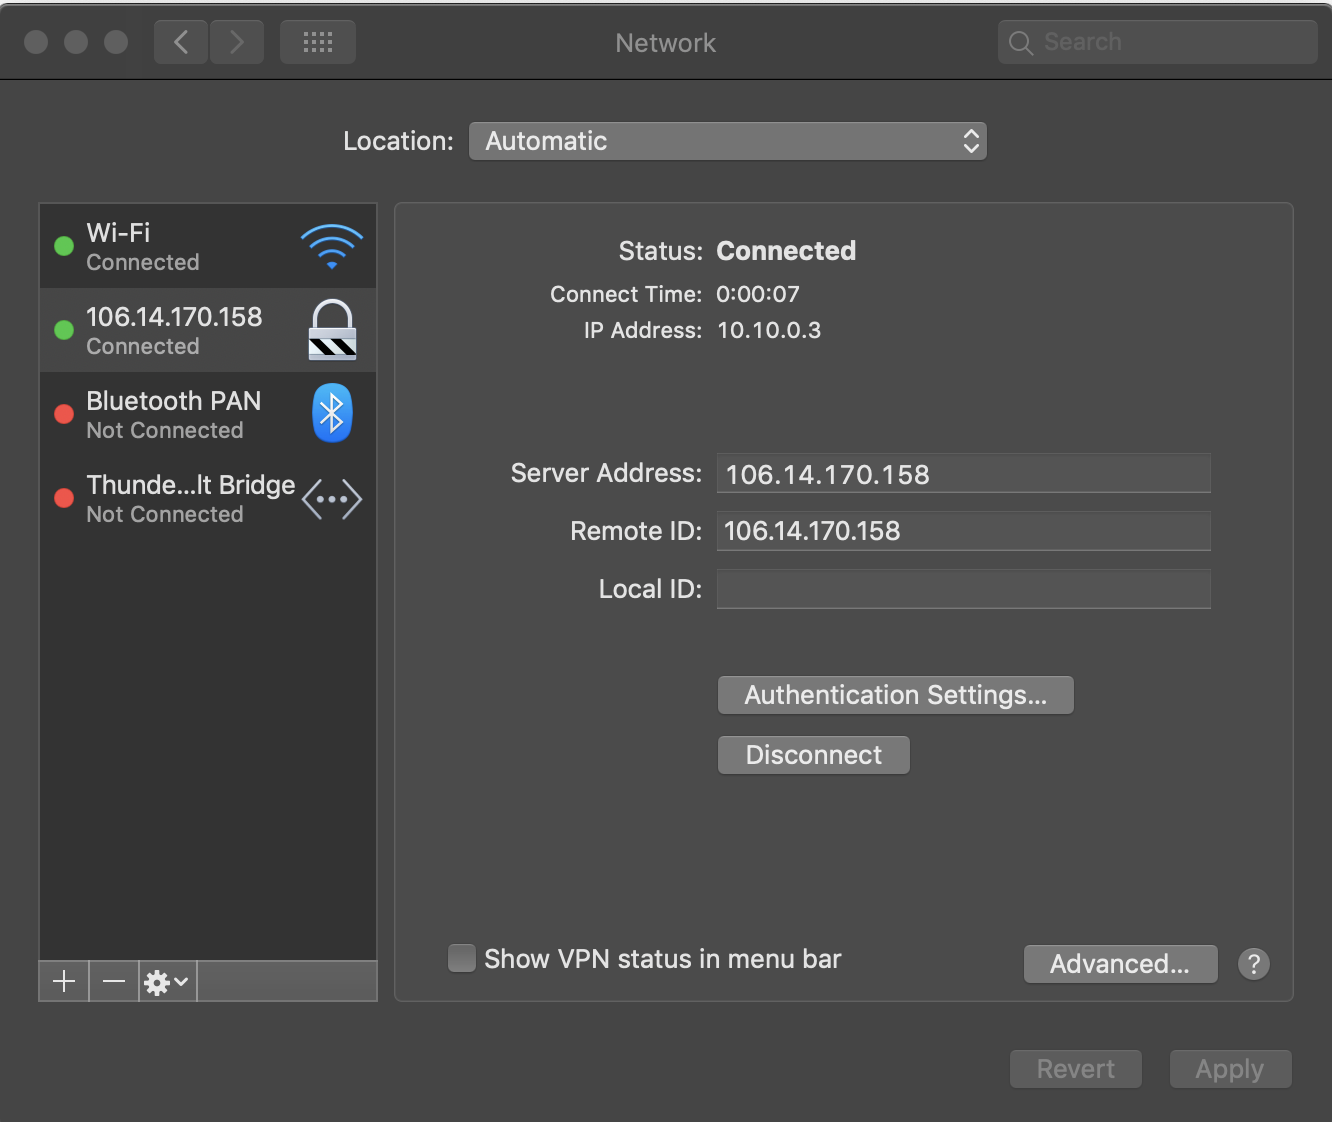
Select the connection named 106.14.170.158 and click Connect. You will now be connected to the VPN.
...
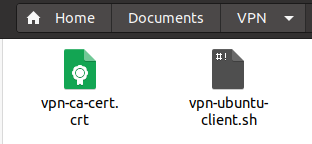
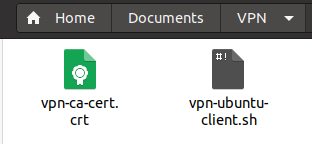
Download the 'vpn-ubuntu-client.sh' and 'vpn-ca-cert.crt' files and save them in the same directory. In this guide, they've been saved to ~/Documents/VPN/.
Navigate to the directory where you downloaded the files.
In your file manager, go to that directory, right-click on the background (not the files) and choose Open in Terminal.
Check for updates to your programs with:
Code Block sudo apt update
You will be prompted for your computer password. Type it in and press Enter. This will run for a few minutes.
Change the permissions of the shell script (.sh file) using:
Code Block language bash chmod +x vpn-ubuntu-client.sh
Run the shell script as root using:
Code Block language bash sudo ./vpn-ubuntu-client.sh
Enter your VPN username.
Enter your VPN password.
Your computer will now install strongSwan and some dependencies. This may take several minutes. Once you see the text as below, you have successfully installed the VPN client.
Code Block To disconnect: ipsec down ikev2vpn To resconnect: ipsec up ikev2vpn To connect automatically: change auto=add to auto=start in /etc/ipsec.conf
Restart your computer.
...
Download the 'vpn-ios-or-mac.mobileconfig' file onto your device. Click the file. A pop-up will appear asking you to review the profile in your device Settings.
Go to the Settings app > General > scroll down and click on Profile. Click on the downloaded profile, IKEv2 VPN configuration
Click Install. Enter your passcode if prompted.
On the Warning screen, click Install.
Enter the username and click Next.
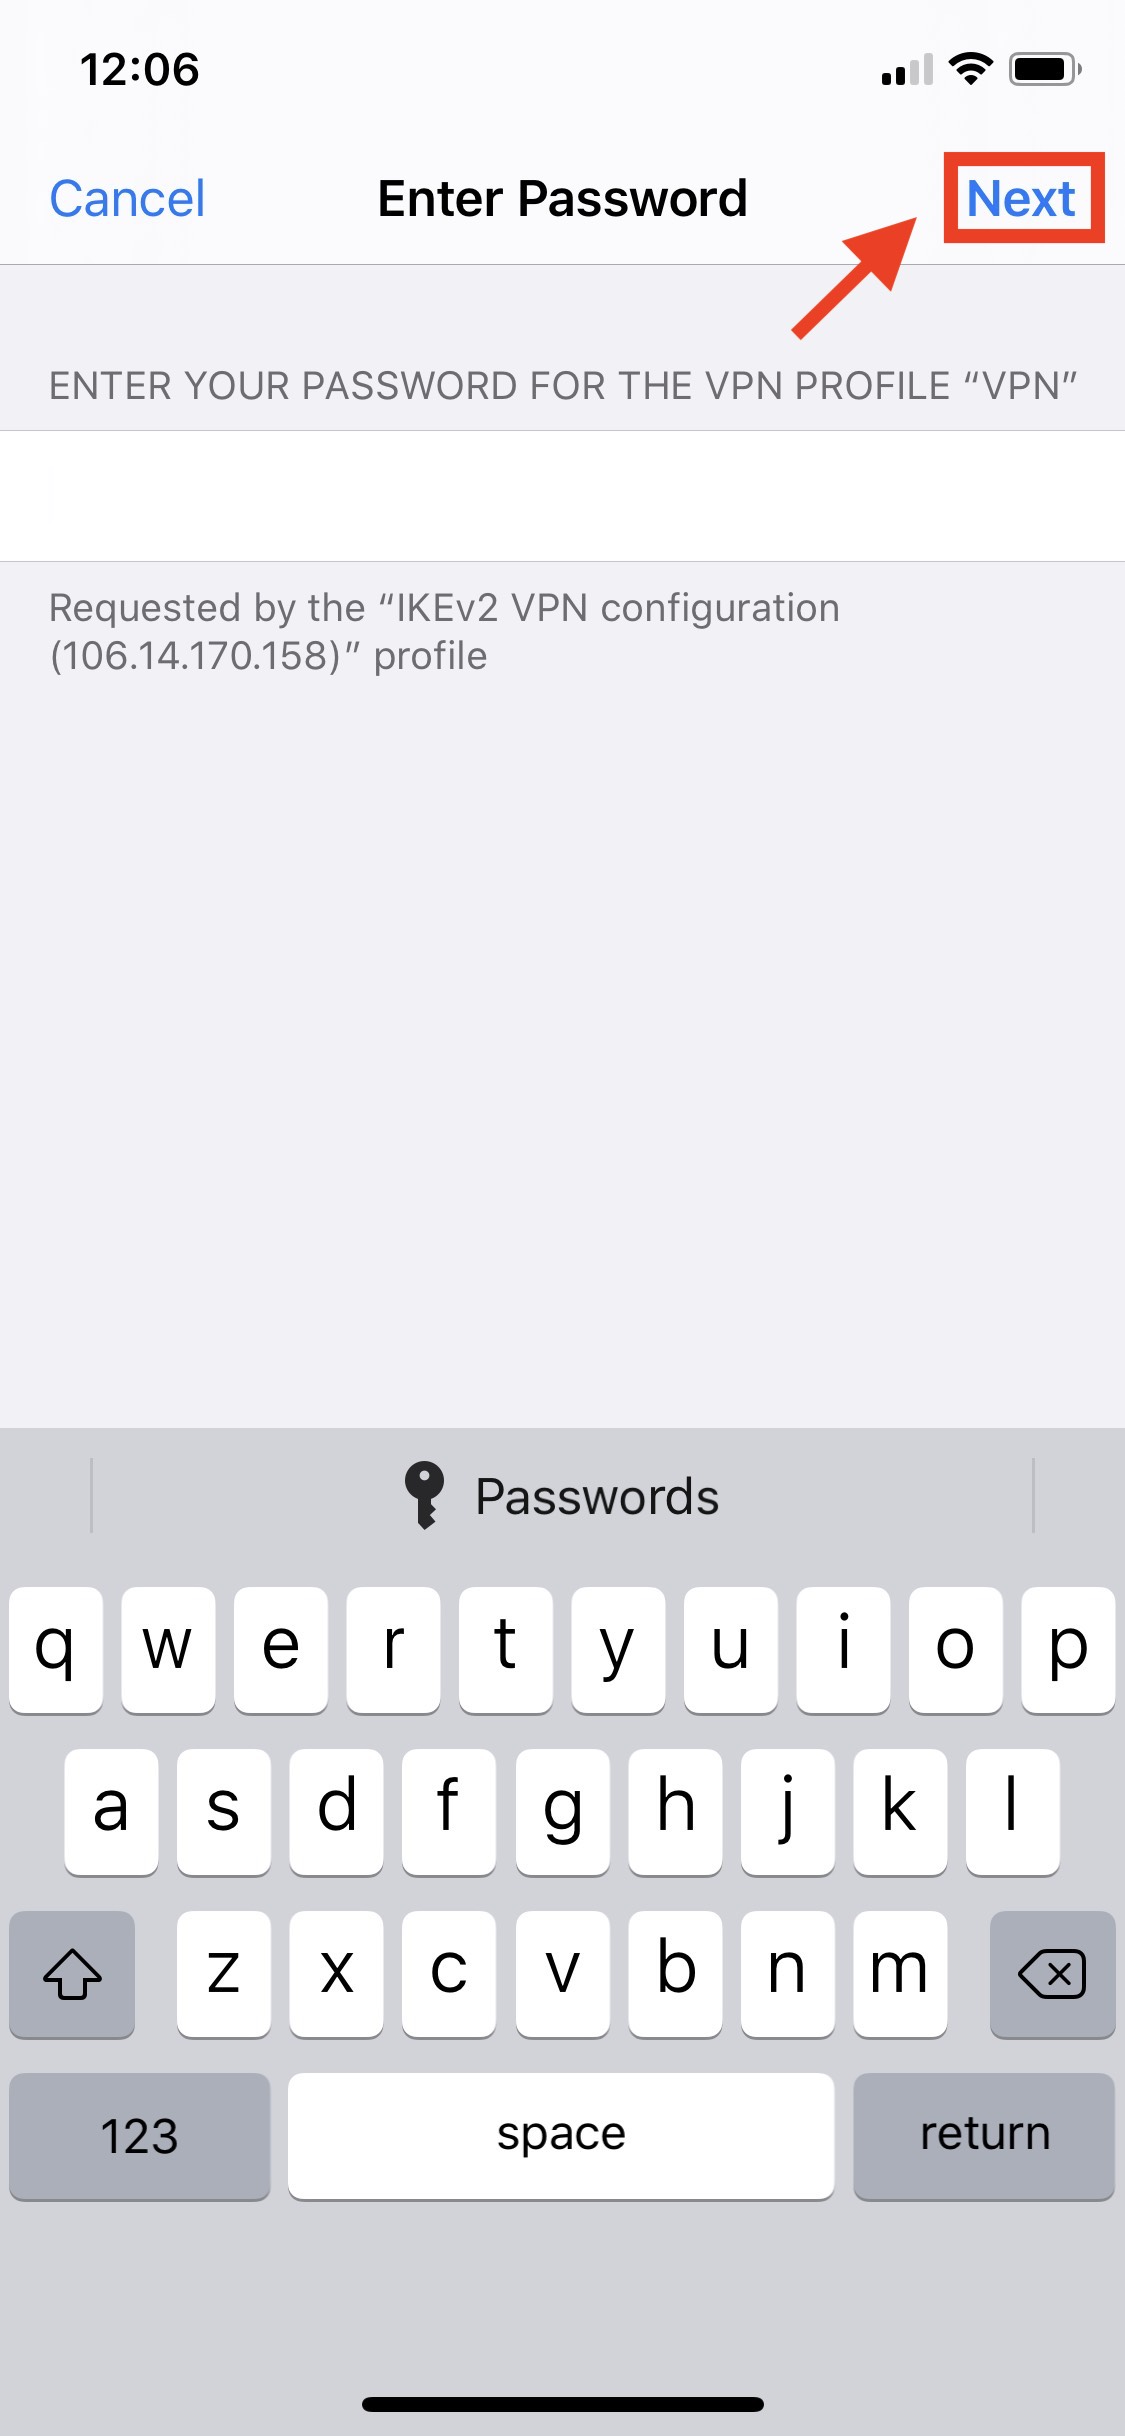
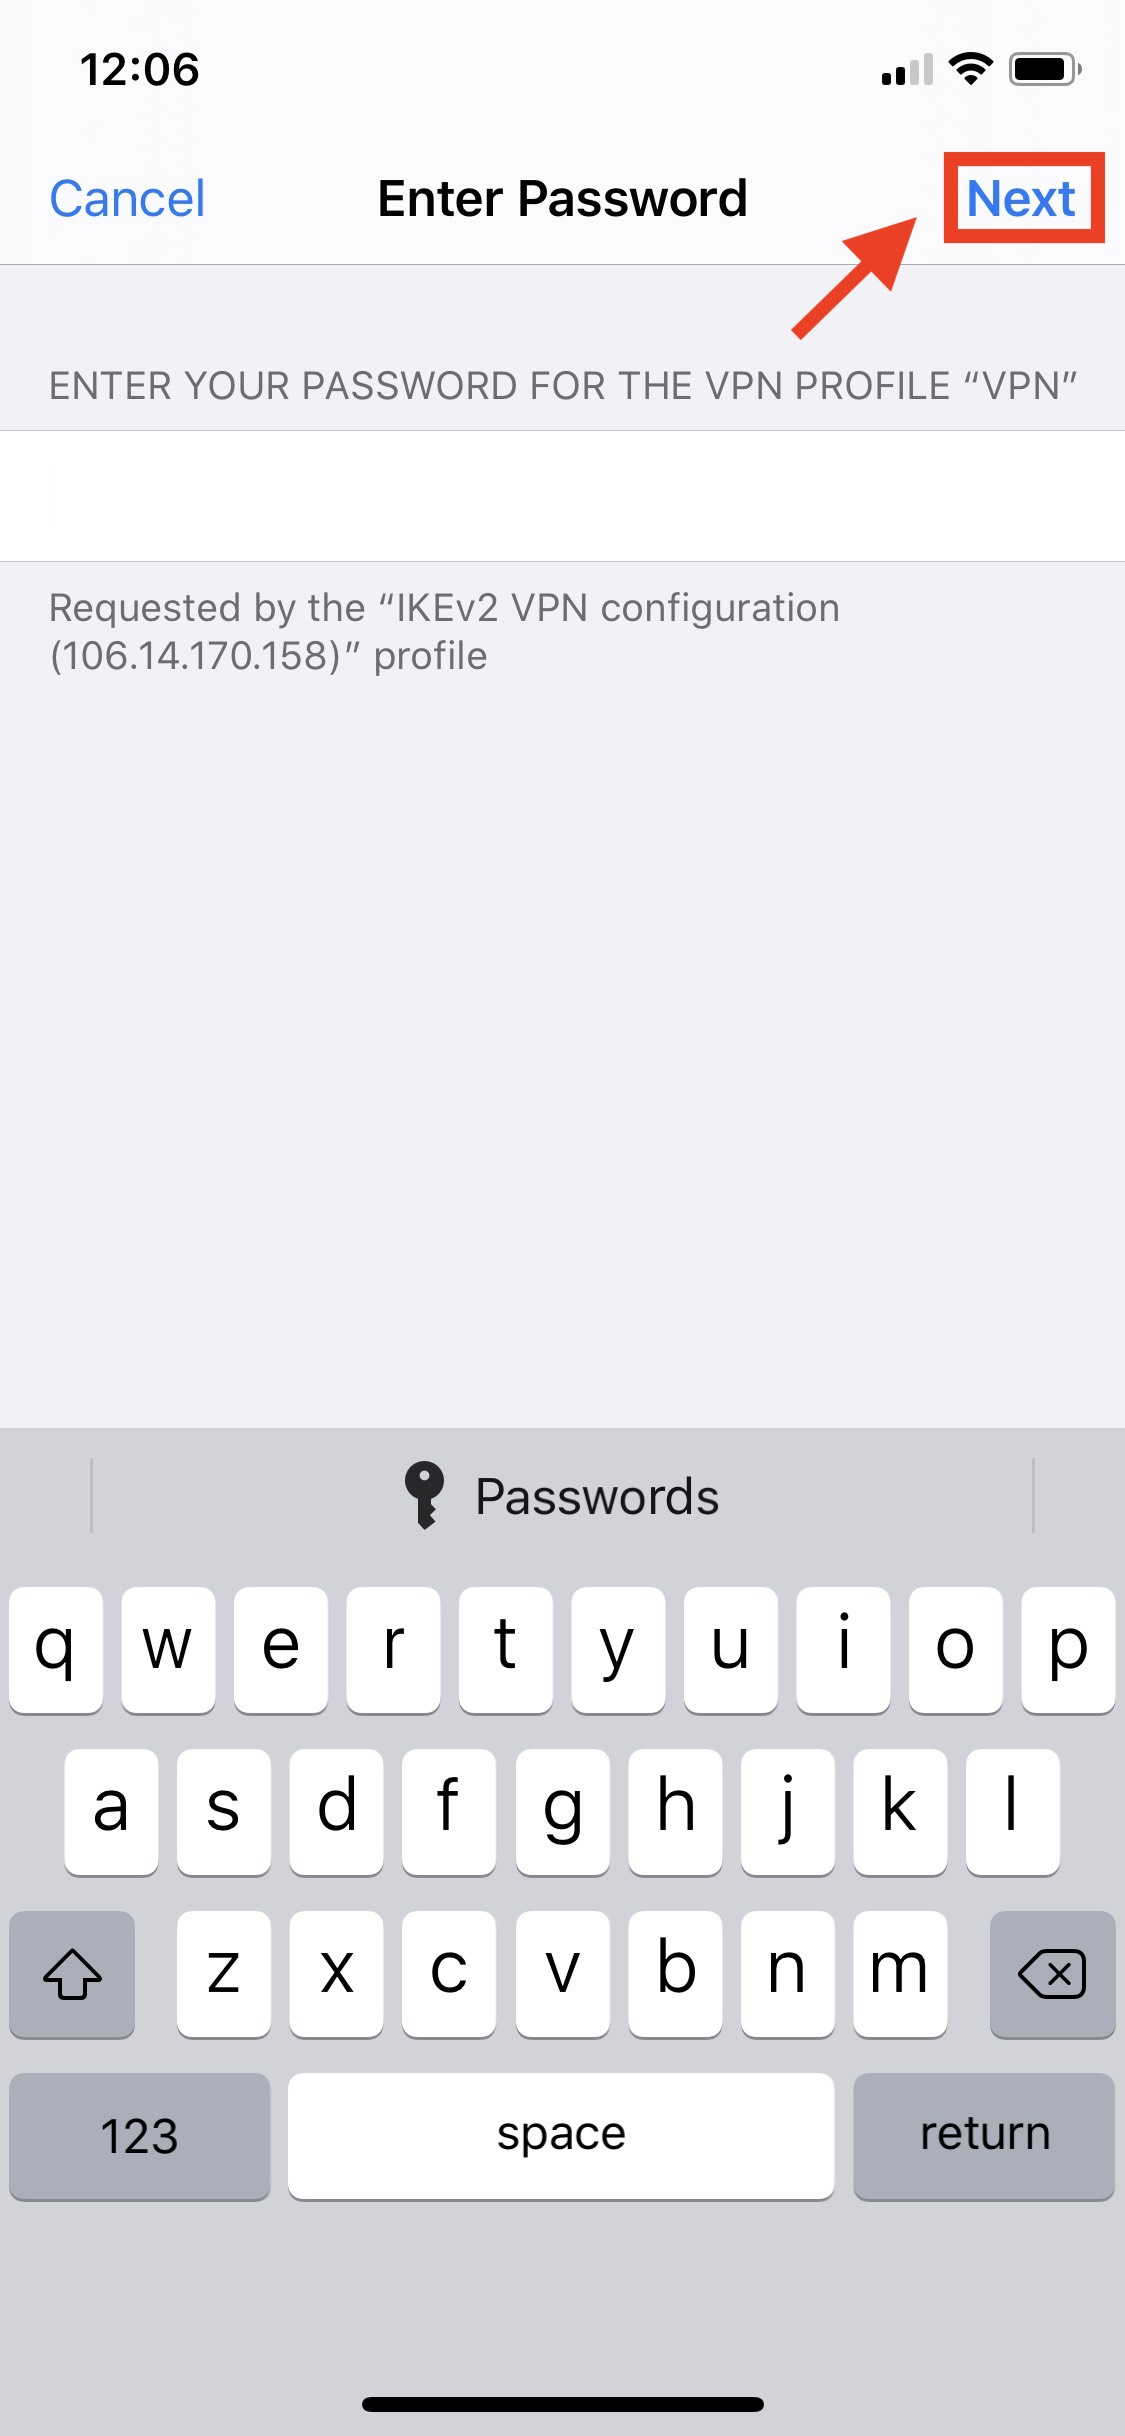
Enter the password and click Next.
The profile is now installed. Click Done.
...
Go to the Settings app > General > scroll down and click on VPN.
Make sure '106.14.170.158' is selected from the VPN list and switch the Status toggle from Not Connected > Connected. You will now be connected to the VPN.
...
How to connect on Android
...
| Filter by label (Content by label) | ||||||||||||||||||
|---|---|---|---|---|---|---|---|---|---|---|---|---|---|---|---|---|---|---|
|
| hidden | true |
|---|
| Info |
|---|
Need help?Contact the IST Service Desk online or 519-888-4567 ext. 44357. |
| Tip |
|---|
Article feedbackIf you’d like to share any feedback about this article, please let us know. |
.png?version=2&modificationDate=1589293430627&cacheVersion=1&api=v2&width=251)
.png?version=2&modificationDate=1589293430627&cacheVersion=1&api=v2&width=238)
.jpeg?version=1&modificationDate=1589285769873&cacheVersion=1&api=v2&width=81)
.jpeg?version=1&modificationDate=1589285769873&cacheVersion=1&api=v2&width=68)