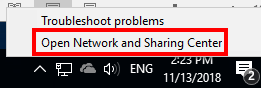
- Right click on the networking icon at the right edge of the taskbar and select Open Network and Sharing Center.

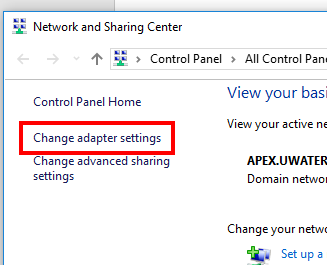
- The Network and Sharing Center menu will now be displayed. From here, select Change Adapter Settings in the top left of the window:

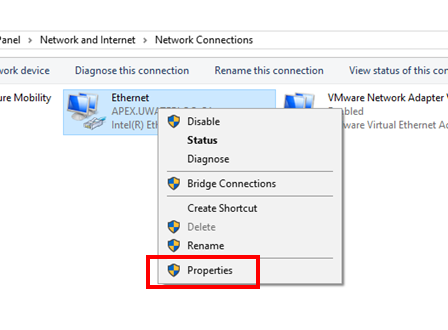
- This will open a new window. From this new window, right click on the Ethernet adapter that the computer uses and select properties. (Computer administrator permission might be required to perform this task):

- This will open a new window. Here, scroll down the list of connection properties until Internet Protocol Version 4 (IPv4) is displayed:

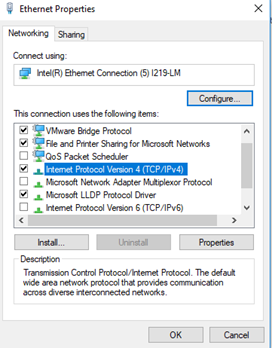
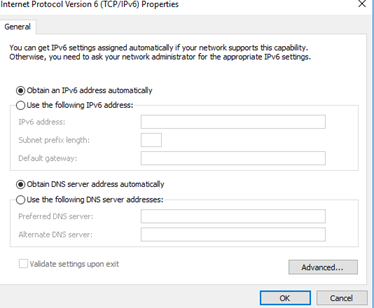
- Select IPv4 and click on Properties (found just beneath the list itself). This will open a new dialogue displaying option for that connection. Set everything to automatic.


- Click OK to close this window, and repeat this process for IPv6.

- Close all control panel dialogues. The wired connection should now be established.
...
| Info | ||||
|---|---|---|---|---|
| ||||
Contact the IST Service Desk at helpdesk@uwaterloo.ca or 519-888-4567 ext. 44357. |